

Facebook Groups are hotter than ever!
In fact, Facebook has now made Groups a core component of the platform.
The latest Facebook design (2021) makes Groups one of 5 items in the main navigation, alongside these Home, Pages, Watch and Marketplace.
Here's what it looks like on desktop:
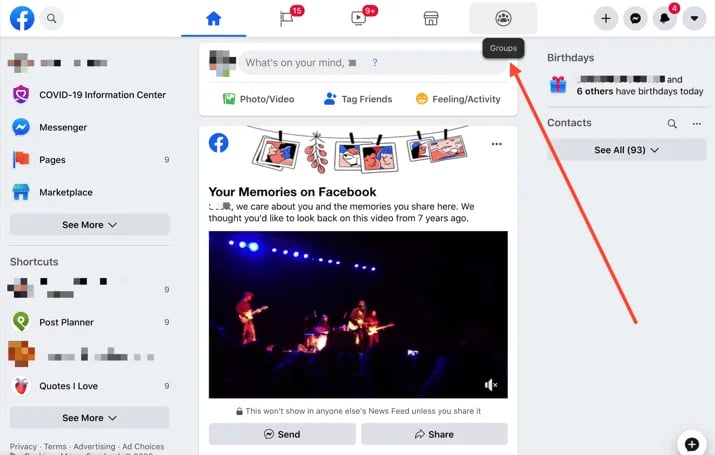
So Groups are obviously important in the eyes of Facebook.
Unfortunately, a lot of people don't know how to create a new Group.
That's why I'm writing this guide!
I'll show you how to get a new Group started... and also share tips on Group settings and key features.
This post won't discuss what to do with your Group once you create it: for example how to get more likes on Facebook posts in your Group -- and how to increase engagement with your community.
Rather, this post will be like our guide on How to Create a Facebook Business Page: a simple, easy-to-follow tutorial that anyone can follow!
But first, the big question:
What is a Facebook Group?
A Facebook Group is way for an exclusive group of people to communicate, share and keep in touch on Facebook.
People tend to create Groups around things topics like:
- a brand or business (often a kind of "insider's club")
- Books (for example, a book club)
- Common experiences
- Exclusive membership sites
- Support groups
In fact, there is no "wrong" topic for a group! It all depends your goals for the community you create.
Once you decide why you want to start a Facebook Group, then it's time to create one and (if you're a business) to use your Facebook Group to market your business.
Luckily, creating a Facebook Group is the easy part! 😎
Keep reading to learn how to start your own Facebook Group.

How to Create a Facebook Group
There are two ways to create a Facebook Group.
You can create your Group with:
1. your Facebook personal profile (which has "friends")
-or-
2. your Facebook Page (which has "fans" or "likes")
Which of these options should you choose?
It depends on why you're creating the Group.
For example, if you're creating a Group to promote your business Page, then you should definitely create the Group with your Page.
But if you're not trying to promote your Page or do anything with the Group that is related to your Page, then you should create the Group with your personal profile.
Keep in mind: there are benefits to creating a Group with your Page.
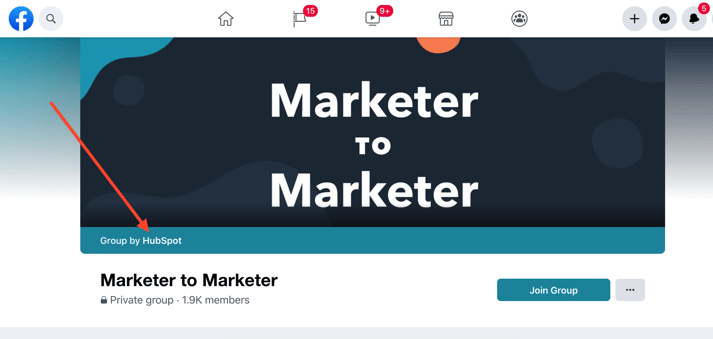
For starters, your Facebook Group will appear on your Page (if you want it to) like Hubspot's "Marketer to Marketer" Group appears on the main Hubspot page here:
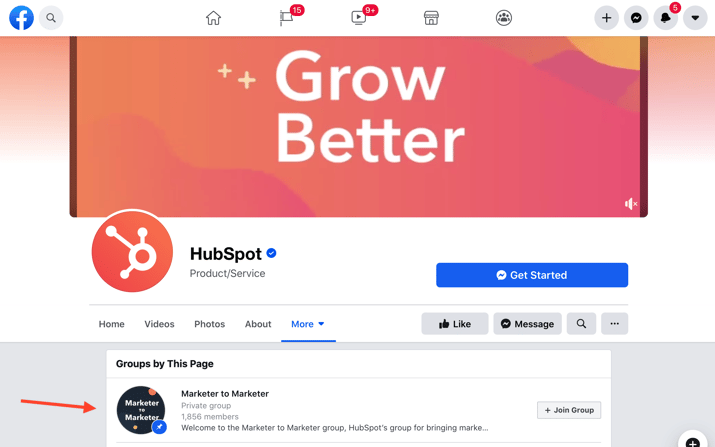
Also, when people visit your Facebook Group, it will show your Facebook Page as the creator, which can drive more people to your Page.
Here's how Hubspot's biz page appears on their "Marketer to Marketer" Group:
Ok great... but what if you don't have a Facebook page?
Not a problem!
You can always create a new Group with your personal profile. It's easy either way!
In facts, as you'll see below, the process of creating a Group is pretty much the same whether you create it with your Facebook Page or your personal profile.
The only difference where you start the process.
So with that in mind, here is how I'll structure this blog post:
Part 1: How to create a new Facebook Group
A. Using your personal profile
B. Using your Facebook page
Part 2: How to configure your Group settings
Part 3: How to use important Group features
Sound good?
Ok, let's do this!
Part 1: How to create a new Facebook Group
Part A below will show you how to start your new Group using your personal Facebook profile (remember: your profile has "friends").
Part B will show you how to start your new Group using your Facebook Page (remember: your Page has "fans" or "likes").
A. How to create a Facebook Group with your personal profile
Creating a Facebook Group with your profile is super easy.
It all starts with heading to the Facebook Groups page here:
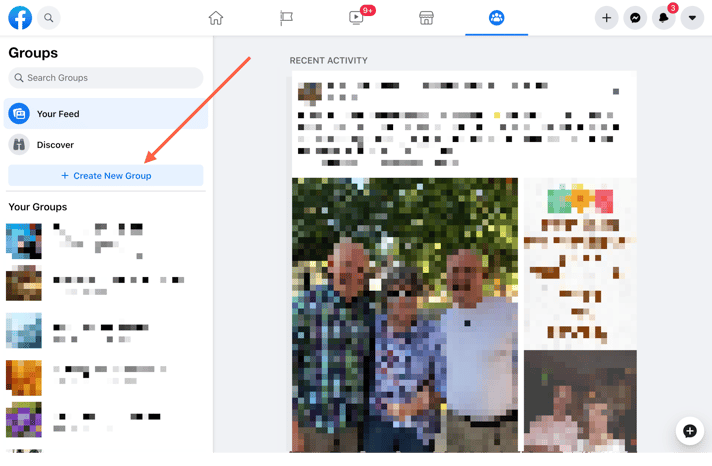
Step 1: Click "Create New Group"
Once you're on the Facebook Groups page, go ahead and click "Create New Group" on the left:
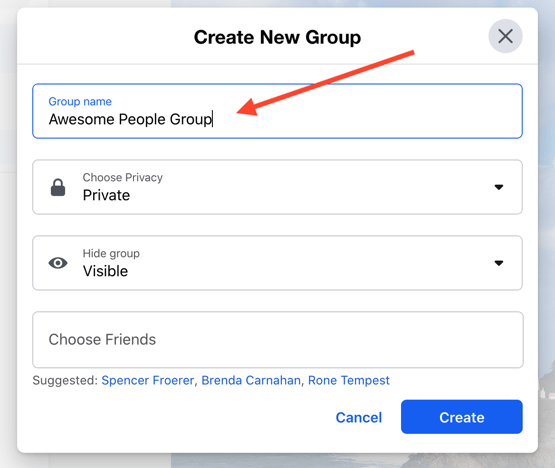
 Step 2: Add a Group Name
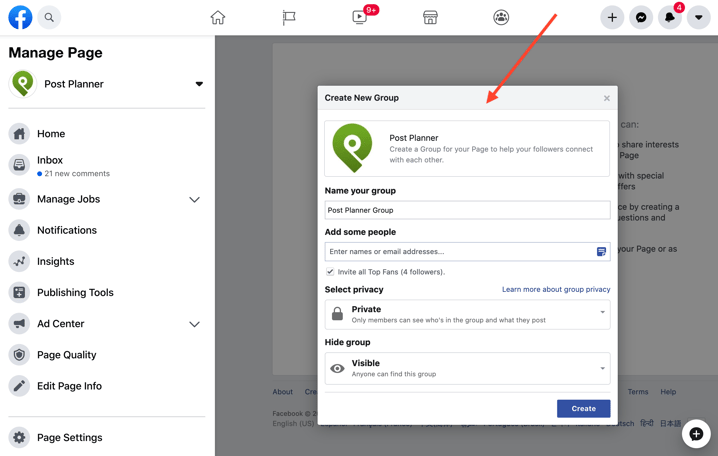
When you click "Create New Group", a popup will appear.
This popup contains a 4-part form that you need to complete to create your new Group.
The first field in the form asks you for the name of your new Group.
I will name my new Group the "Awesome People Group" (wanna join? 😎).
Keep in mind that you can name your Group whatever you want (and you can change it later at any time).
Try to make the group name memorable and searchable -- so people can find it.
Your Group name should be relevant to the topic of your Group.
Here are some tips for naming your new Group:
- Use your name, brand name, product name, or other recognized name that is easily discoverable in search.
- Use keywords that relate to the topic being discussed or the people you are trying to gather. For example, you could have a Facebook Group for Social Media Managers or a Facebook Group discussing Social Media Management.
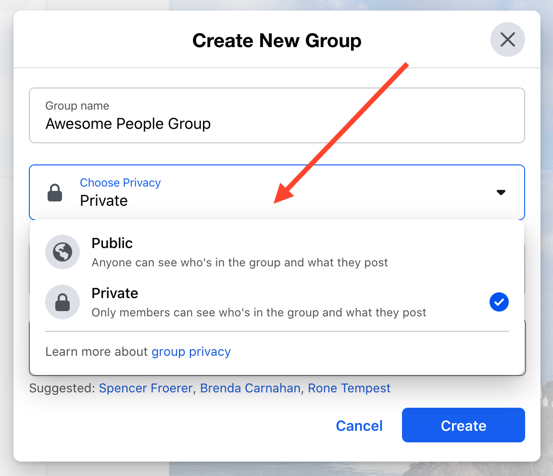
Step 3: Choose your Privacy setting
Once you've chosen a Group name, the next step is to choose your privacy setting.
You have 2 options:
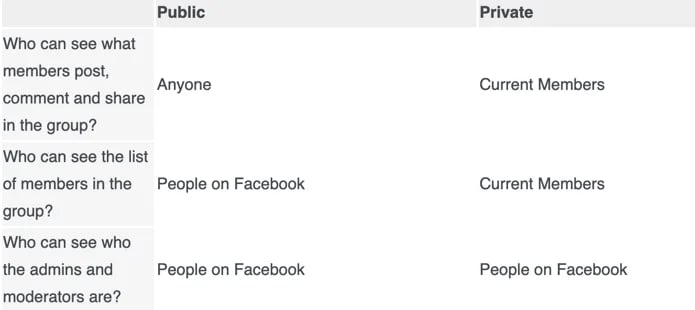
- Public: anyone on Facebook can who's in the Group and what they post
- Private: only Group members can see who's in the Group and their posts
Choosing the Group's privacy setting is probably the most important choice you'll make while creating your group.
This is because it locks you in and limits what you can change down the road.
According to Facebook, the official differences between Public Groups and Private Groups are as follows:
Group privacy settings can be modified later, but only under certain conditions.
- Admins can only change the privacy setting for a group once every 28 days, although they have 24 hours to revert a change made to a Group's privacy settings.
- Admins can change the privacy settings for Groups under 5,000 members from Public to Private or Private to Public.
- Admins can only change the privacy settings for Groups with over 5,000 members from Public to Private, but not Private to Public.
These are Facebook's official rules. But it's always important to keep in mind the topic of your Group.
If it's a sensitive topic, and you change the privacy from Private to Public, you can expect to lose members quickly.
Try to be very careful about this, since being publicly outed as being part of a Group on a sensitive topic could be embarrassing for some members!
I've chosen "Public" as the privacy setting for my new "Awesome People Group".
Folks need to know who's awesome, right? 🤠
Step 4: Choose your Visibility setting
After choosing your privacy setting, the next step is to choose your visibility setting for your new Group.
This is also known as the "Hide Group" setting:
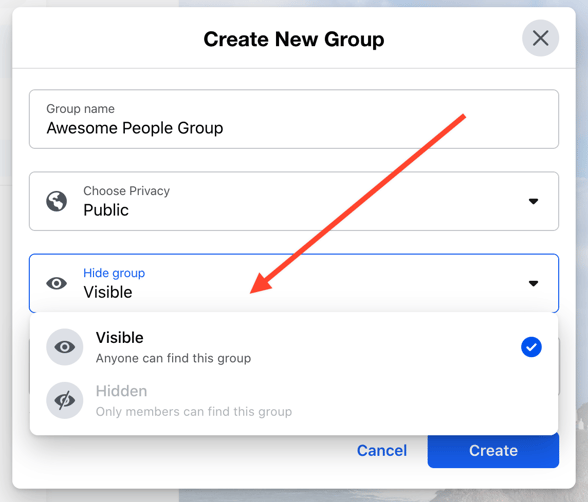
If you choose "Visible" then anyone on Facebook can find the Group.
If you choose "Hidden" then only members can find the Group. And they need to be invited to join by the Group admin.
As you can see, public Groups cannot be hidden. They have to be visible by default.
Only private Groups can be hidden.
Step 5: Select Friends to add to your new Group
The last step is to add your first Group members:
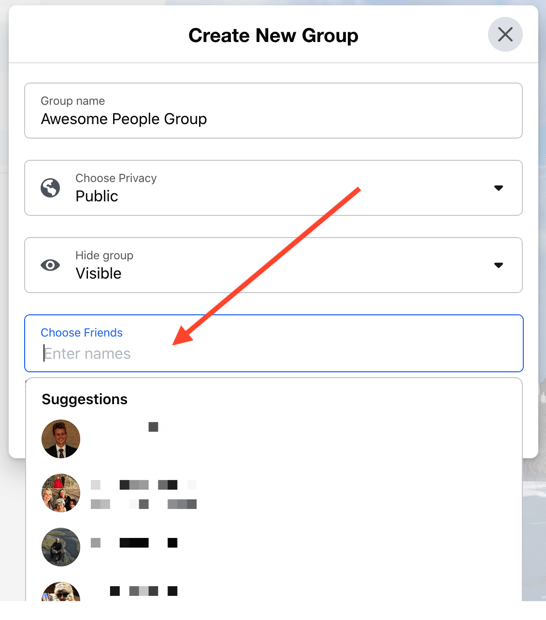
Facebook will suggest people from your own friends list, and also recommend more relevant friends as you start choosing.
You are required to add at least 1 friend to the group before you can create it. If you don't, you may get an error message.
You will automatically be added as a member of your new Group too (of course!).
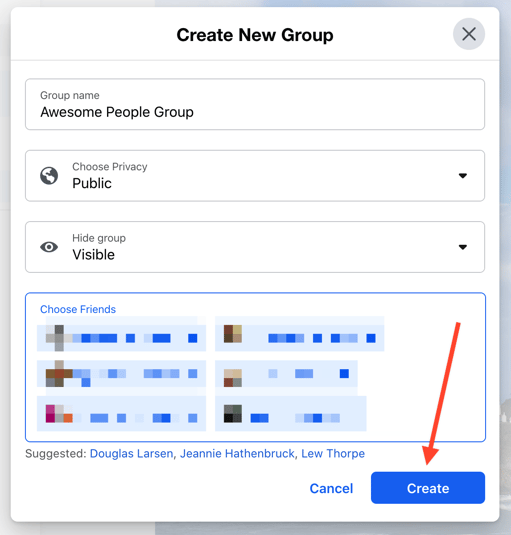
Step 6: Click "Create"
Simplest step of all!
Just click the "Create" button. 👇🏼
 BOOM! 🎉🎉🎉
You've just created a Facebook Group with your personal profile.
Now let's walk through the same process for creating a Group with your FB Page.
B. How to create a Facebook Group with your Facebook Page
Remember: Pages have "fans" or "Likes"... not "friends"!
So let's jump into how to create a new Group with your Facebook Page.
It's super simple. 😉
Start by going to your Page Settings:
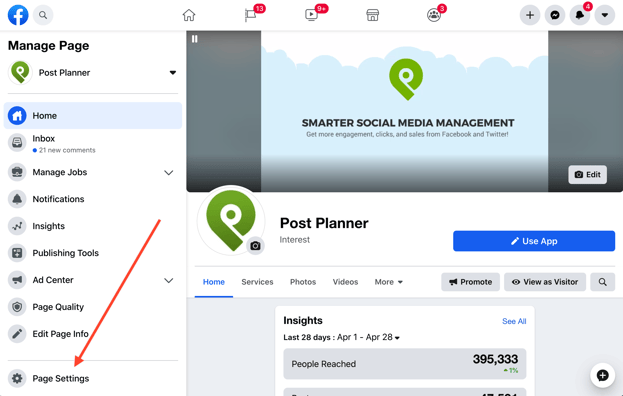
Then follow the steps below.
Step 1: Turn on the "Groups" tab in your page settings
Once you're in your page settings, click on "Templates and Tabs".
Then turn your page's "Groups" tab on:
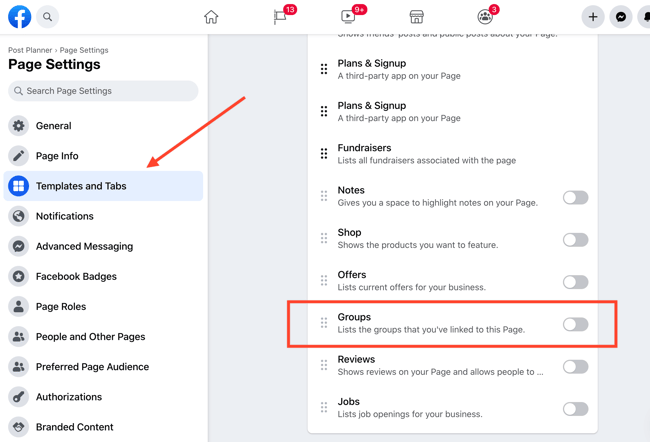
Click the toggle and turn it green to activate!
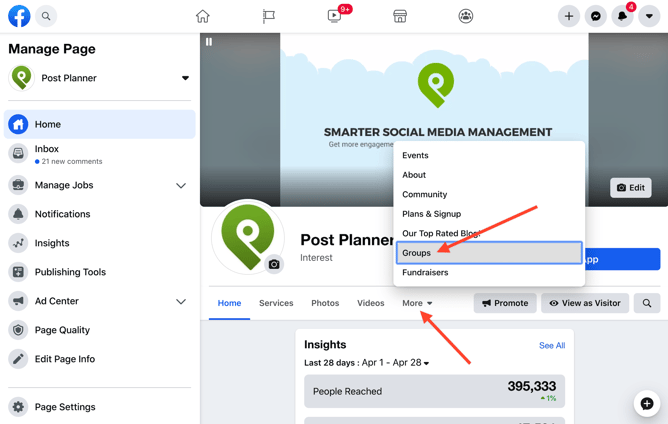
Step 2: Go to Groups tab and click "Create Group"
Once your Groups tab is activated, you can go back to the main view of your page.
You will notice that below your page's Profile photo and title, you will see your page tabs, including:
- Home
- Photos
- Videos
- More
Your "Groups" tab probably won't be visible. So you'll need to click "More" to see it.
Click "More" and then "Groups":
When the Groups tab opens, you will see the option to "Create Group".
Click that option!
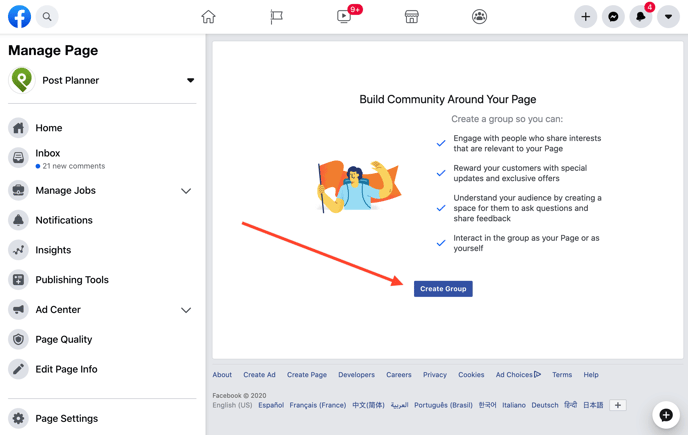
Btw, if you've already created a Facebook Group for your business using your personal profile, then you should also see a "Link Your Group" option.
This option will allow you to link your Facebook Group to your Facebook Page.
But if you are creating your first Facebook Group, you can just click the "Create Group" button.
Step 3: Complete "Create Group" popup form
Clicking "Create Group" will activate a popup with the same form fields as the "Create New Group" popup above in Part 1 of this post.
These options include:
- "Name your Group": give your new Group a name
- "Add some people": add your new Groups first members (you can invite "Top fans")
- "Select privacy": select your new Group's privacy setting
- "Hide Group": select your new Group's visibility setting
If you want more info on these 4 individual fields, just scroll up to Part 1 above.
When you're finishing with the form, click "Create" and BOOM!... your new Group will be created and ready to configure!
Part 2: How to configure your Group settings
Now that your Facebook Group is up and running, you will need to do a few things to make sure you maintain a happy community.
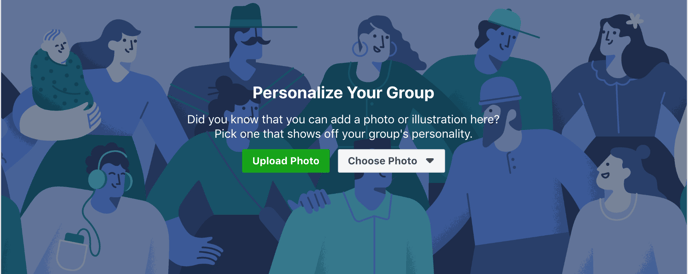
Add Your Facebook Group Cover Photo
Facebook will now give you the option to add your creative graphic for your header or cover image.
This is completely up to you and should be aligned with your current brand or the theme of your group.
But if you've created many groups or have multiple groups in your favorites, you'll want to choose an image that differentiates each of them.
Keep in mind: the dimensions for this cover photo are different from those on your personal Timeline or business Page.
To keep your cover photo looking sharp, use the recommended Facebook Group cover photo size, which is 1640 x 856 pixels.
Complete "About" Section
The About section allows you to describe your group to potential members, assuming your group is visible to non-members.
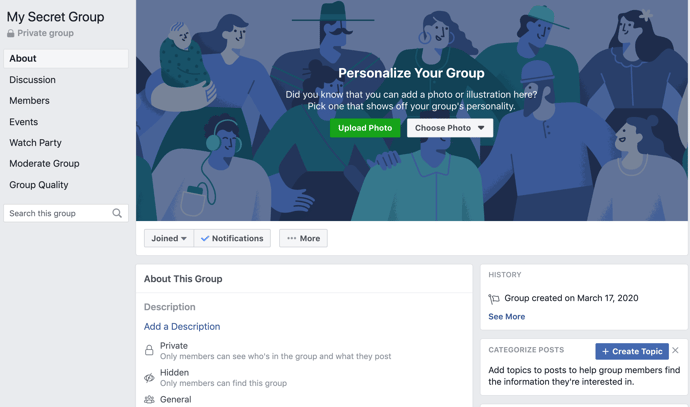
Edit Group Settings
Next, you'll want to edit the group settings.
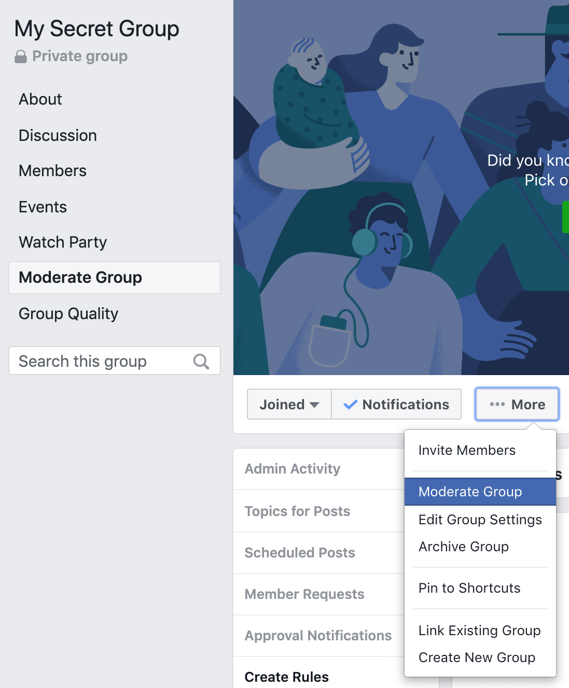
You do this by clicking on the "More" tab and then clicking "Edit Group Settings":
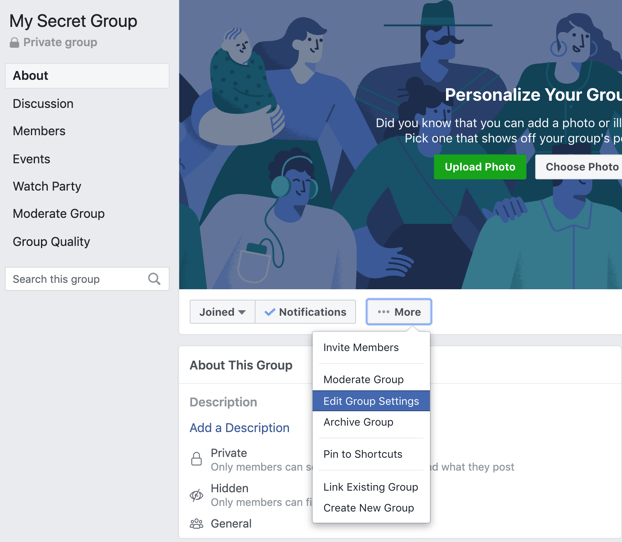
Once on the edit page, you'll have many options to change:
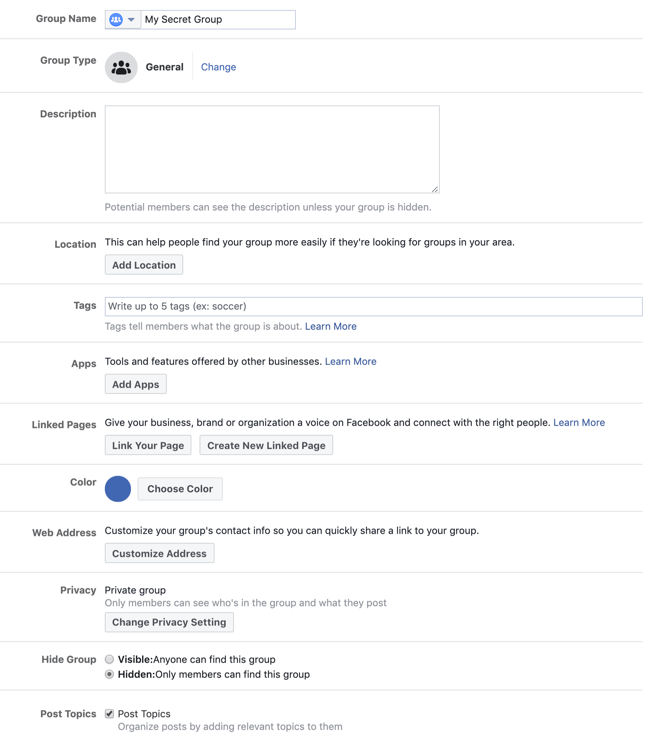
The first section covers the basics of your Facebook Group Settings. This is where you can:
- Change your Facebook Group name
- Change your Facebook Group type (General, Buy & Sell, Social Learning, Gaming, Jobs, and Work)
- Update your Facebook Group description
- Add a Location for local Facebook Groups
- Add 5 keyword-related Tags to describe your Facebook Group
- Add Apps to help with your Facebook Group
- Link your Facebook Page(s) to your Facebook Group
- Choose a main color for your Facebook Group
- Add an external website link to your Facebook Group
- Change your Facebook Group's Privacy Settings
- Change your Facebook Group's Visibility Settings
- Add Post Topics to categorize posts in your Discussion Tab
The next section of settings covers optional sections you can add to your Facebook Group.
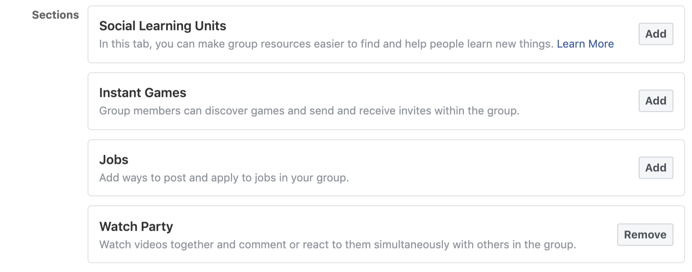
- Social Learning Units can serve to educate and onboard your new Facebook Group members.
- Instant Games can help bring your community closer during their downtime.
- Jobs allow you and members to share job listings.
- Watch Parties allow group members to watch Facebook videos with others and discuss in real-time.
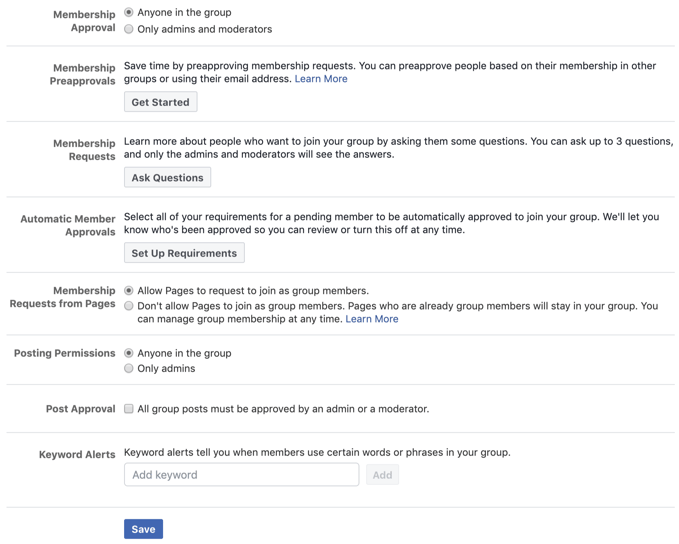
The final section covers most of the membership administration. You can use this section of settings to determine how new members join the group, set up Membership Request questions, and configure post-approval options.
Create Group Rules
On the More menu, above the Group Settings option, is a link to your Facebook Group's moderation options.
In this section, you will create your Facebook Group's Rules. This is a list of rules that you can show to potential members before they join your group.
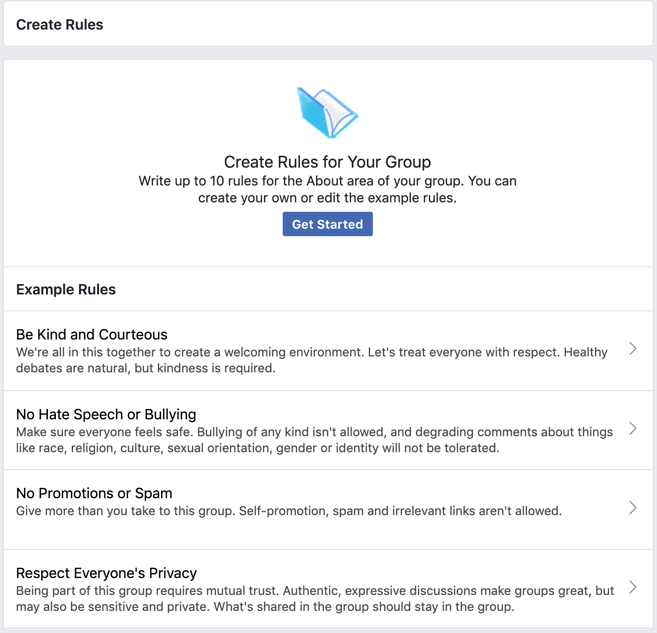
You can even include a Membership Request question that quizzes them to see if they read the rules that they agreed to. That is a great way to select the best members of your community.
Your Group is Ready to Go!
You've now successfully created a Facebook Group! Congrats!
Now you can post updates inside the groups -- and so can members (if you've allowed it).
Part 3: How to use important Group features
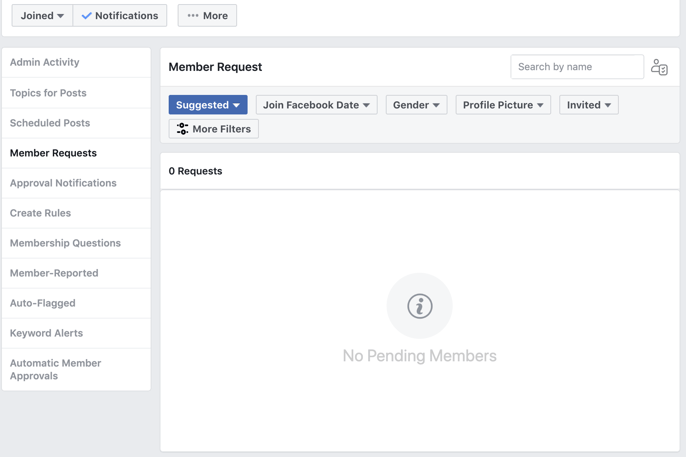
How to Moderate Your Group
The same section where you added your Facebook Group's rules is also where you will review answers to membership questions, approve new members, approve posts, and handle other moderation tasks.
Facebook Group Notifications
As a Facebook Group admin or moderator you should probably turn the notifications on to receive all updates when anyone posts -- just in case someone spams the group & you want to respond quickly.
By default, this is set to Highlights, but you will want to change it to All for faster response time.

Messages/Chat
One of the great things about groups is you can initiate a group chat/message with either all members of a group or select members.
This is especially useful when you have an announcement to make or need to quickly collaborate on an item/issue.
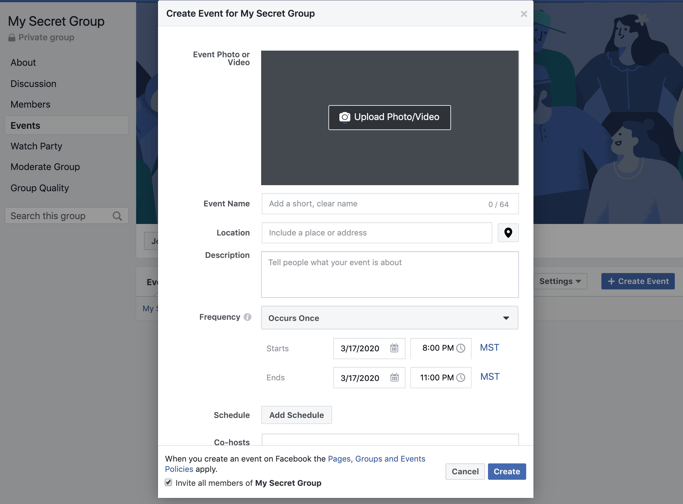
Facebook Group Events
A feature probably not used often enough in Groups is Events. Inside the group, you can create events that only members can see & RSVP for.
Just click on the "Events" tab to the left and then "Create Event" & the lightbox below will load to create your event.
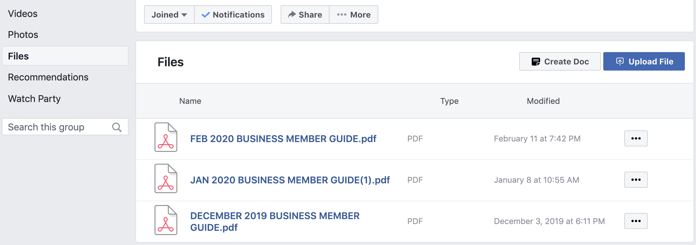
Facebook Group Files
Inside groups, you can share files of any kind as well as create documents that group members can add to & collaborate on.
Think of this as your own little workspace within Facebook -- or perhaps a replacement for apps Dropbox or Google Docs for your community.
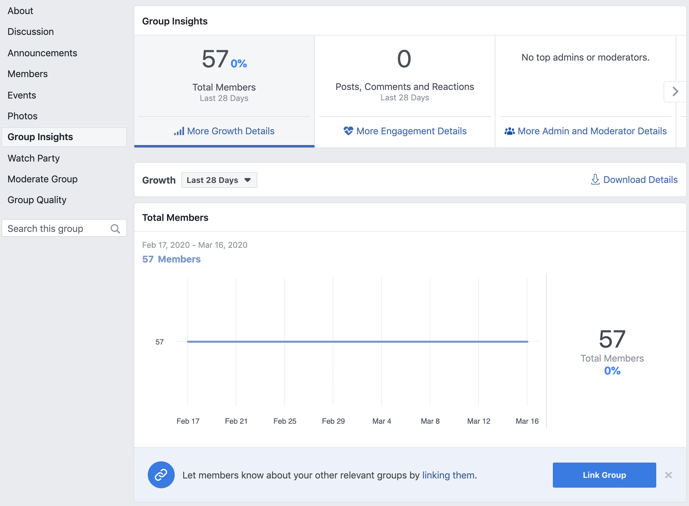
Facebook Group Insights
Groups admins can view Group Insights to see analytics about the growth of their group's membership and engagement.
This is also where you'll find your top contributors, top posts, and much more.
Final Thoughts on How to Create a Facebook Group
Now that you've read this post, hopefully, you can now successfully create a Facebook Group on your own.
On a future post, I'll debate whether you should have a Facebook Profile, Page or a Group for your business.
Please let me know if you have any questions in the comments below.


ViewHide comments (51)