Twitter's latest policy update has left many people scratching their head.
As the social platform works to combat spam and bot activity, they’ve also left a wake of confusion.
Their announcement to prohibit simultaneous tweets across multiple accounts containing identical content has left many users feeling like… And with good reason!
Just look at what Yoel Roth on the Twitter blog had to say,
“One of the most common spam violations we see is the use of multiple accounts and the Twitter developer platform to attempt to artificially amplify or inflate the prominence of certain Tweets. To be clear: Twitter prohibits any attempt to use automation for the purposes of posting or disseminating spam, and such behavior may result in enforcement action.”
Reading that can make your head spin! What does it mean and why does Twitter have to make everything so complicated? That’s why we’re here to clear the air.
While we applaud Twitter for taking action against spammers, we also want to ensure you understand how this affects you.
Because, let’s face it… we know you’re not a spammer and would never intentionally push out spammy content to your audience.
That’s left to those who auto dm you until you can’t take it anymore.
So let’s talk strategy and how you can use Post Planner as your best advocate in building a strong, loyal, and attentive Twitter tribe.
Below is a breakdown of Twitter’s policy updates and how you can improve your use of Twitter in a few easy steps!
Worried about the new Twitter policy updates? Here's everything you need to create a strategy that really works! Click to Tweet
The Twitter Content Strategy That's Easy and Really Works
Twitter Policy #1: Similar Content Across Multiple Accounts
“Do not post the same content or very similar content across multiple accounts.”
You’ve seen this happen. You log into Twitter and your feed is full of similar tweets from multiple accounts.
You wonder, how is it possible that so many people tweeted the same content at the same time?
Automation is the answer and Twitter has made it abundantly clear to all social media management services what the solution is.
“Do not (and do not allow your users to) simultaneously post identical or substantially similar content to multiple accounts.”
What this means to you: Posting the same content to multiple accounts at once is not allowed.
This means choosing multiple accounts from the Post Planner composer and sharing the same content is no longer possible.
So what do you do when you manage several accounts and need to share similar content on Twitter? You simplify your strategy!
Instead of blasting the same content across a variety of Twitter accounts all at the same moment, you're going to customize your approach.
Here's how to do it inside Post Planner -
- Go to Post and add your tweet - choose one profile where the content will originate from.
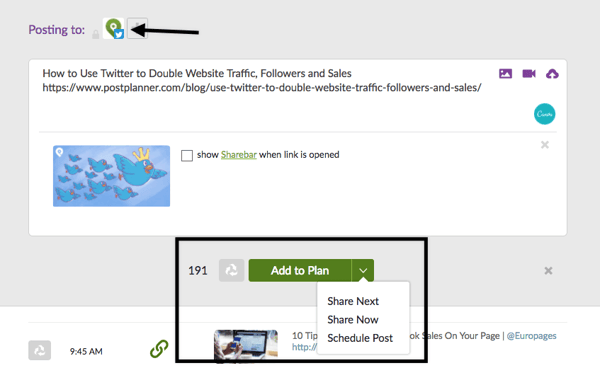 Now connect each of your Twitter accounts to your mobile device. This will allow you to switch back and forth between multiple accounts.
To add additional accounts:
- In the top menu, tap your profile icon.
- Tap the more icon
- From here you can Create new account or Add an existing account.
- Once you've added your additional account(s), you can toggle between them by long-pressing your profile icon.
- You can also switch accounts from your top menu by tapping your profile icon, then tapping the smaller, additional profile icon(s) next to the more icon.
Once this is done, go to each profile, navigate to the original tweet, and retweet from each account.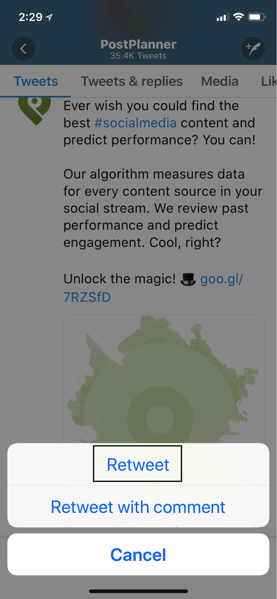 This action is encouraged by Twitter and will help create engagement and awareness between your accounts.
It’s positive momentum as you engage natively on Twitter. Plus, you're not spamming your feeds with the same content over and over.
This native and natural approach will garner you more interaction while building trust and credibility.
Twitter Policy #2: Posting Identical Content Repeatedly
“You may not post duplicative or substantially similar Tweets on one account or over multiple accounts you operate.”
This one directly impacts how you share your evergreen content. That’s the content you’ve been setting to automatically tweet and then drop back into your queue.
Let me give you an example of how you might be using this.
Let’s say you’re a blogger and want to tweet your top blog posts for all eternity… or at least until they’re no longer relevant.
Prior to this change, you only had to click the recycle button in the Post Planner composer and off it went into your queue.
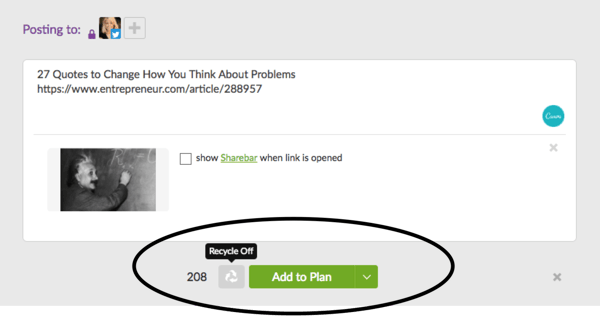
Per Twitter’s latest update, this is no longer allowed. It's a hard line they’ve taken against controlling spam and one you don’t want to cross.
So what do you do instead? You get creative and here’s how!
Instead of posting the headline of your article every time (e.g. How to Use Twitter to Double Website Traffic, Followers and Sales) use content within your post, product or landing page to change it up.
Sure, it might take you a few extra minutes, but we recently tested this new content plan and here’s what we found:
- Link clicks: 147% increase
- Engagement rate: 166% increase
- Impressions: 170% increase
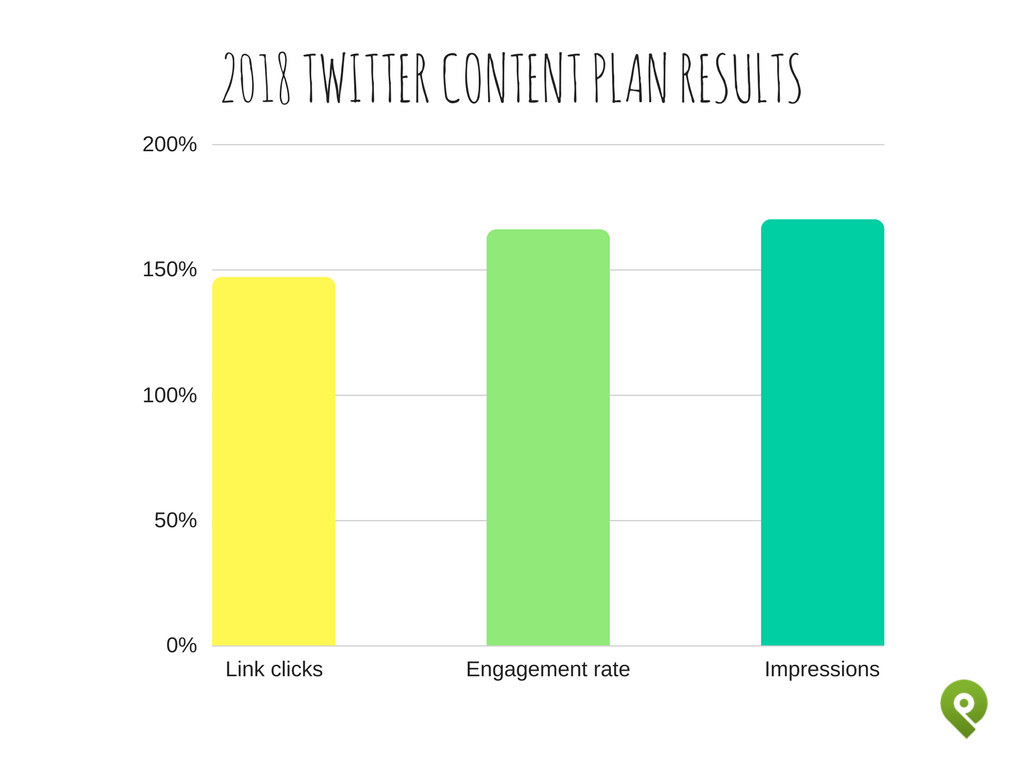
And the good news? There’s a simple formula to this. Below is exactly how we did that (and you can too!)
Step 1: Share the Best Type of Content at Your Best Time
The whole idea behind this first step is to reuse and repurpose your content without using the same post ever again.Here you're going to tie your best time to post to the various types of content within Post Planner’s “Plan” to maximize engagement.
But don’t sweat it, this isn’t going to create a crazy amount of work for you. The strategy is easy to implement.
1: Go to Your Twitter Analytics
If you want to know your best times to post, don’t look to general articles that talk about when “most people are online.”
Nope, get specific and look to your own Twitter Analytics for clues to when your audience is online.
Once in your analytics, click on the Tweets tab and then export your data by clicking the “Export” tab to the right of your profile.
Open your spreadsheet and click on impressions. You can now see a complete list of times and the impressions associated with each of those.
Pick your top 4 times and now head over to Post Planner.
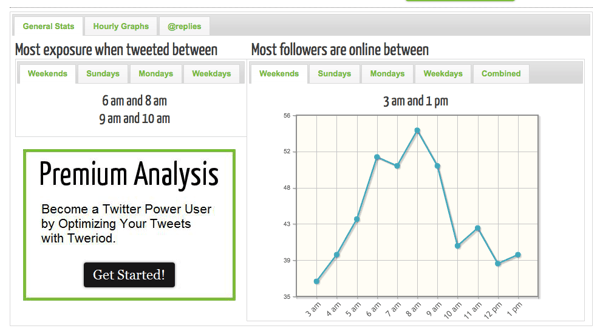
Tooltip: You can also use a free tool like Tweriod, but keep in mind that you’re only get an analysis of 1000 Twitter followers. To analyze your whole account, you have to upgrade to a paid plan.
2. Go Into Post Planner and Add Your Custom Times
Once inside your Post Planner account, click on Plan. If you’ve already created your personal Plan times, choose that and we’re going to edit it.
If you haven’t, click the plus sign to create a new Plan.
Now update your times to your best times to post. Then choose the type of content next to each of those times.
You’ll set in order like this:
- Image
- Link
- Text
- Video
Now you're ready to launch with your biggest engager.
Leverage that momentum into additional branded content, and continue to build that momentum, moving the needle on your overall engagement.
Step 2. Share the Right Mix of Content for Your Audience
Once you’ve chosen your best times to post, it’s time to add in your content. Here you’re going to include everything from infographics to podcasts, blog posts, images, quotes and videos.The easiest way to do this is to cull through your top trafficked content. Go to Google Search Console and click on Search Traffic - Search Analytics. Now check “Position.” What you’re looking for are pages ranking on page 1, and around position 1.
Grab your top 10 posts and open each one. Create 3 variations of each headline and drop those into your Twitter account within Post Planner. Remember, they must be different.
Now go through all other content you’ve created over the years and pull in your most shared content. You’ll start to add all of this into your Plan.
Once you have 15-20 tweets from your content, now it’s time to add in other people’s content.
Head over to “Find” in Post Planner to begin your search.
 Here you can do two things:
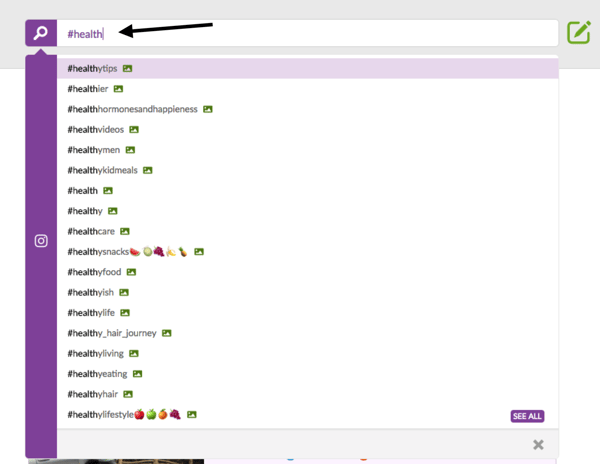
1. Search by Facebook page, Twitter profile, Instagram hashtag or keyword
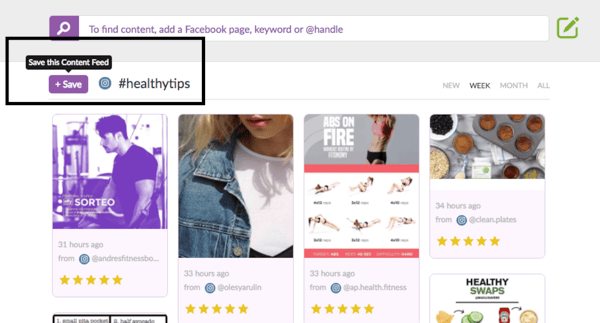
2. Search based on the folders already created in Post Planner
Now you’re looking for articles, images, and videos that are relevant to your audience and have already performed well.
You’ll know how content has performed through our Star Rating algorithm. Any content (including your own) pulled into the app, will run through our algorithm.
It will then receive 1-5 stars based on virality - a combination of engagement including shares, likes, retweets, and comments. The higher the number, the better that content performed.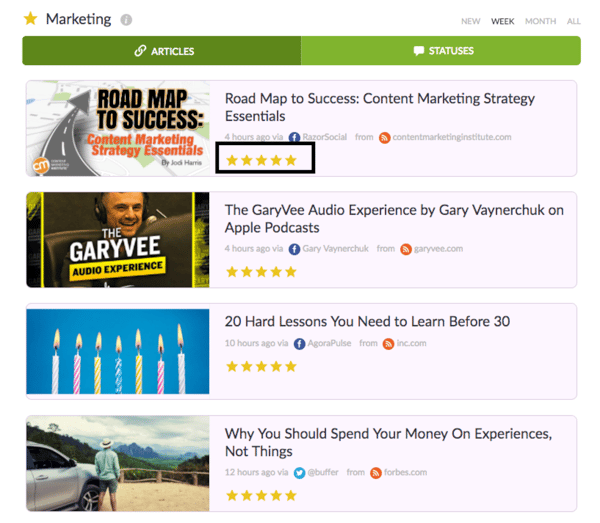 This content is designed to help you create a healthy mix of content, plus:
- Add value to your audience
- Create reciprocity
- Boost your engagement
- Increase the reach of your tweets
- Earn more likes, clicks, retweets, and comments
As you find the right content, hover over, click share, and drop that content into your Post Planner queue.
You can also add all of your favorite sources and then categorize through folders. For example, let’s say you have favorite blogs that you like to share on a consistent basis.
Grab their URL, add it to the search bar, and click the link to add it to your “My Content” section in Post Planner. Another great way to find the best Twitter content is to Google your topic, industry or niche. Let’s say you’re a cycling shop, your search would be “Best Cycling Blogs.”
From here, you can begin to categorize your content within folders. This makes it easy to pull all of your content into one location, score it based on popularity, and easily add it to your queue.
A simple way to do this is to think of the top 5 topics you’re known for. Then take those topics and create folders to curate content into.
Mine look like this: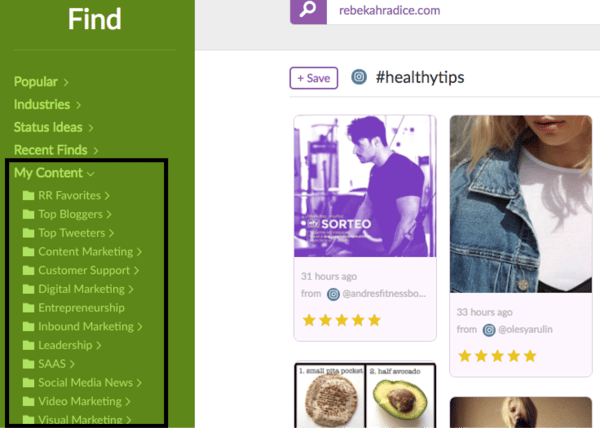 In this scenario, you’ve added your content into Post Planner, found scientifically proven content to share through the app, saved your favorite blogs and resources, and categorized for easy sharing.
Doesn’t get much better than that, does it?! 😊
PRO HASHTAG TIP
Once you have your content ready, add the most relevant hashtags to each tweet. This strategy must also evolve to abide by the updated Twitter guidelines.
Back in the day, you might have repeated the same group of hashtags over and over. But that strategy wasn't the best strategy and here's why.
When you use the same group of hashtags on each tweet, you're limiting your reach. You're only exposing your content to that group.
The better strategy is to change up the 2-3 hashtags you use within your tweet, customizing them to the exact content.
Here's two examples from author and consultant, Lolly Daskal:
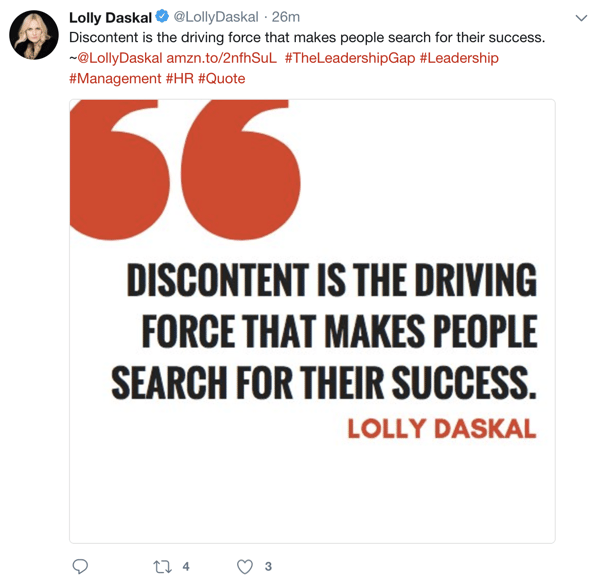
 You'll see that as a leadership consultant, she frequently uses hashtags like #leadership, #HR, and #management.
But she doesn't use them in the same order or all of them in the same post repeatedly.
The key to using hashtags correctly is in the personalization. Change it up and keep it fresh, but make sure the relevancy to your audience and content is there.
Final Thoughts
The Twitter policy update doesn't mean you can’t use automation.What they do mean is you need to adjust your thinking and your strategy.
And as you can see, when you apply a little science behind it, the results are magical!
If you’re ready to find better content, manage it all from one location, and increase your Twitter engagement - check out our new Starter Plan.
For less than $.10 per day, you can gain access to the most powerful content scoring engine on the internet!




ViewHide comment (1)