
Can you post on Instagram from your PC or Mac?
Yes!
You can post on Instagram from their website or with an Instagram scheduling tool like Post Planner.
(HINT: the BEST way to post on Instagram from a computer is with Post Planner! Try it for FREE today!)
We’ll cover the following:
- How to post on Instagram from your PC or Mac (the limited way)
- The best way to post on Instagram from your computer
- 3 Rules for posting on Instagram
How to post on Instagram from your web browser on PC or Mac
Posting photos, videos, Reels, and carousels on Instagram from your computer is easy.
But there are a few limitations:
- You can't post stories
- You can't schedule your posts
- You don't get as many tools for Instagram marketing
If you're interested in those functionalities, skip to our Post Planner section.
To get started, go to: https://www.instagram.com/
And log in to your Instagram account.
Posting photos
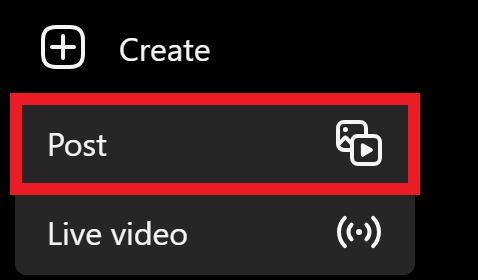
1) Click "Create" on the lefthand sidebar.

2) Click "Post."
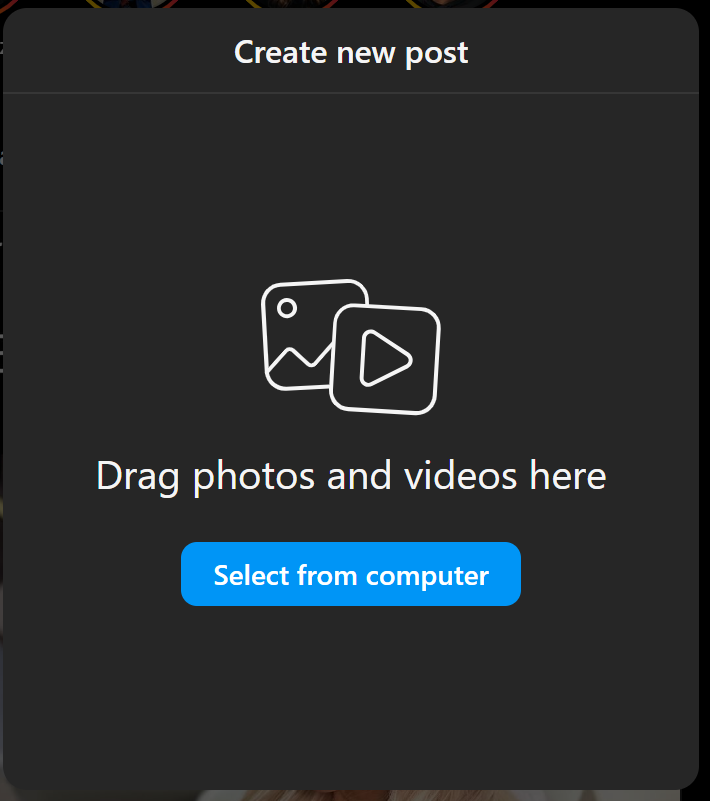
3) Click "Select from computer." Then, choose the image or video file that you want to post.
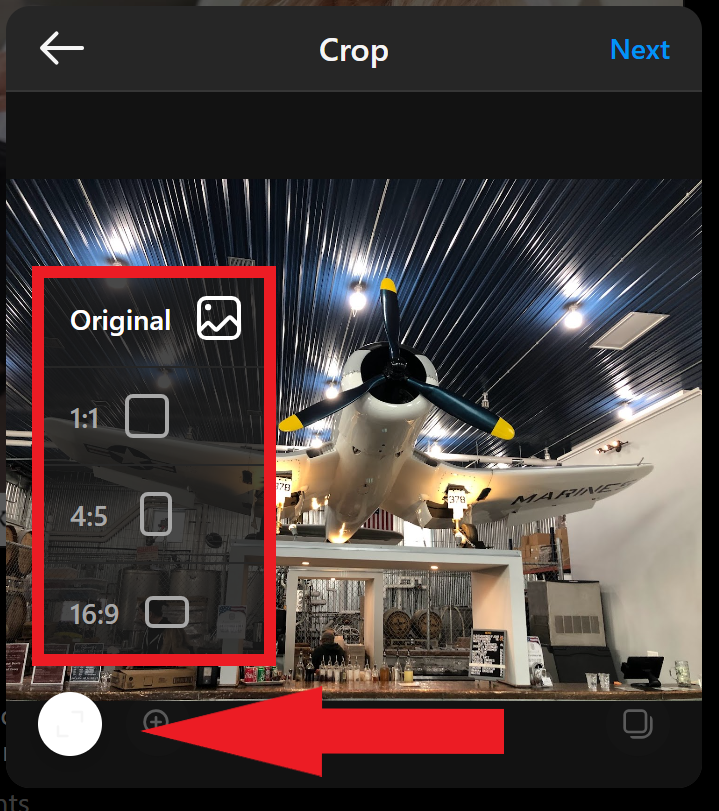
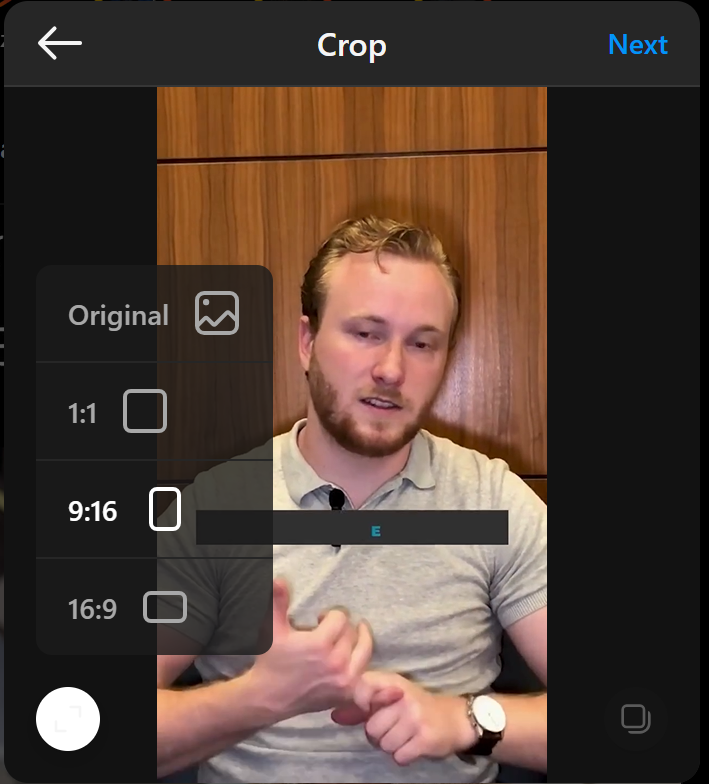
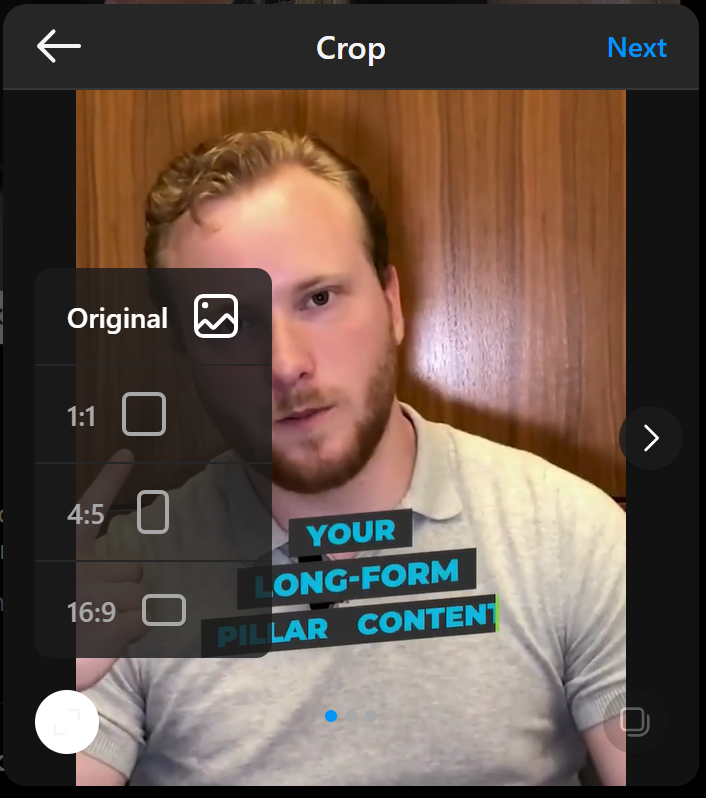
 4) Select the aspect ratio you want. Then, click and drag your photo to crop it.
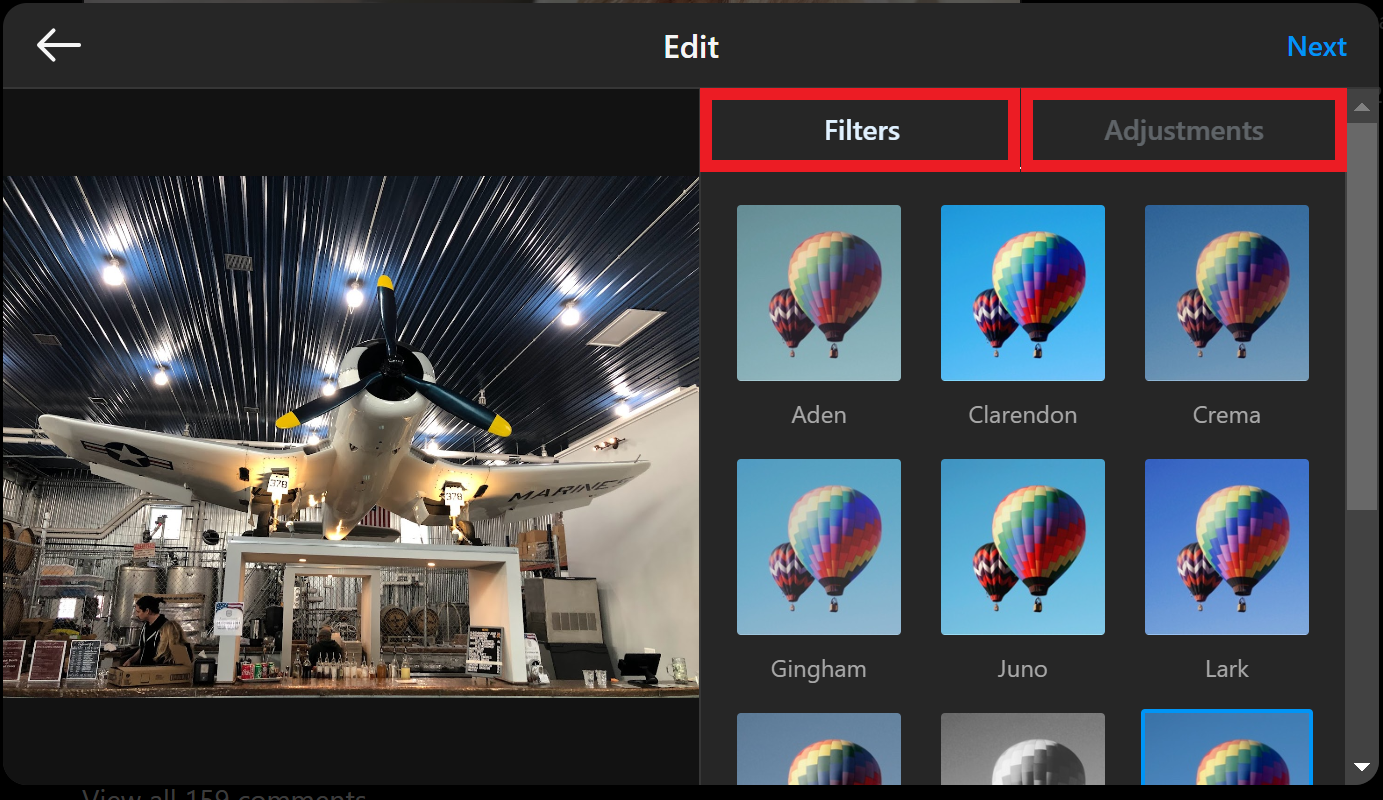
5) Optional: Add any filter or adjust how your photo appears. Then, click "Next."
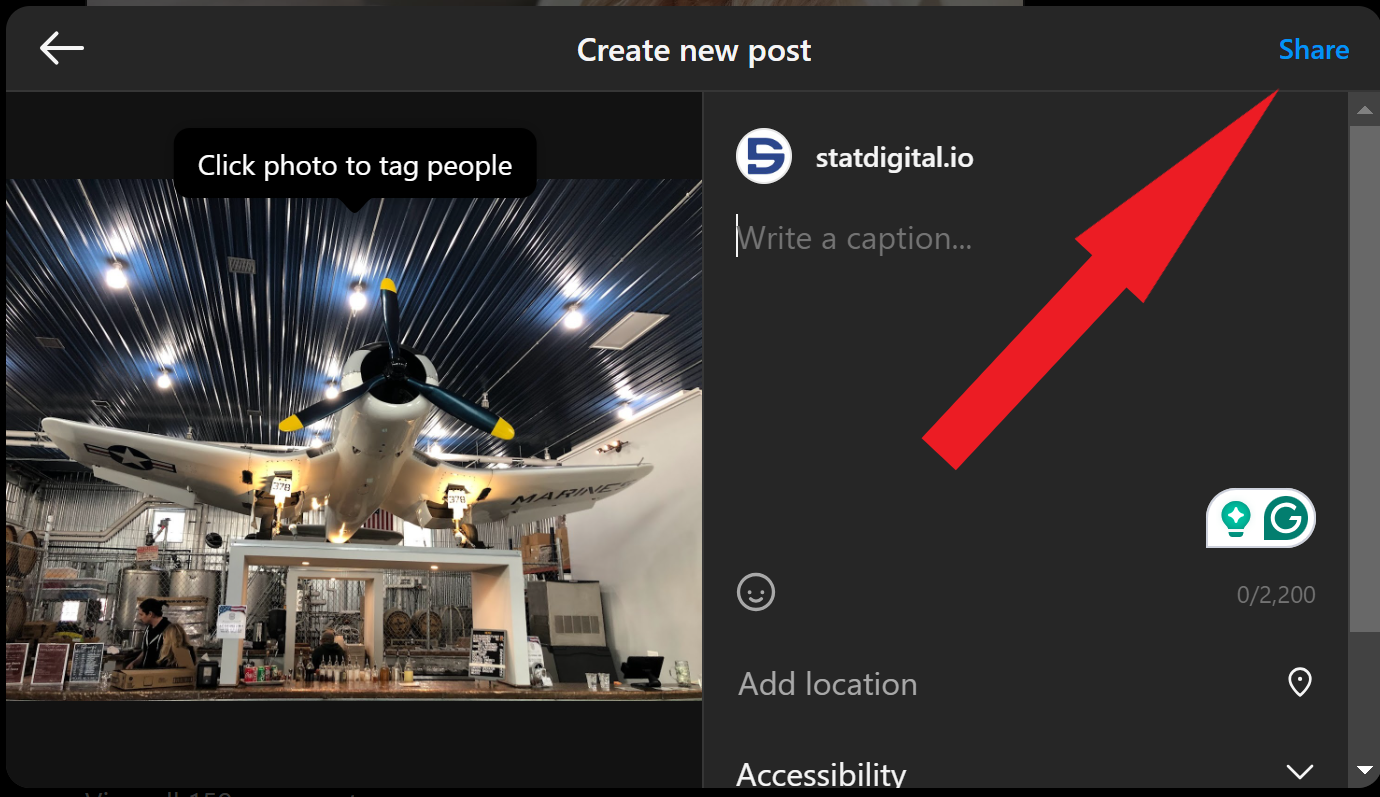
6) Tag any accounts that you want. Write your caption. Add a location if you want. Then, click "Share."
Posting videos & Reels
Follow the same steps from above, except upload a video.
1) Crop your video to the aspect ratio you want. If you're posting a Reel, use the 9:16 ratio.
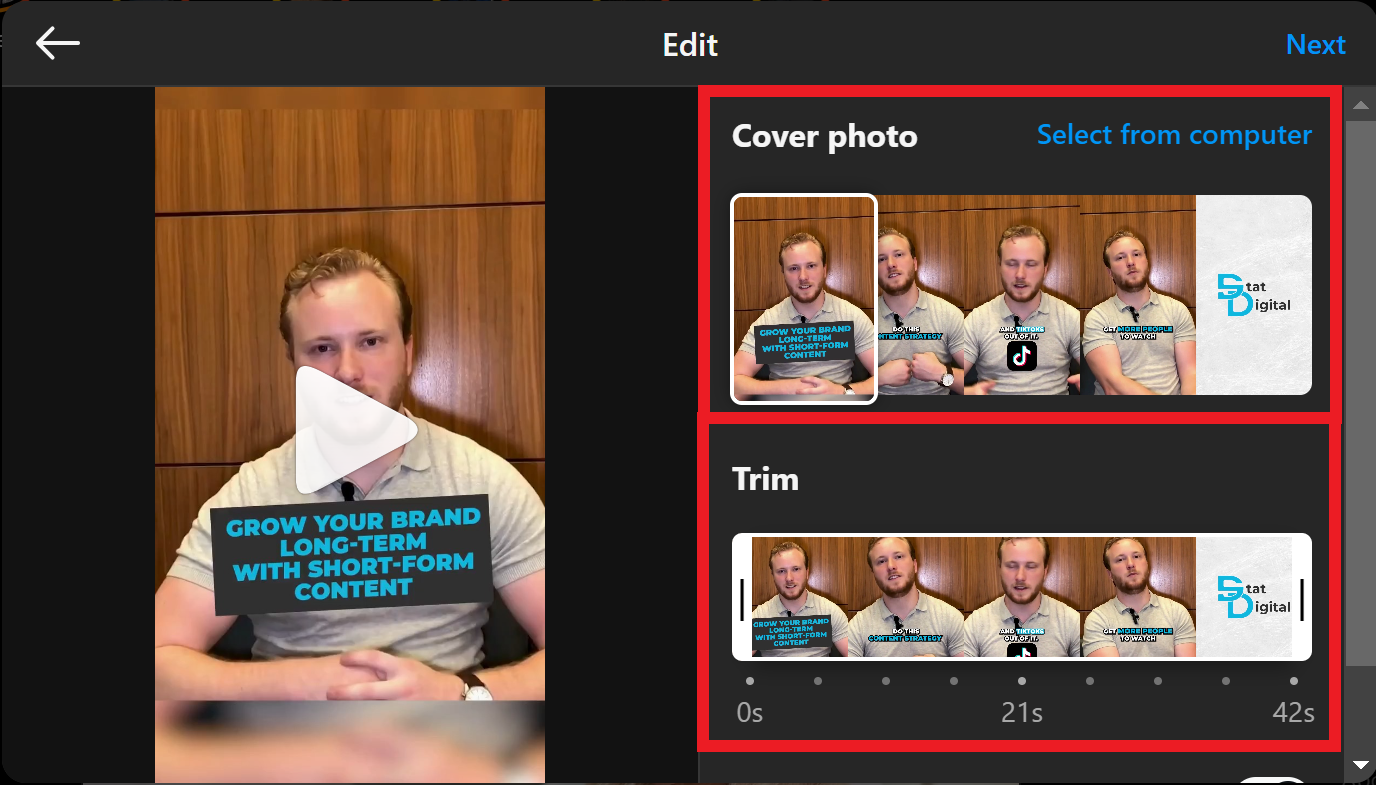
2) Use the sliding bars to choose a cover photo (what people see before playing your video), and if you want, trim the video to the length you want.

3) Then, click "Next" and post as you would normally
Posting carousels
Note: You can have 1 video and multiple images in a carousel.
1) When you're creating your post, upload 1 video or image. Then, click on the carousel icon on the bottom right.

2) Click on the "+" icon and add your images or single video.

3) Select an aspect ratio for all of your media (they all have to be the same ratio). Then, crop each image/video to your liking. Click "Next" when you're done.
4) If you have a video in your carousel, select a cover photo and trim the video (if you want).
5) Click, next. Then, add any details to your post as you normally would. Click "Share."
How to post to Instagram from a computer with Post Planner (The best way)
Post Planner not only allows you to post on Instagram from your computer but you can also:
- Schedule your Instagram posts in bulk
- Automate Instagram posting
- Discovery trending content
- Design and create Instagram posts
- Recycle your top-performing content
- Analyze the data behind your Instagram posts
These features help you save HOURS of time EVERY week - and get more Instagram Likes!
The best part? You can sign up for a free Post Planner account.
Here's how you can improve your Instagram posting with Post Planner:
How to post or schedule images & stories
Want to quickly publish or schedule a single Instagram post?
1) Click on "Create Post."
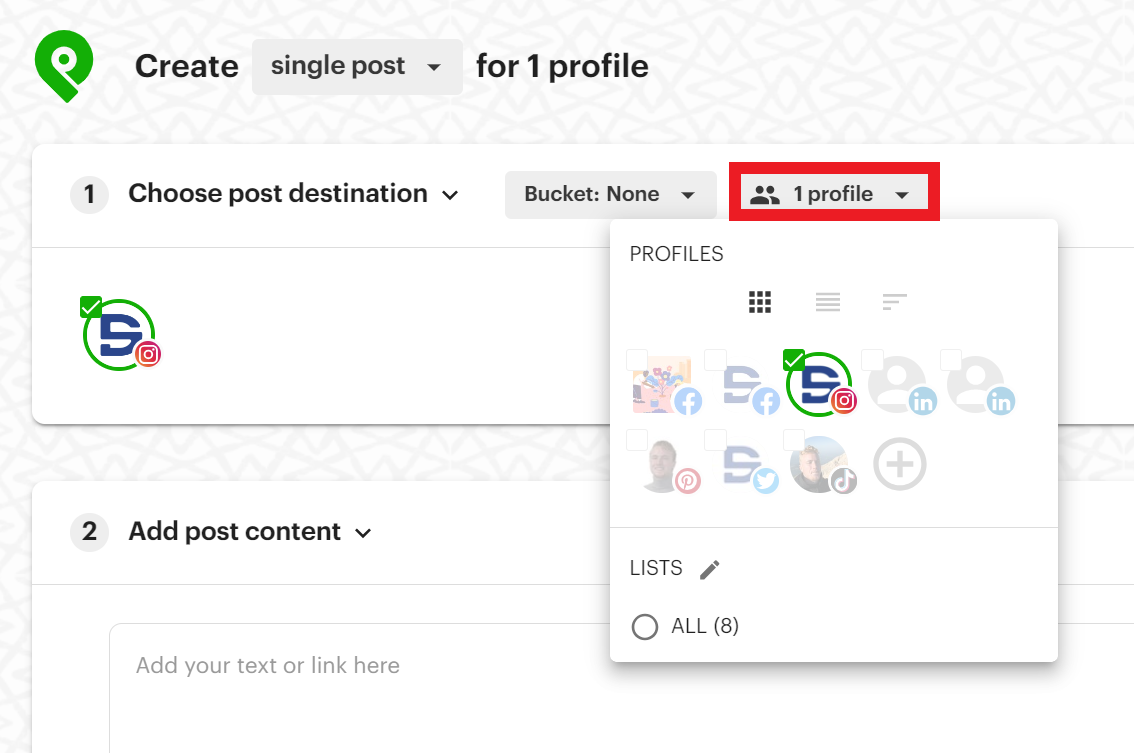
2) Select the Instagram account that you want to publish to.
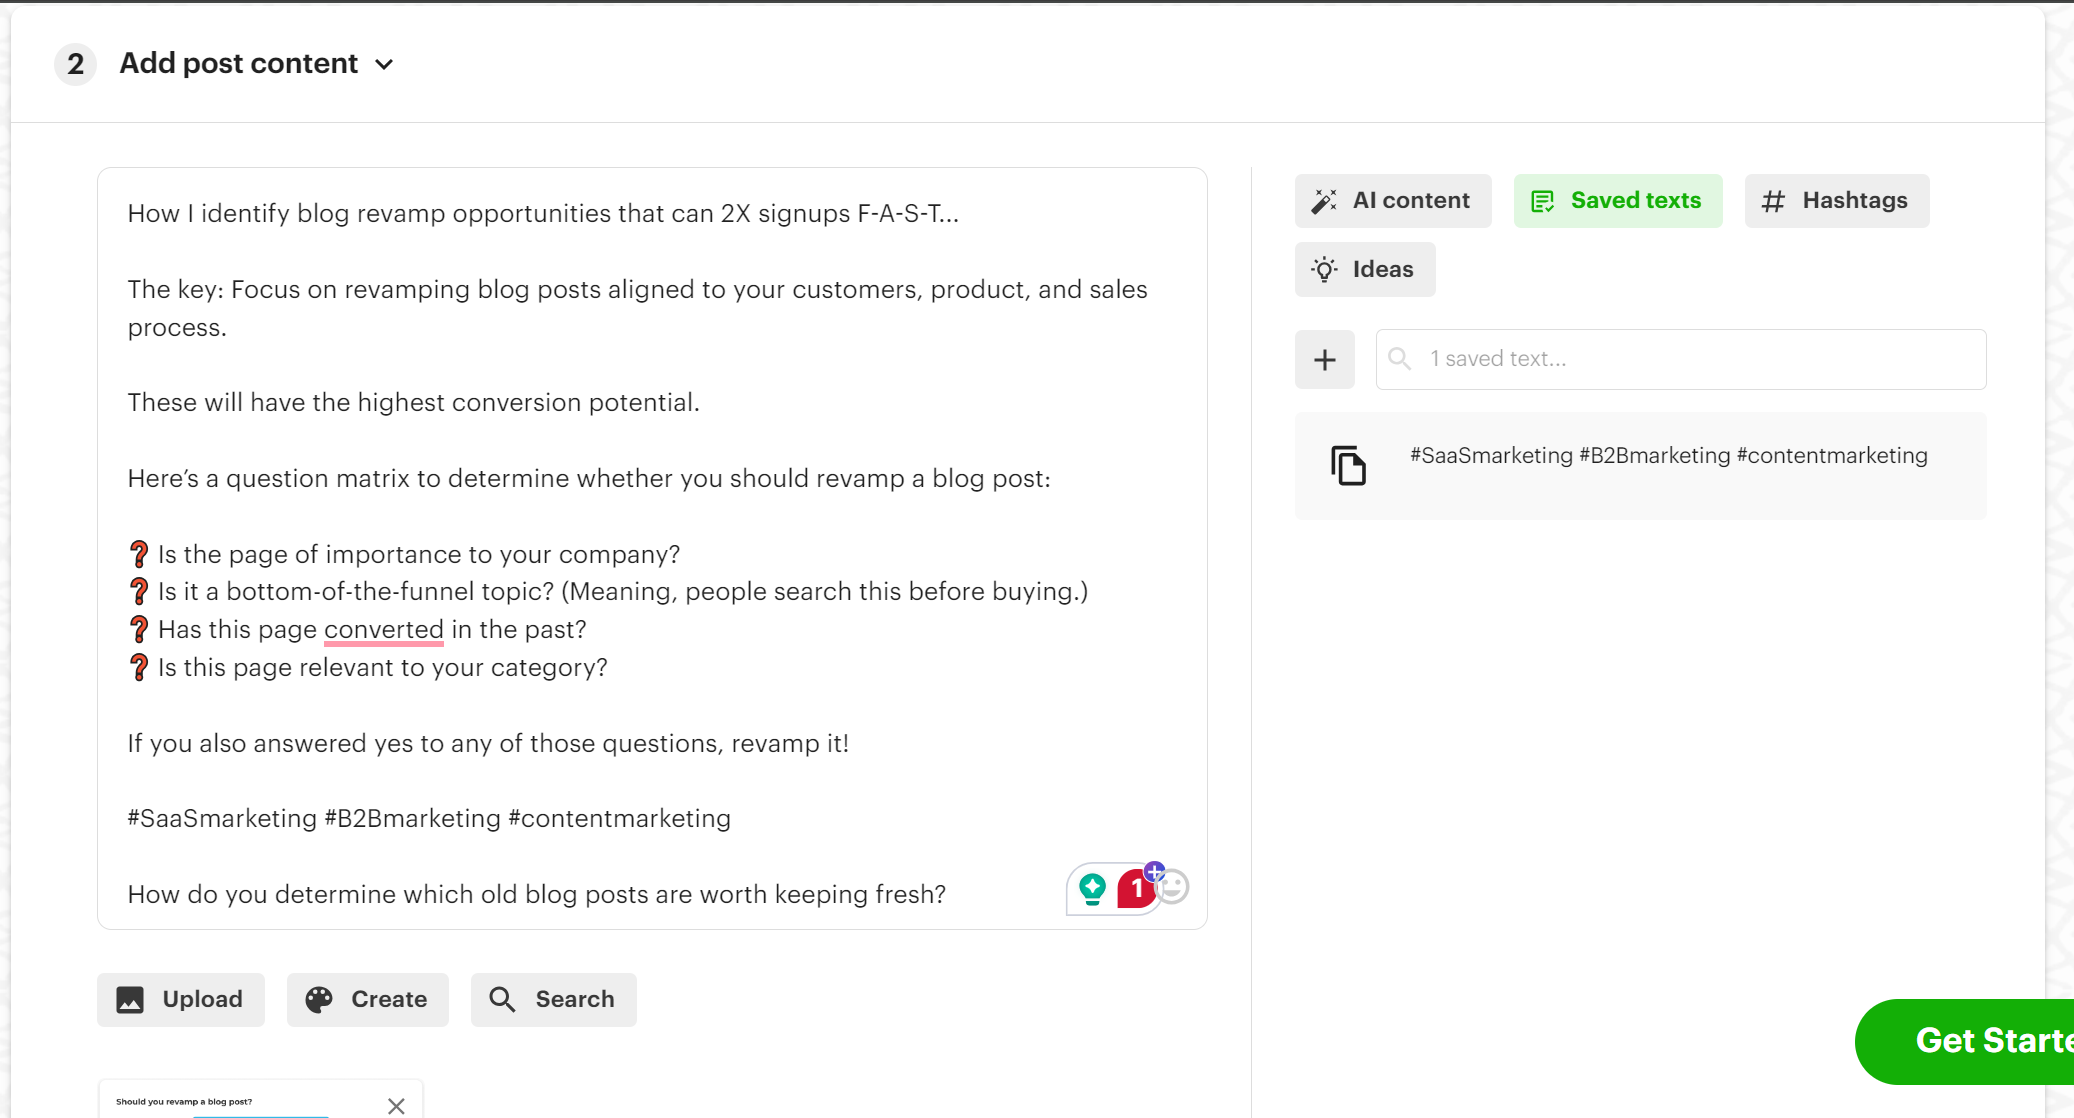 3) Write your Instagram post caption. Upload your Instagram photo.
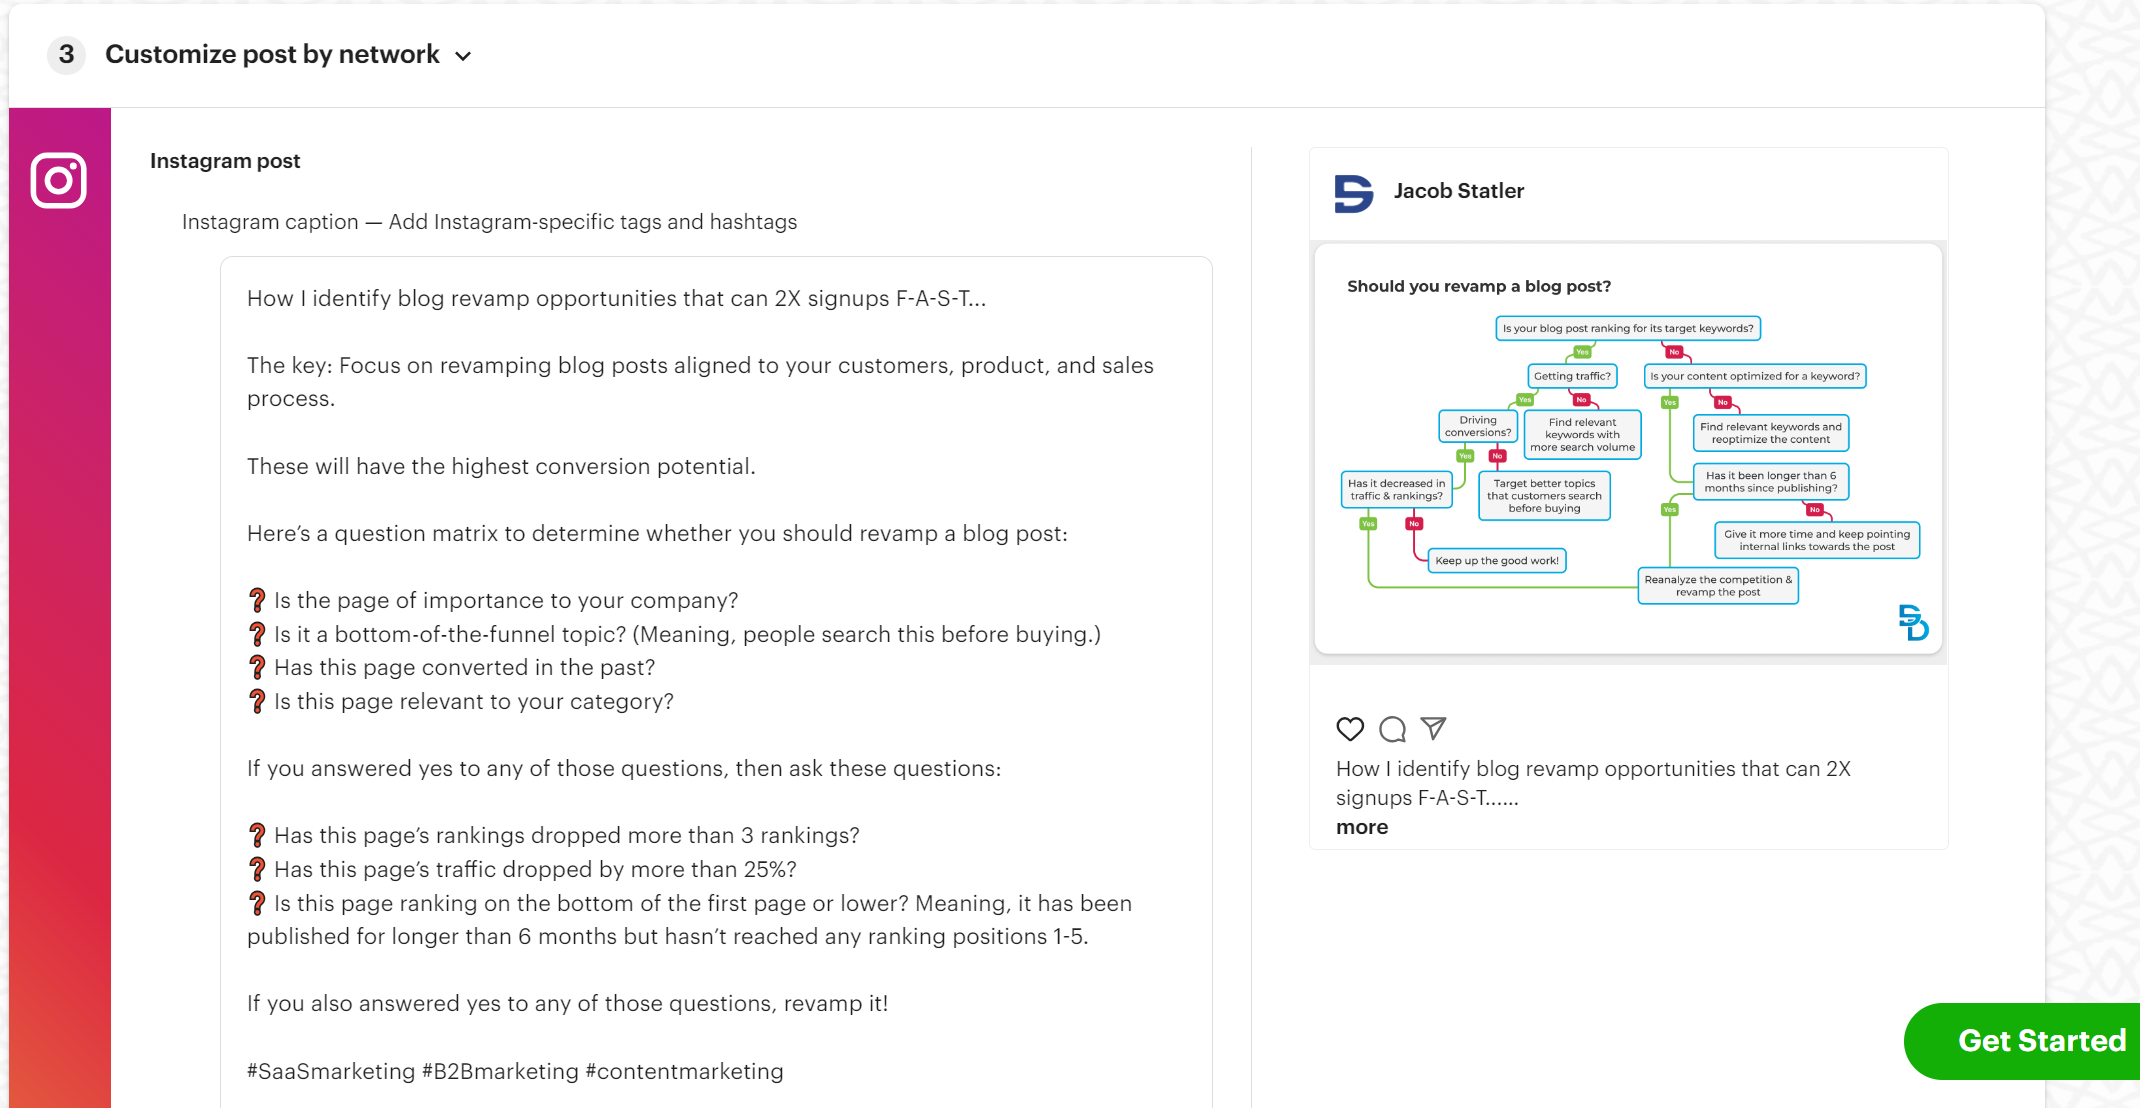
4) Preview your post to make sure it's optimized for Instagram.
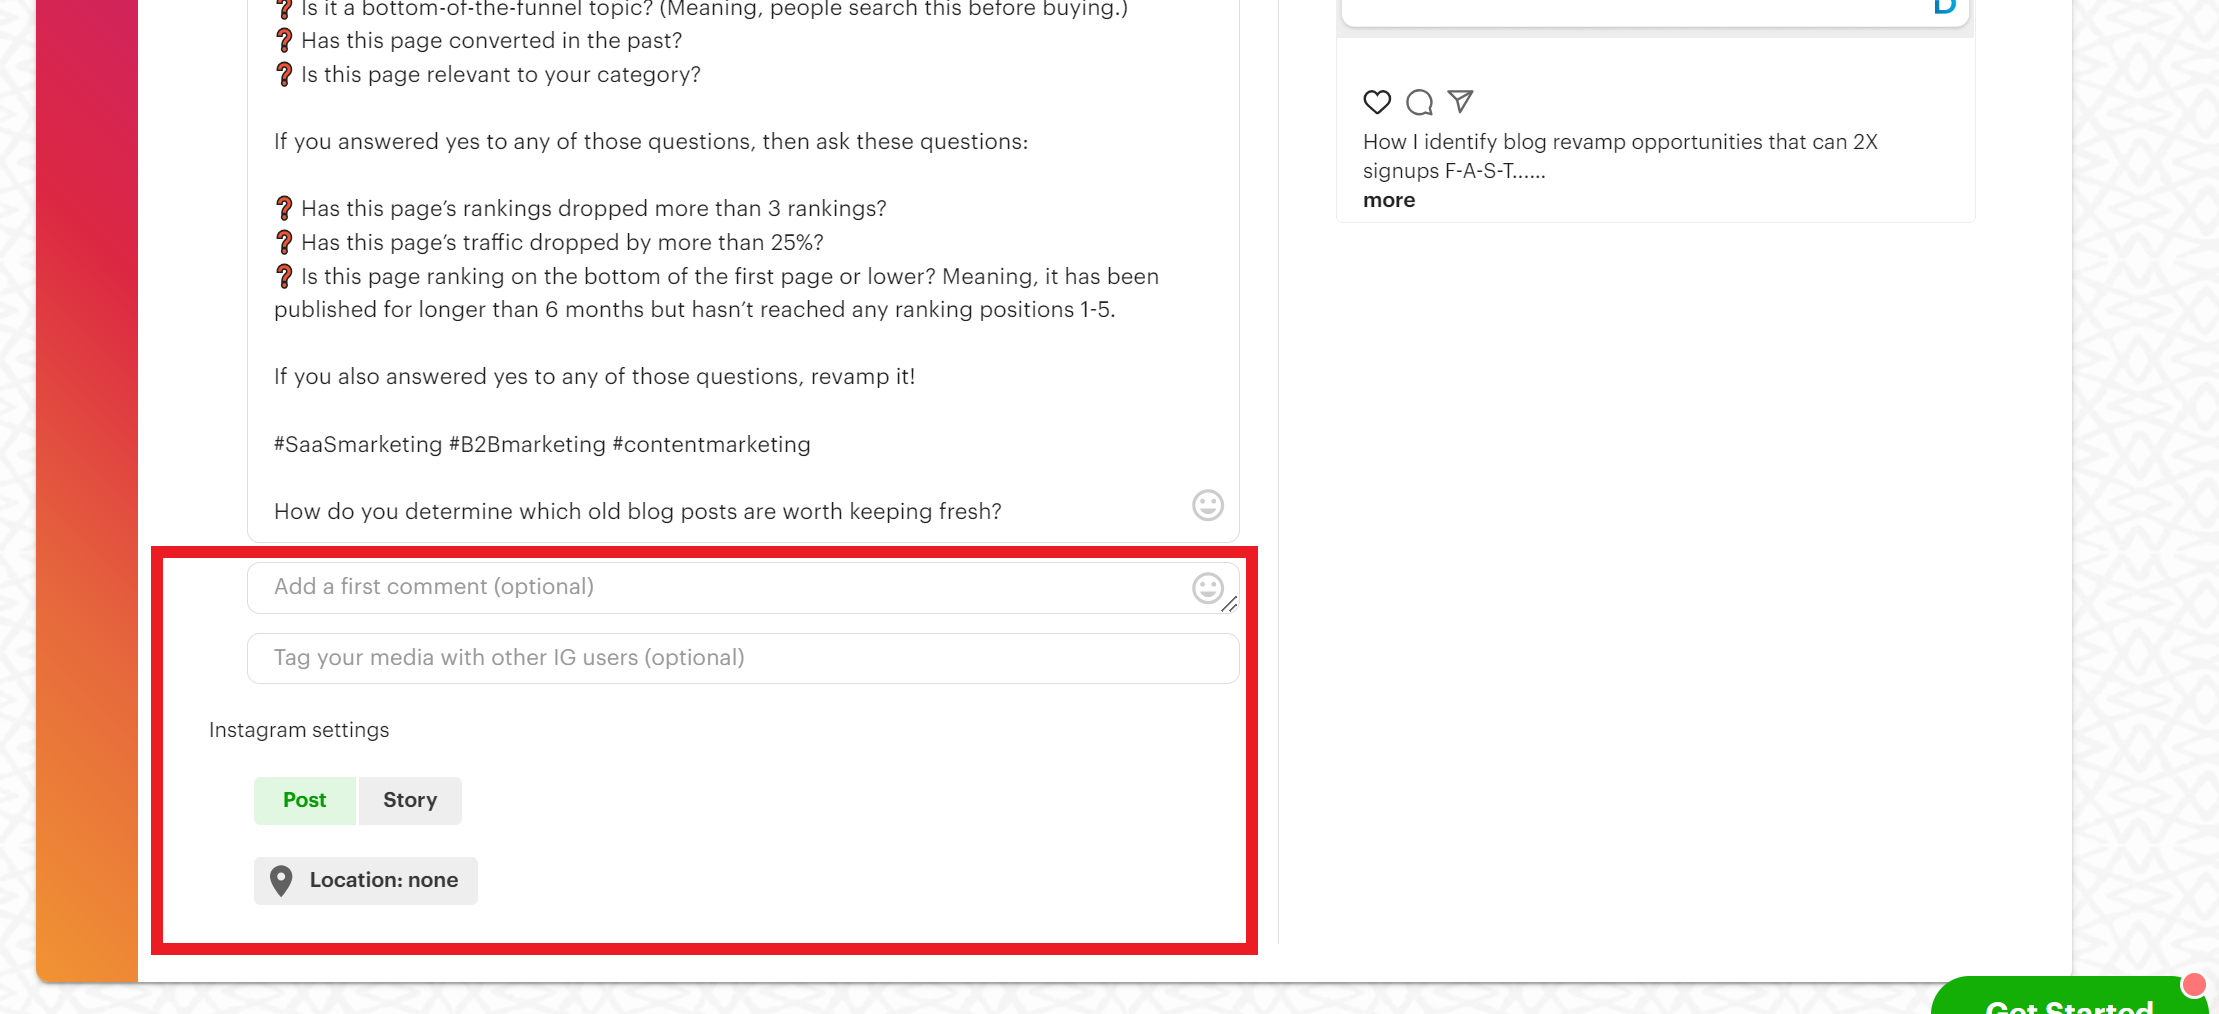
5) Choose whether to publish as a normal post or story. Optional: Add a first comment, tag other accounts, and add a location.
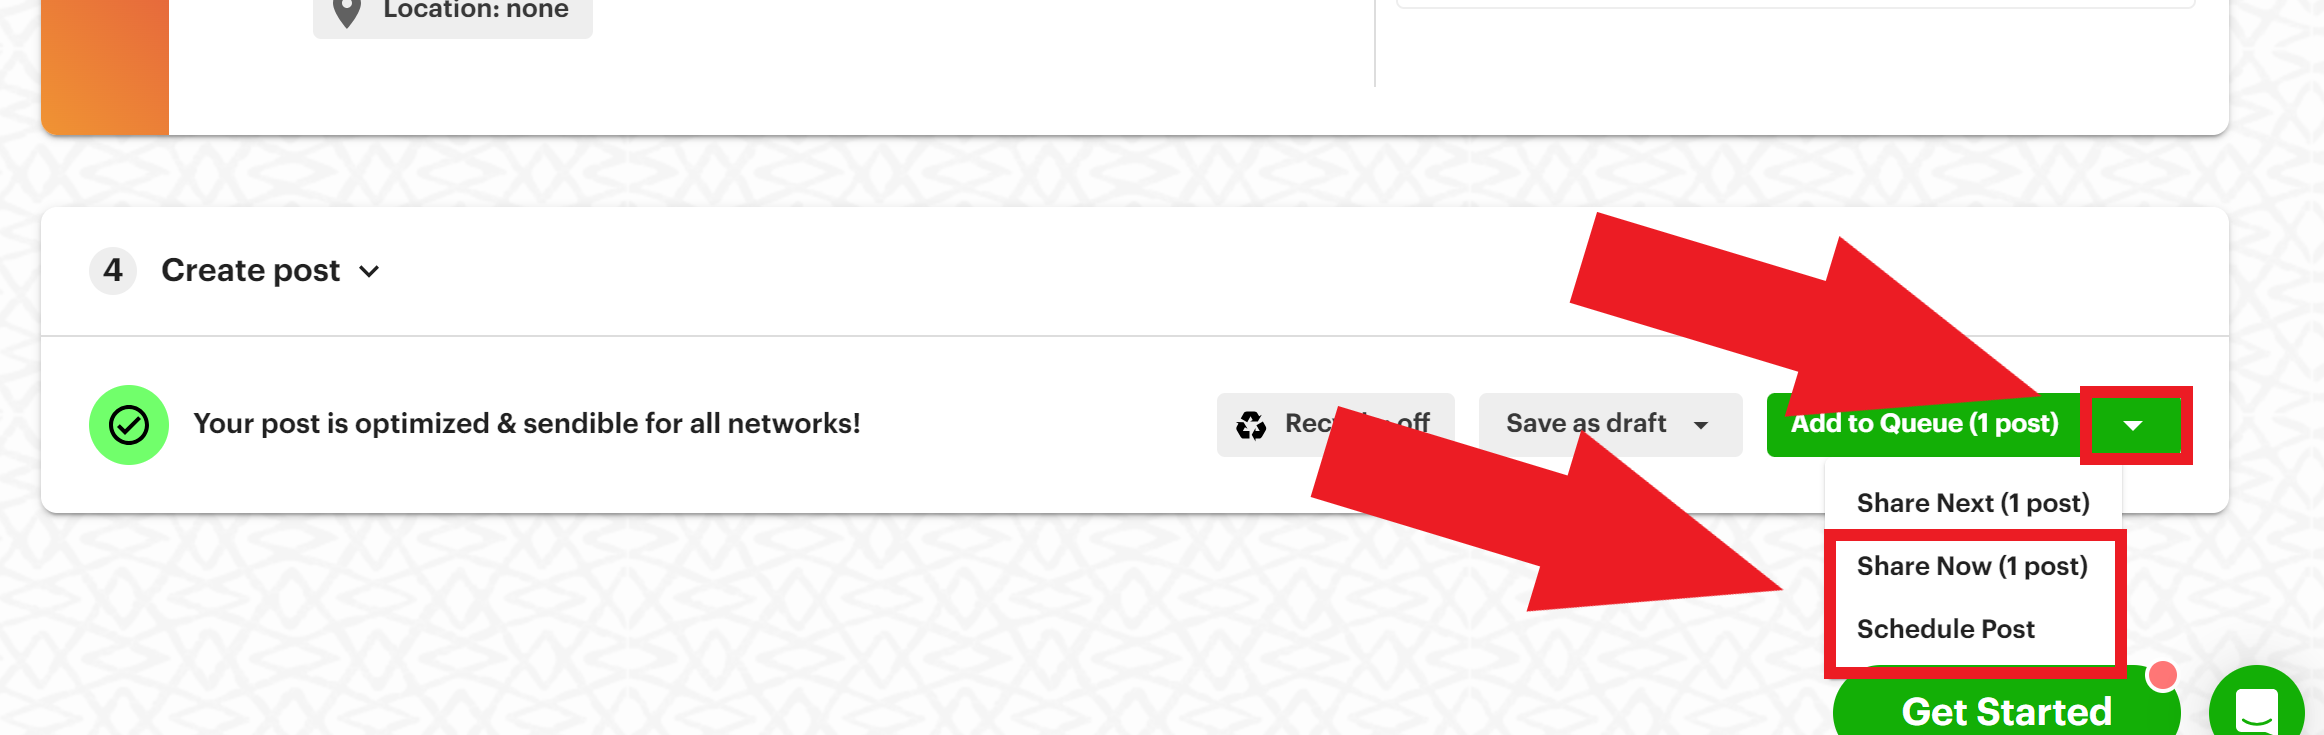
6) Click on the down arrow next to "Add to Queue" and select "Share Now" or "Schedule Post."
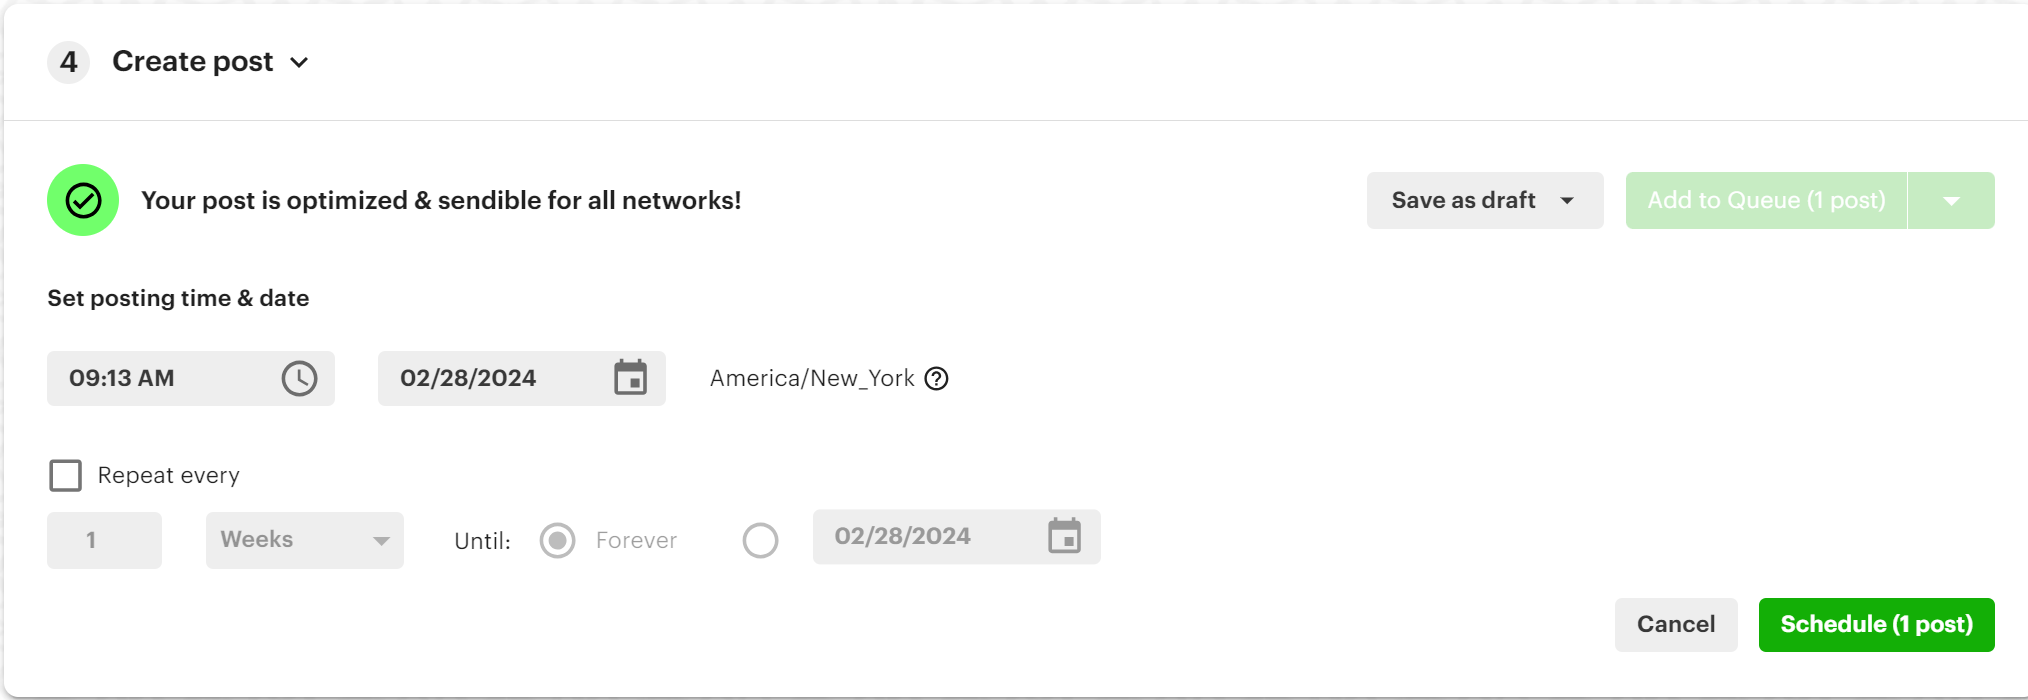 7) If you're scheduling your post, select your date and time. Then, click "Schedule."
How to post or schedule Instagram Reels
Posting or scheduling Reels is very similar to posting image posts, except with a few extra steps.
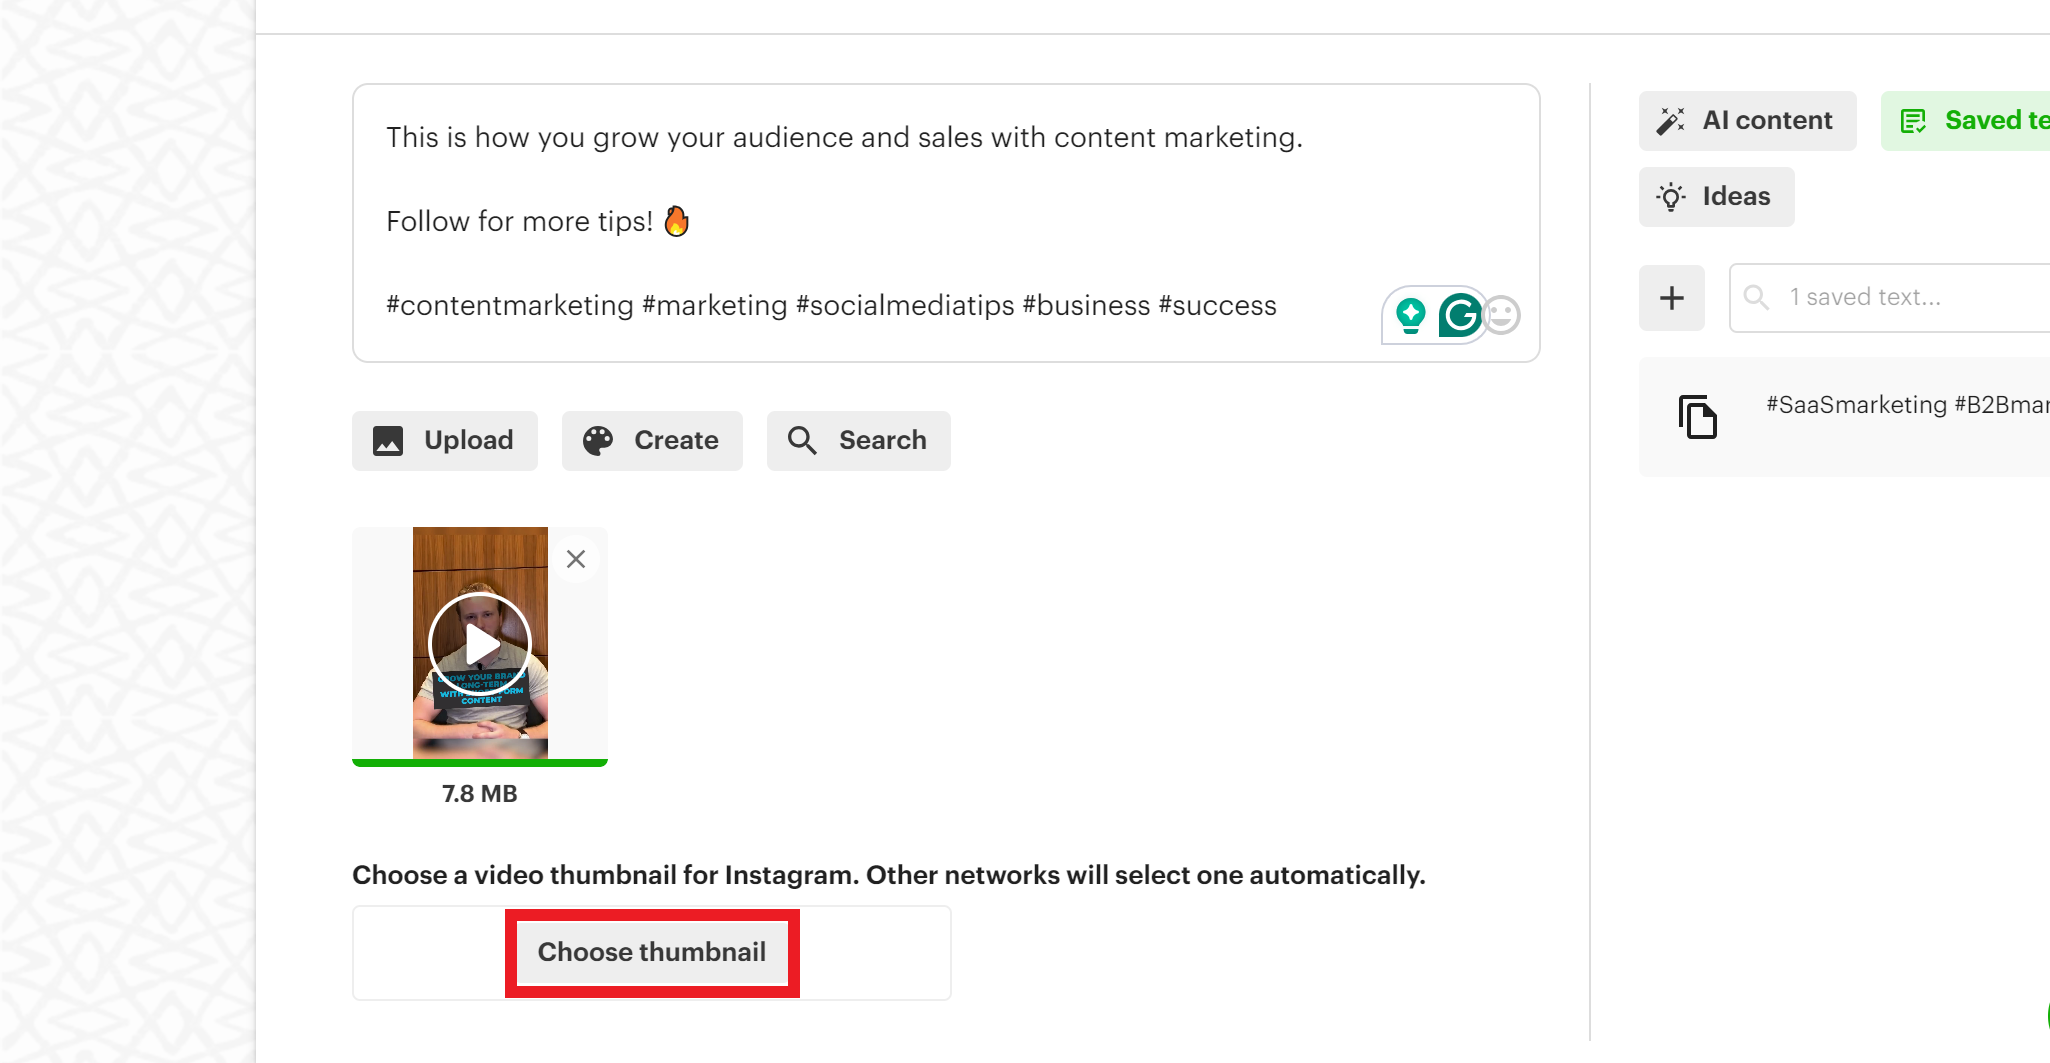
After uploading your video, click "Choose thumbnail."
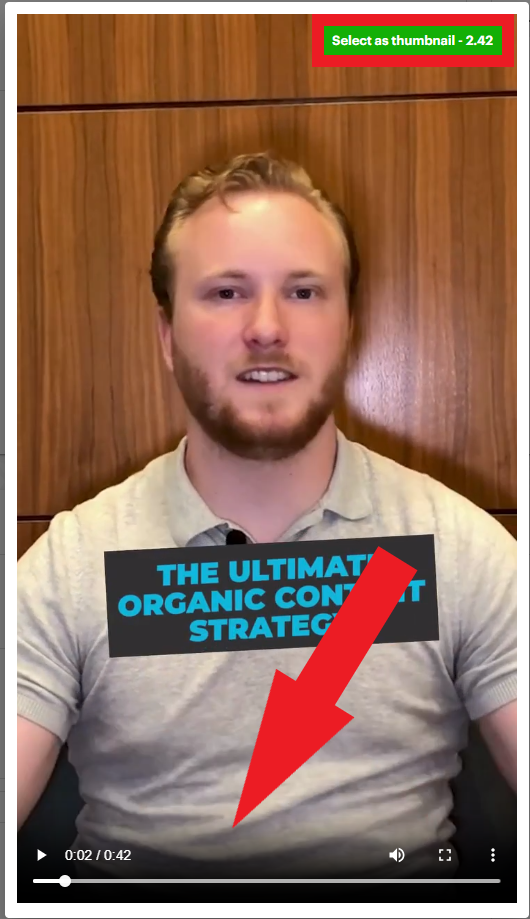 Then, choose the point in the video that you want people to see before clicking.
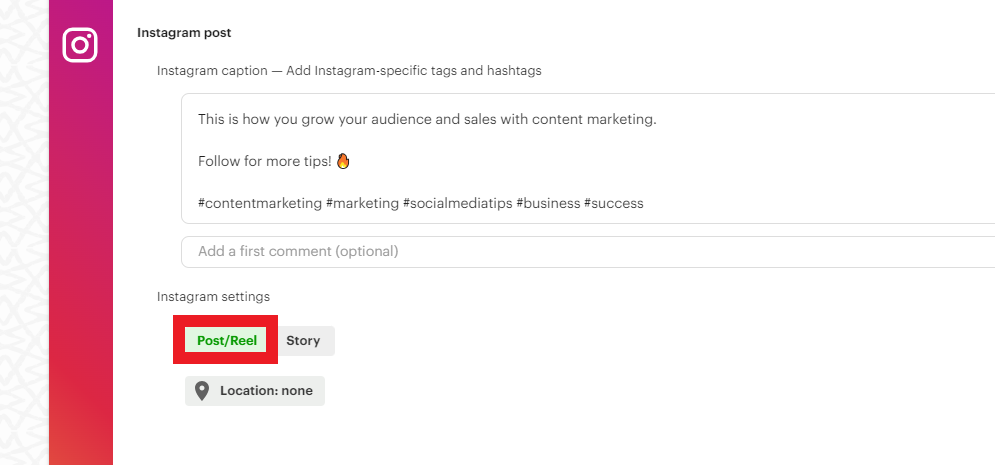 Also, make sure you select "Post/Reel" under "Instagram settings."
Then, publish or schedule your post.
How to post or schedule Instagram carousels
Post Planner allows you to post one of the most popular post formats on Instagram: Carousels!
There are 2 ways to use Post Planner to create and post or schedule your carousels:
1) Create a carousel using your own images. All you have to do is upload them simultaneously when you create your post.
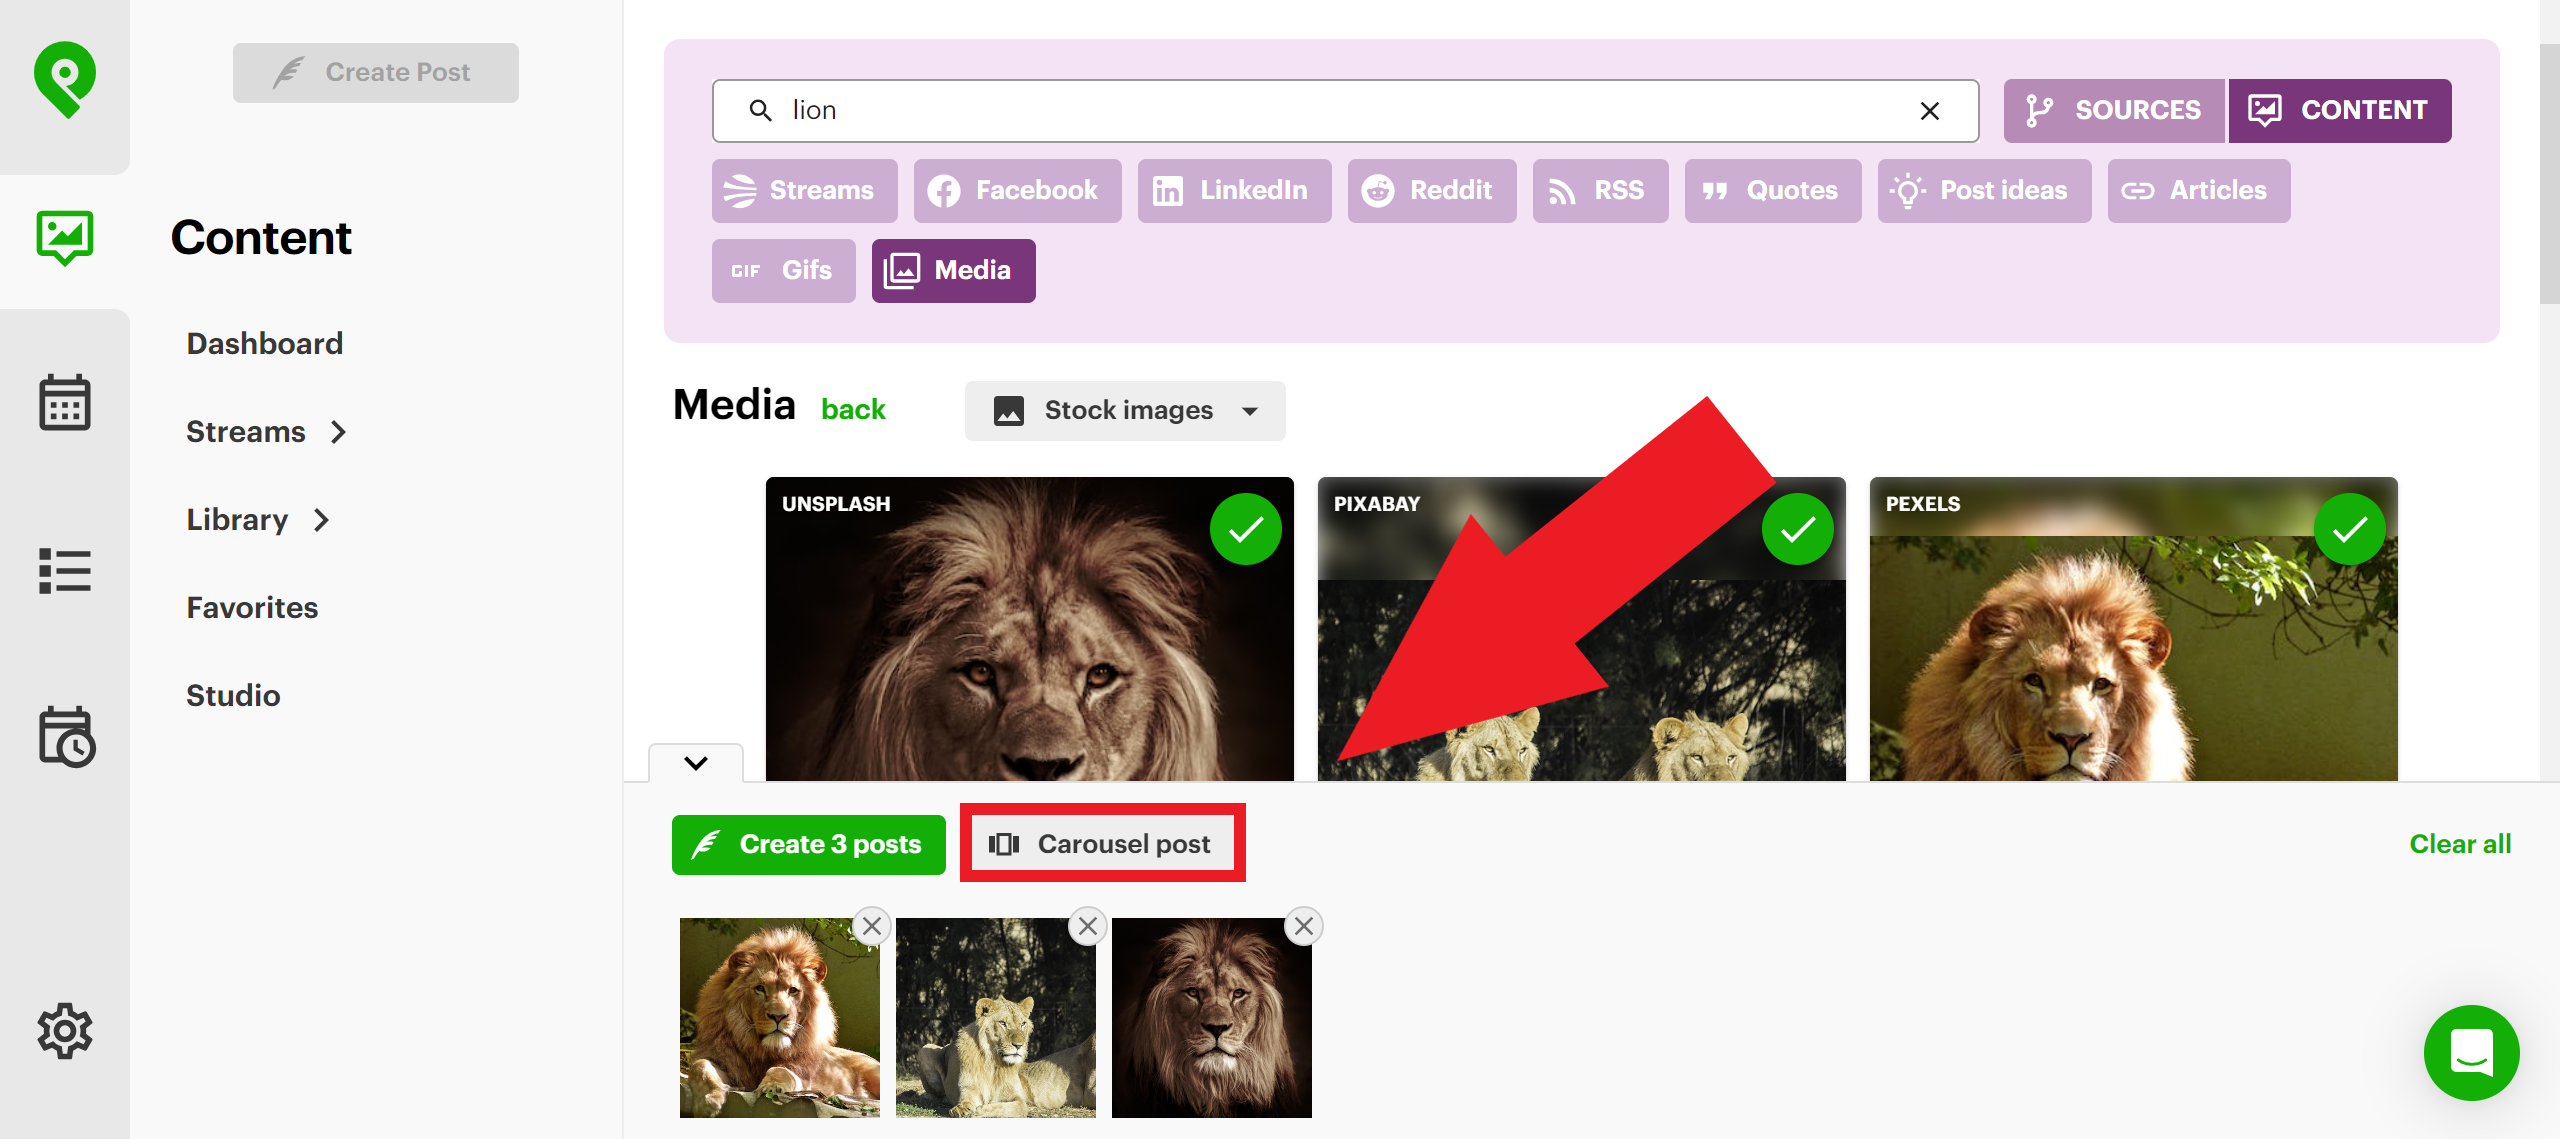
2) Curate images from Post Planner to turn into a carousel.
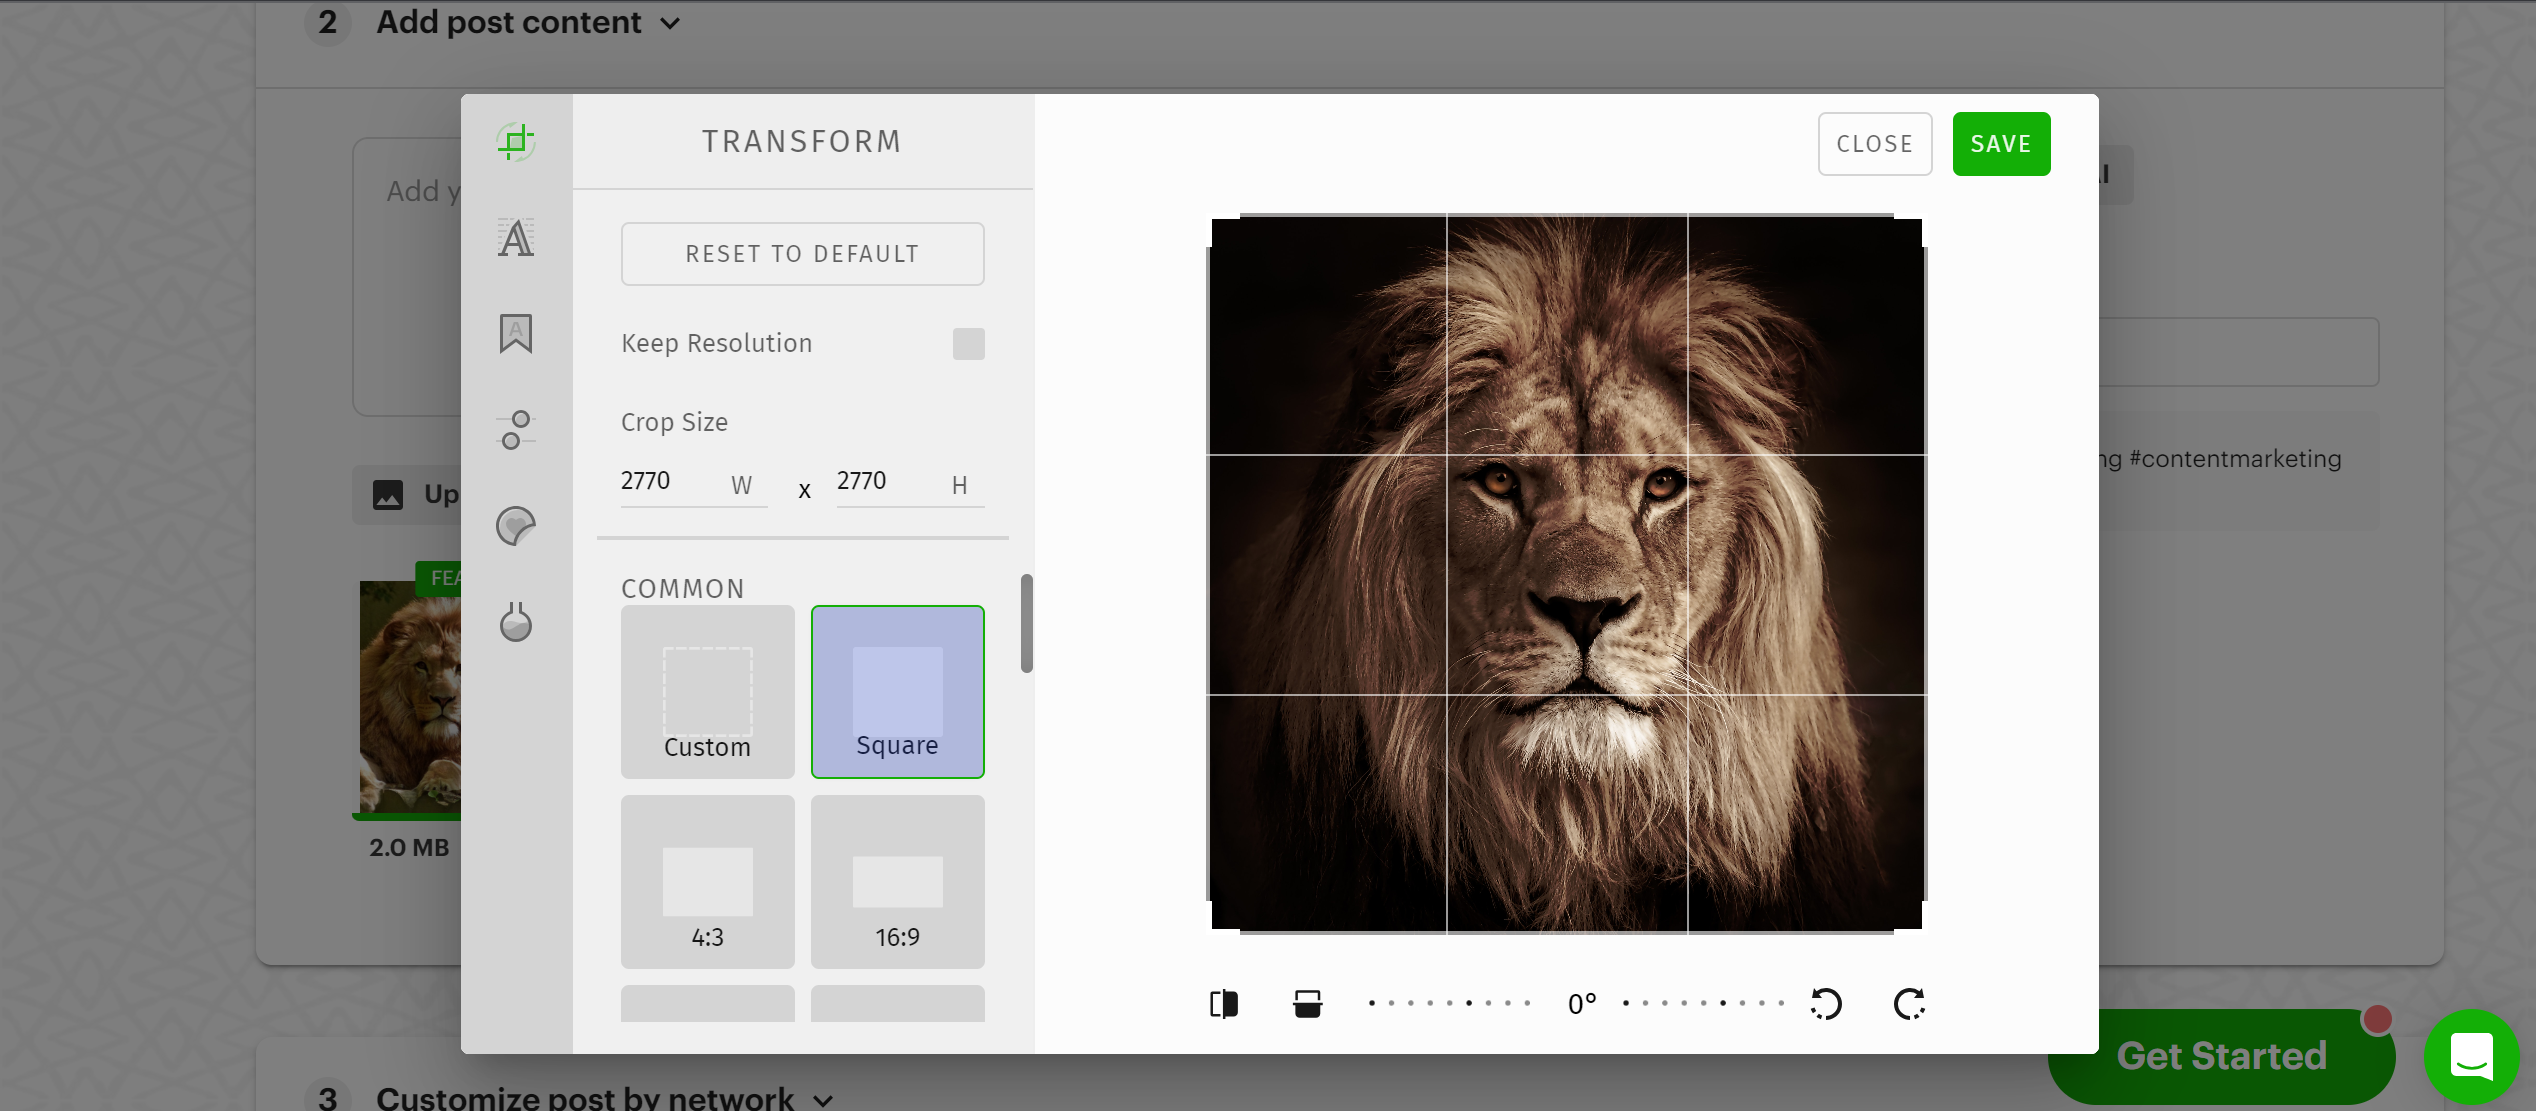
 Make sure to edit your images to be the same ratio (if needed).
How to automate your Instagram posts with Posting Plans
PLANS is where you manage the times when your scheduled posts publish to Instagram.
All you have to do is hover over the time block where you want to add a posting time and click “Add a posting time.”
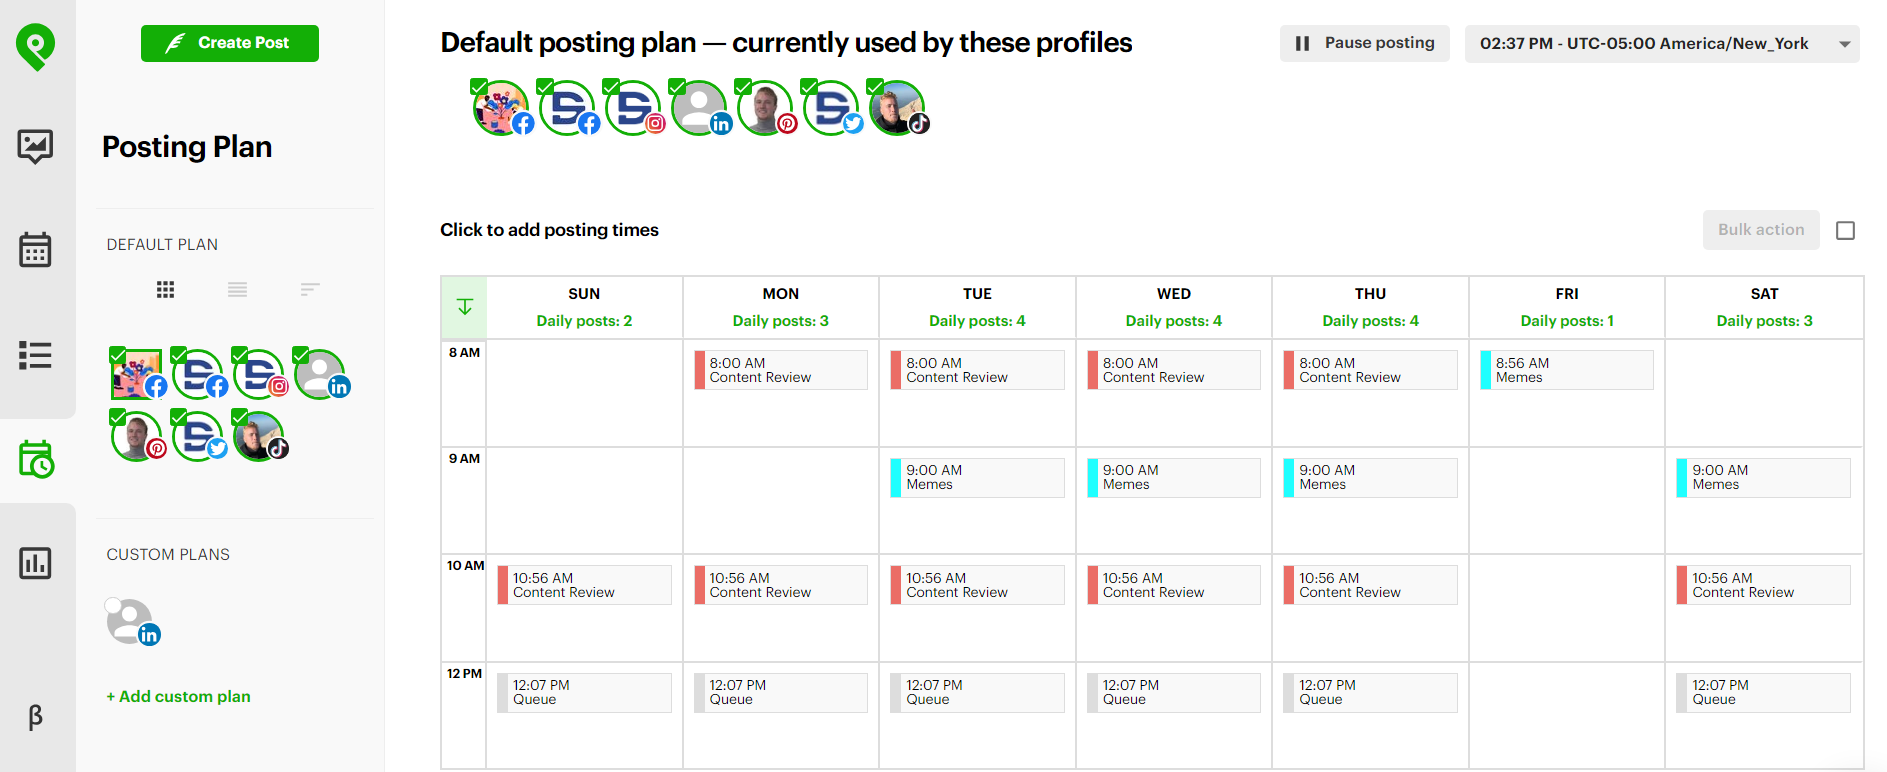
This allows you to automate an Instagram posting plan that works best for your audience.
How to share viral content
Out of good post ideas for your Instagram content strategy?
Turns out you don’t have to create something new every time to boost engagement!
Post Planner offers neverending viral content for you to re-share:
1. Go to “Content” in the left-hand navigation bar and search for pre-made Content Streams in your niche.
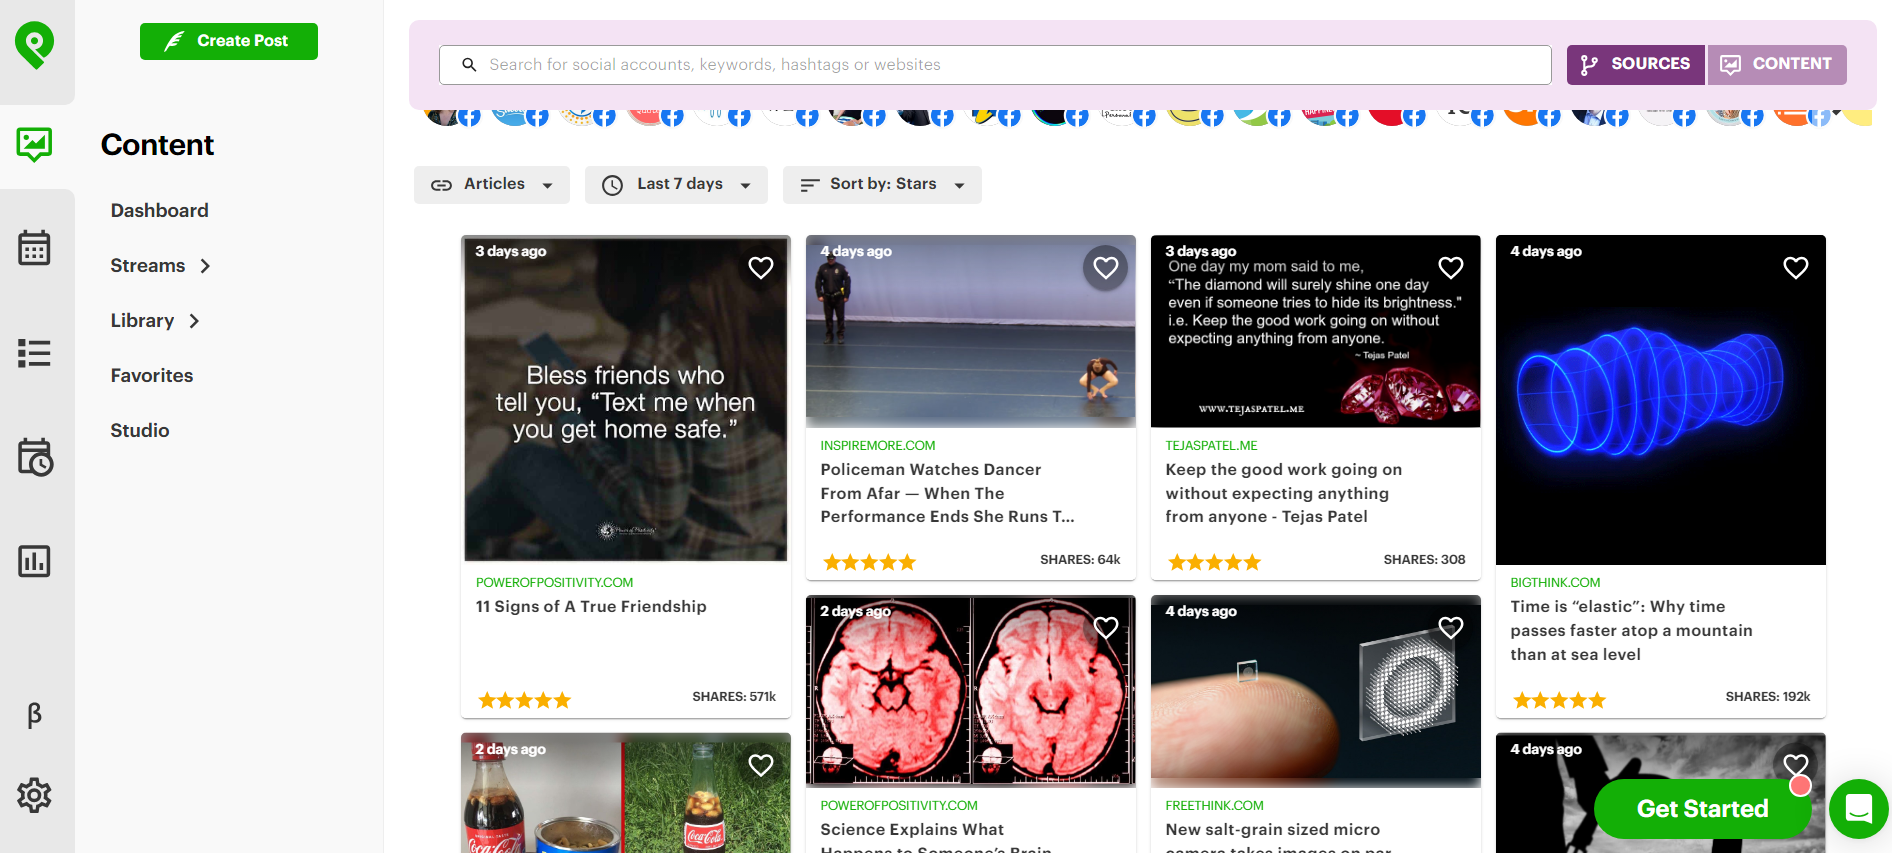
2. Choose images or videos tailored to your audience and click “Add Content.”
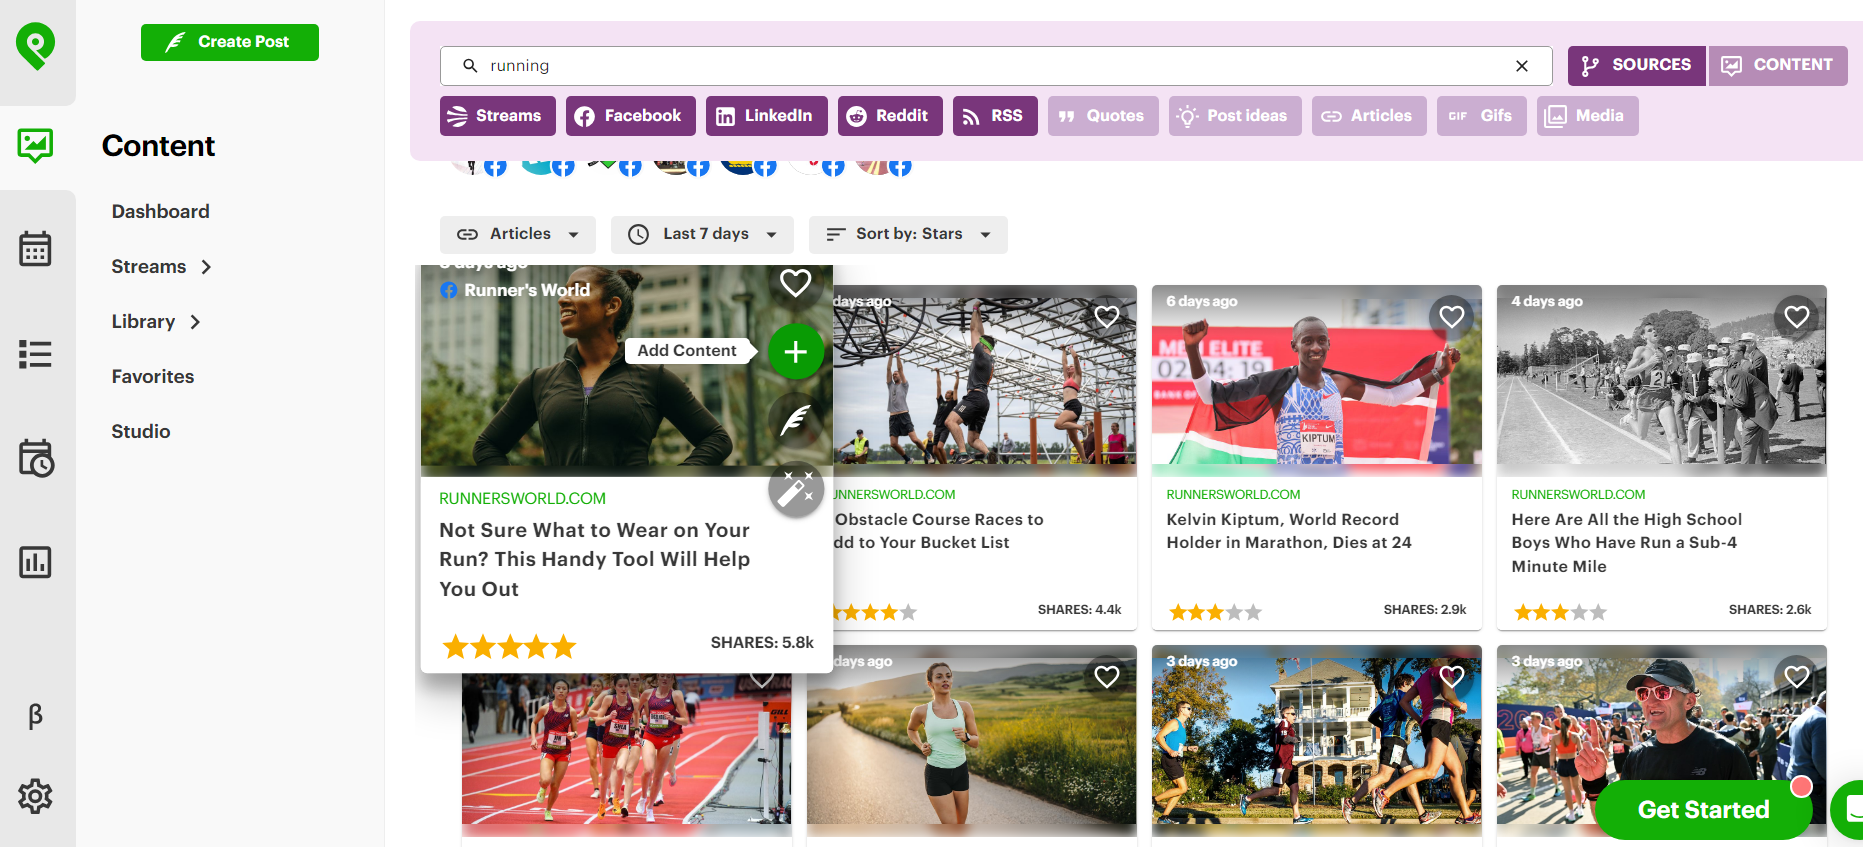
3. Make adjustments in the composer, then click “Add to Queue.”
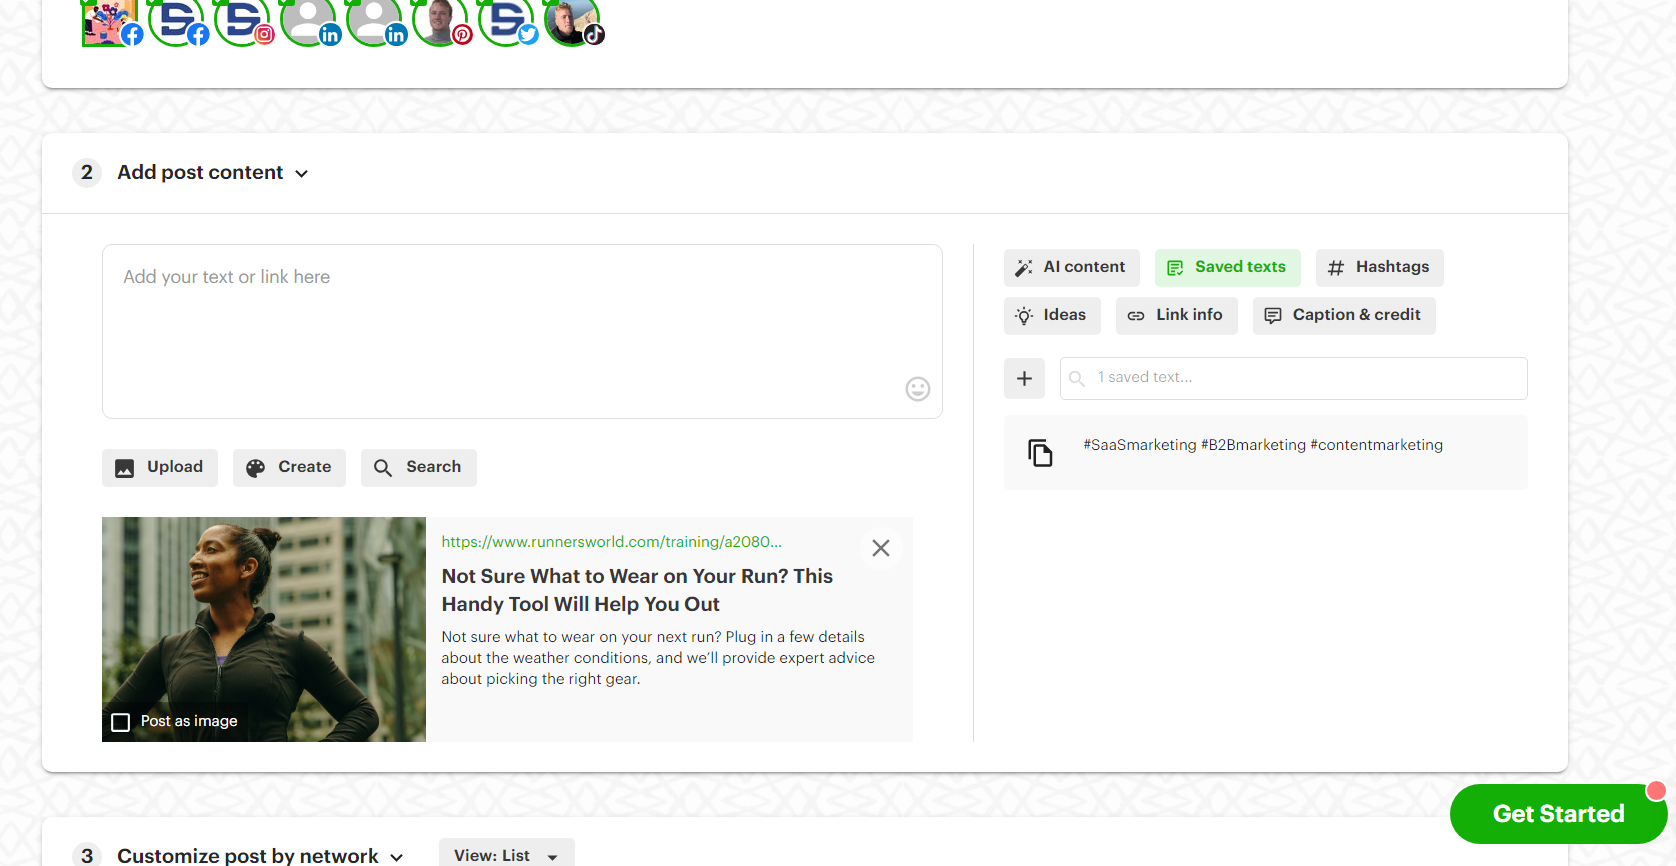
Your post is now scheduled and will go out at the next available time in your posting plan.
You can also check your updated posting schedule by clicking on the “Posts” tab on the left-hand toolbar.
How to recycle top-performing content
Scheduling your Instagram posts consistently on Post Planner allows you to see data about which posts are most engaging.
Post Planner saves your past content, so you can repurpose your BEST posts and cash in on more engagement.
Instagram posts don’t get much easier than that.
Here’s how to review and repurpose your most engaging posts:
- Click on “History” on the left-hand toolbar
- Scroll through your posts, looking at the engagement statistics
- Pick one with high engagement, then select “Re-queue.”
%20(1).webp?width=1140&height=760&name=re-queue-FULL%20(1)%20(1).webp)
Your old post is now added to your current scheduling queue! You can go to your posting plan and tweak the exact posting time if desired.
How to bulk schedule Instagram posts to save MORE time
You can take your time savings to the next level with bulk scheduling.
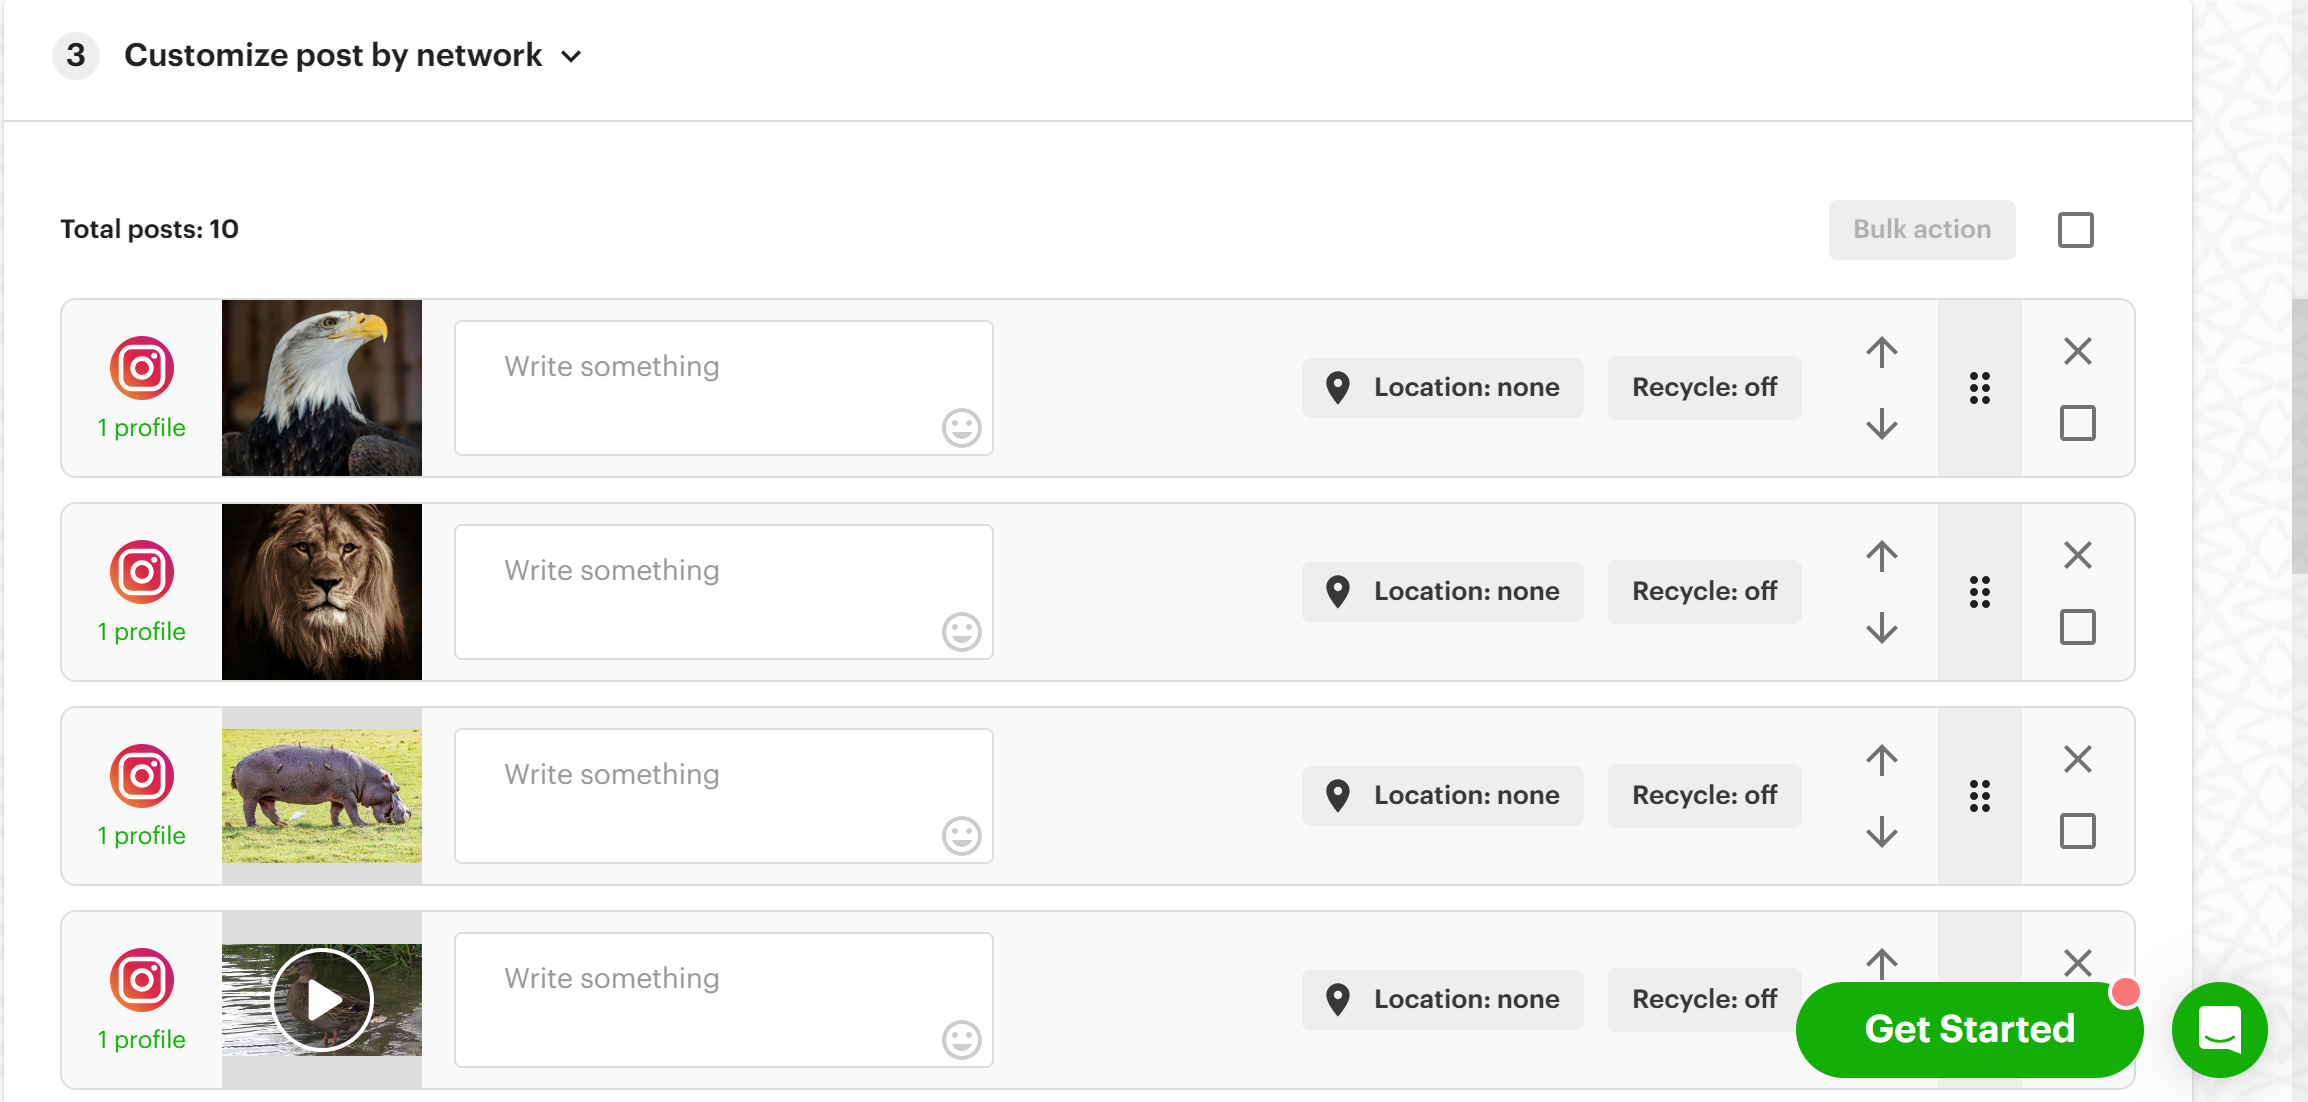
When you’re in the Content tool, simply select multiple pieces of content that you want to share with your social media followers. I’ve selected 10 pieces of content in the image below.
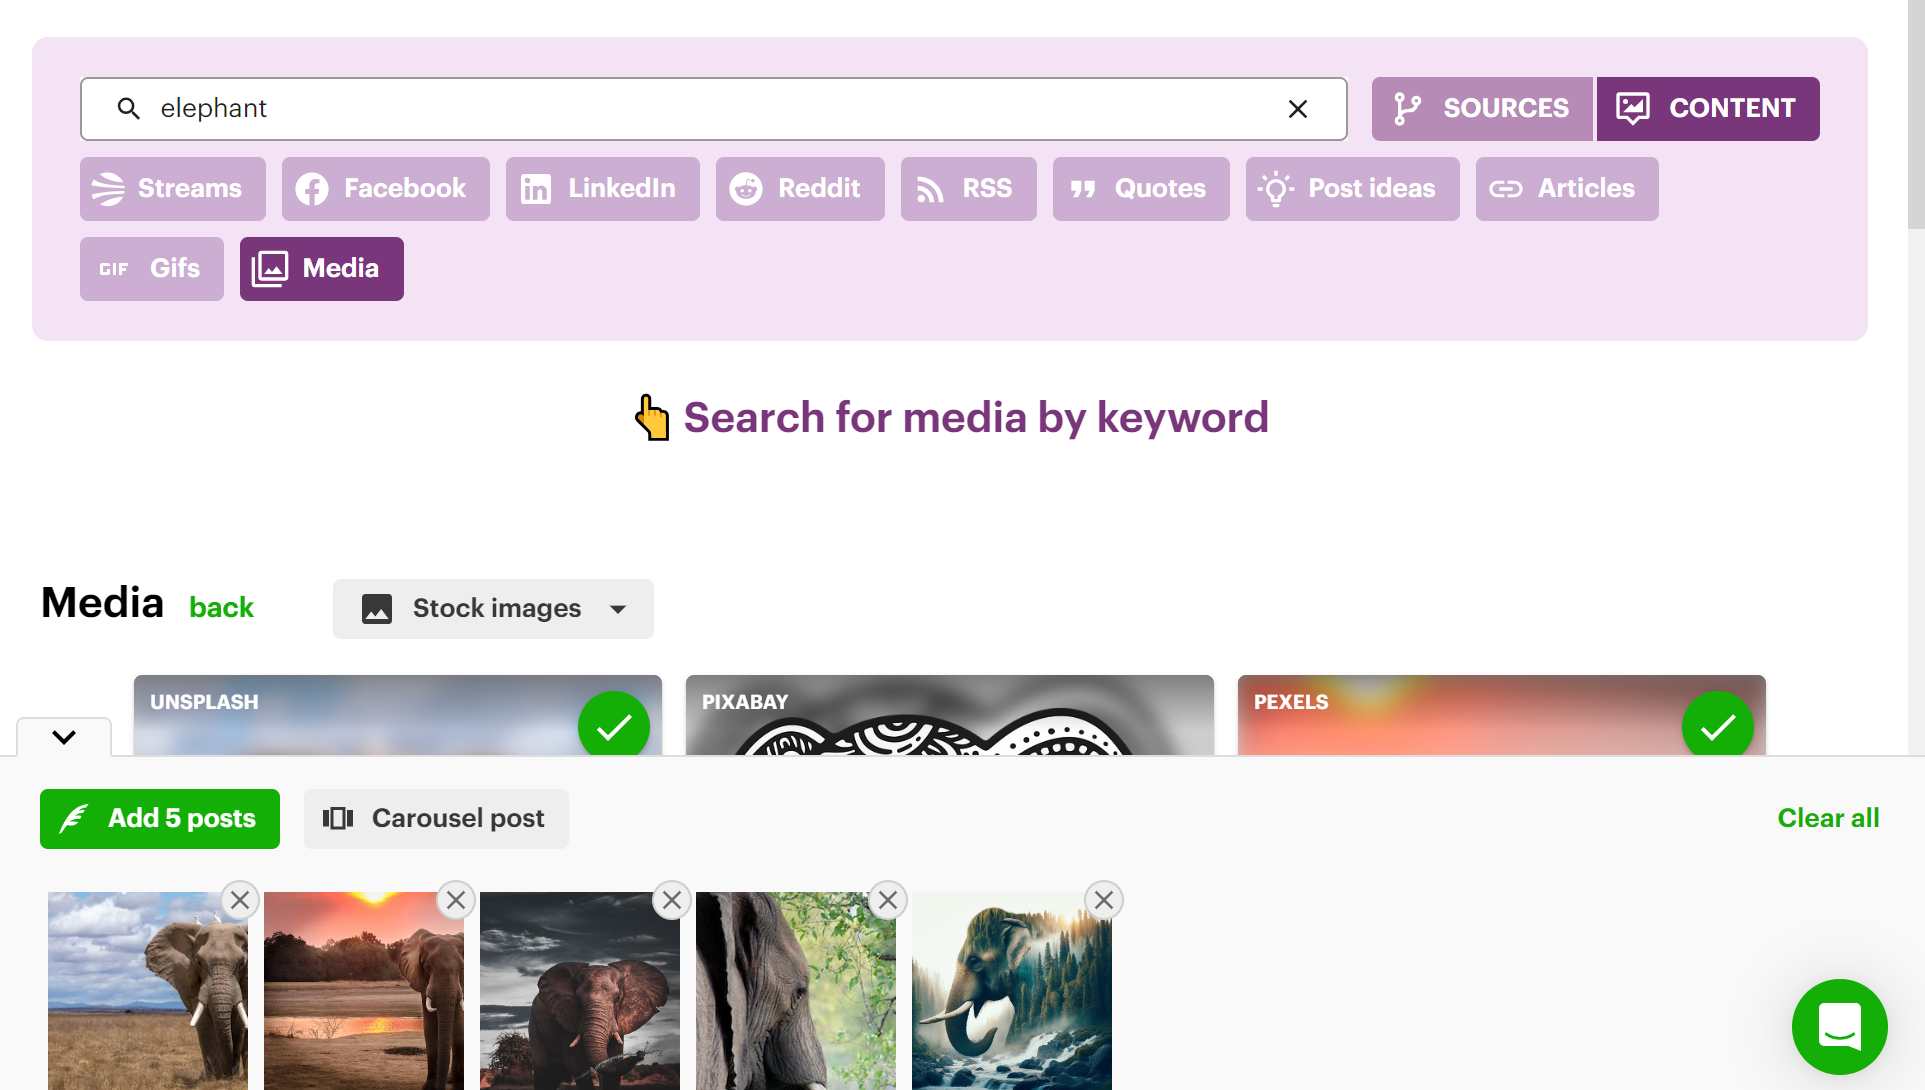
Now, bulk edit these posts in the Post Composer, making sure you optimize them for Instagram.
You can see below that these curated images and videos will turn into 10 POSTS in a matter of MINUTES!
Alternatively, you can bulk upload your own content by selecting "Multiple posts" from the Post Composer.
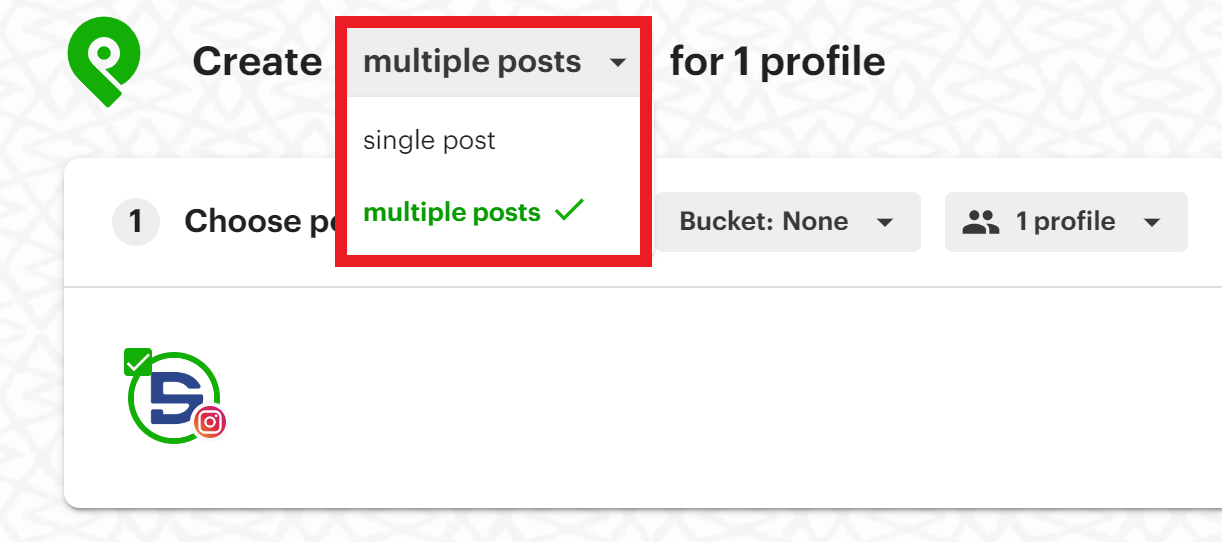 Then, upload your content in bulk.
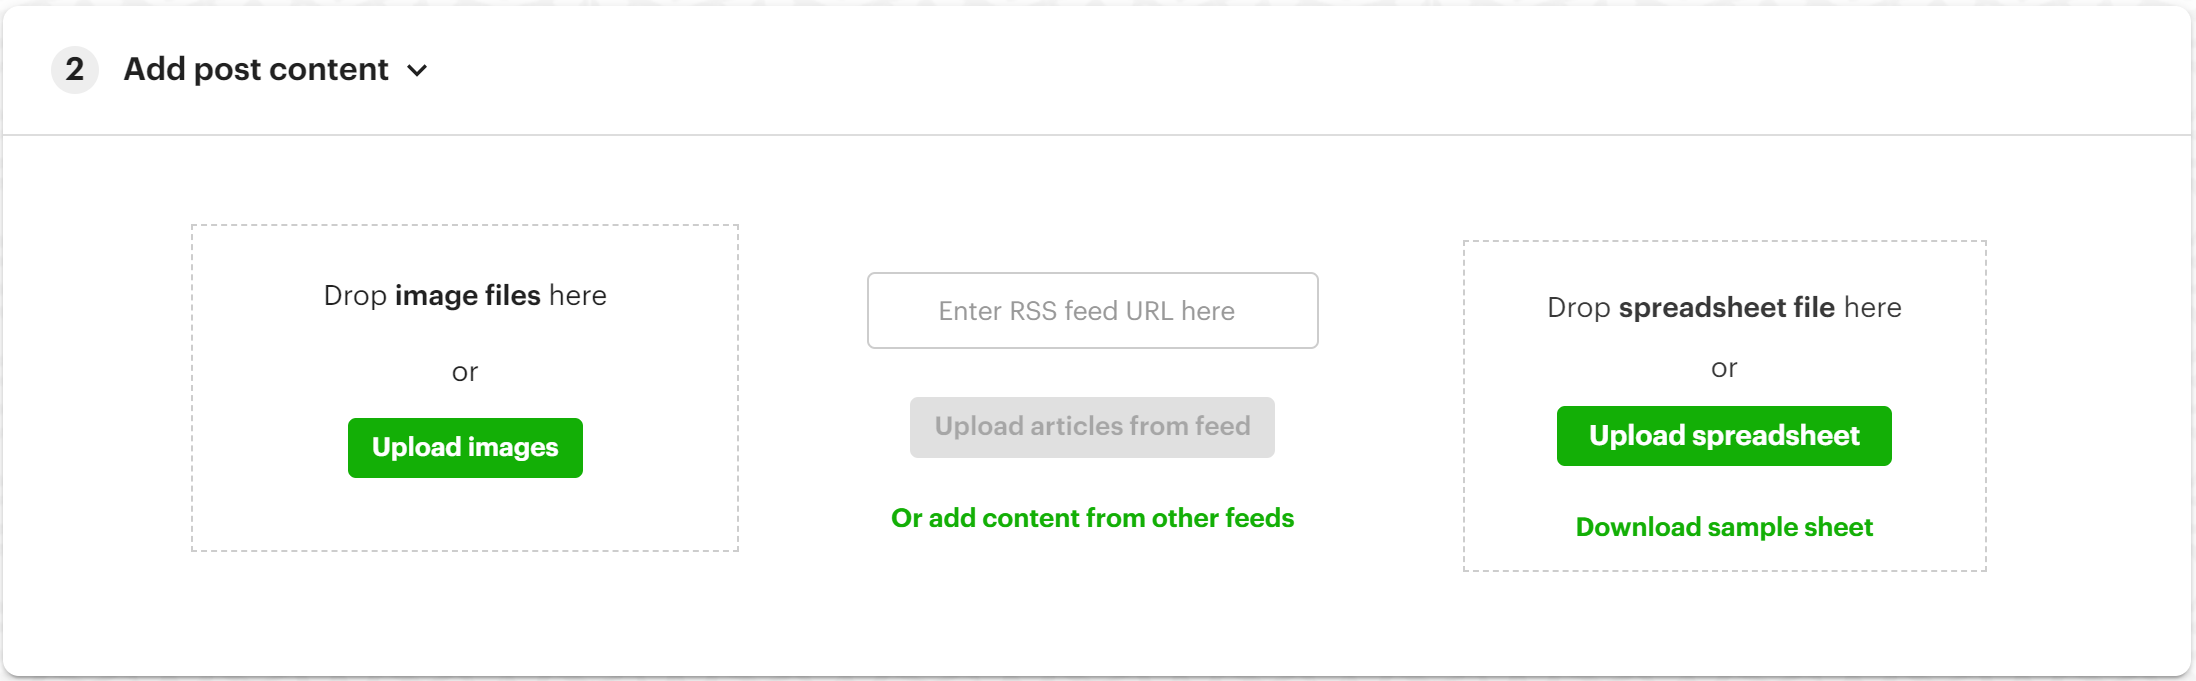
Using bulk scheduling, you can easily plan a month’s worth of content in an afternoon.
3 Rules for posting to Instagram
Let's be honest: mediocre Instagram content won’t benefit you (whether it comes from your phone or computer).
So, before we dive into posting from your computer, let’s talk content strategy.
Over 1.4 billion people use Instagram every month.
About 81% of those people use IG to research products and services.
.png?width=980&height=412&name=how%20to%20post%20on%20instagram%20from%20pc%201%20(1).png) So, how do you make the most of those numbers?
So, how do you make the most of those numbers?
Here are 3 Instagram posting rules to get more reach, followers, and engagement on Instagram:
Rule #1: Vary your content!
One of the worst things you can do on Instagram is repeatedly post the same type of content.
Monotonous content makes your page boring, stale, and boring (yes, so boring, I had to say it TWICE).
Consider mixing in a variety of content, including:
- Quotes
- Photos
- Carousels
- Reels
- Selfies
- Curated content from around the web
This next tip may sound counterintuitive, but stick with me.
YES, you should promote your products and services.
But you should do other things, too:
- Make your followers laugh
- Provide educational content
- Offer inspiration or motivational ideas
- Highlight adjacent brands and loyal followers
You’ll see an uptick in engagement rates when you vary your content.
If you're having trouble thinking of Instagram post ideas, check out this article!
Rule #2: Post at the right times
If your followers aren't online when you post, they won't see it!
It’s that simple.
Knowing your peak hours and scheduling your content accordingly allows you to EXPAND your reach, not just maintain it.
The solution:
Experiment with posting at different times and days to see what gets the most engagement.
Then, double down on posting during the times you get the most engagement!
Rule #3: Post consistently, but not too much!
Ever heard the saying, "too much of a good thing is a bad thing”?
Consistency on Instagram is good.
But posting too often?
That can backfire like a combustion engine.
So, what’s the Goldilocks zone?
You should aim for at least 1 post per day and no more than 2 on any given day.
The right number for you depends on your audience and competition, but that rule of thumb should get you headed in the right direction.
No matter the frequency you choose, Post Planner makes it easy for you to stay on schedule.
Ready to start posting on Instagram like a pro?
You can post on Instagram from your PC in 2 ways:
- From Instagram's website
- Use a scheduling tool like Post Planner to post automatically from your desktop
Scheduling brings tons of time-saving benefits, which leads to more frequent posting and higher engagement.
The most important things to remember are to:
- Post frequently
- Post high-quality content
- Post from your desktop if it will help you save time or increase the quality of your posts.
Do you post to Instagram from a PC?
If so, what methods have you used to increase your success?
Let us know in the comments below!
Happy posting!


No Comments