Are you serious about growing on Instagram?
Then Reels aren’t optional anymore.
They’re still one of the highest-reach formats on the platform, especially if you have 1K-50K followers.
But there’s a catch.
Reels only work if you post consistently. And that’s exactly where most people fall off.
Not because they don’t know what to post, but because consistency demands a lot:
- Coming up with ideas
- Creating the content
- Posting at the right time
- And doing it all again next week
Manually juggling all of that gets exhausting fast, making it easy to lose momentum.
Scheduling fixes that. It gives you a system that you can fall back on, even when you’re running low on motivation.
You can batch your creative work, handle logistics separately, and keep publishing consistently without having to think about it every day.
In this guide, you’ll learn:
- How to schedule Reels natively on Instagram
- How to schedule Reels using Meta Business Suite
- How to schedule Reels in bulk using Post Planner
- Pro tips for scheduling Instagram Reels
Let’s start with the simplest option first.
How to schedule Reels natively on Instagram
Instagram provides a handy built-in scheduler for creators and small business owners who don’t want to buy another tool.
A couple of native limits to know up front:
- You can schedule up to 25 posts per day.
- You can schedule up to 75 days in advance.
(If you’d like to schedule posts without these limitations, skip to the next section.)
Here’s how you can schedule Instagram Reels in the Instagram app:
- Make sure you’re using a professional account (Creator or Business). Native scheduling isn’t available on personal accounts.
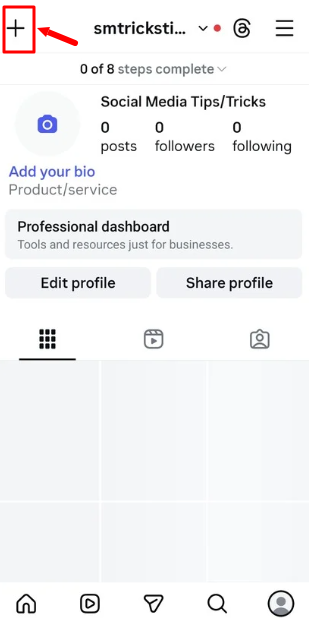
- Tap the + (Create), then choose Reel.
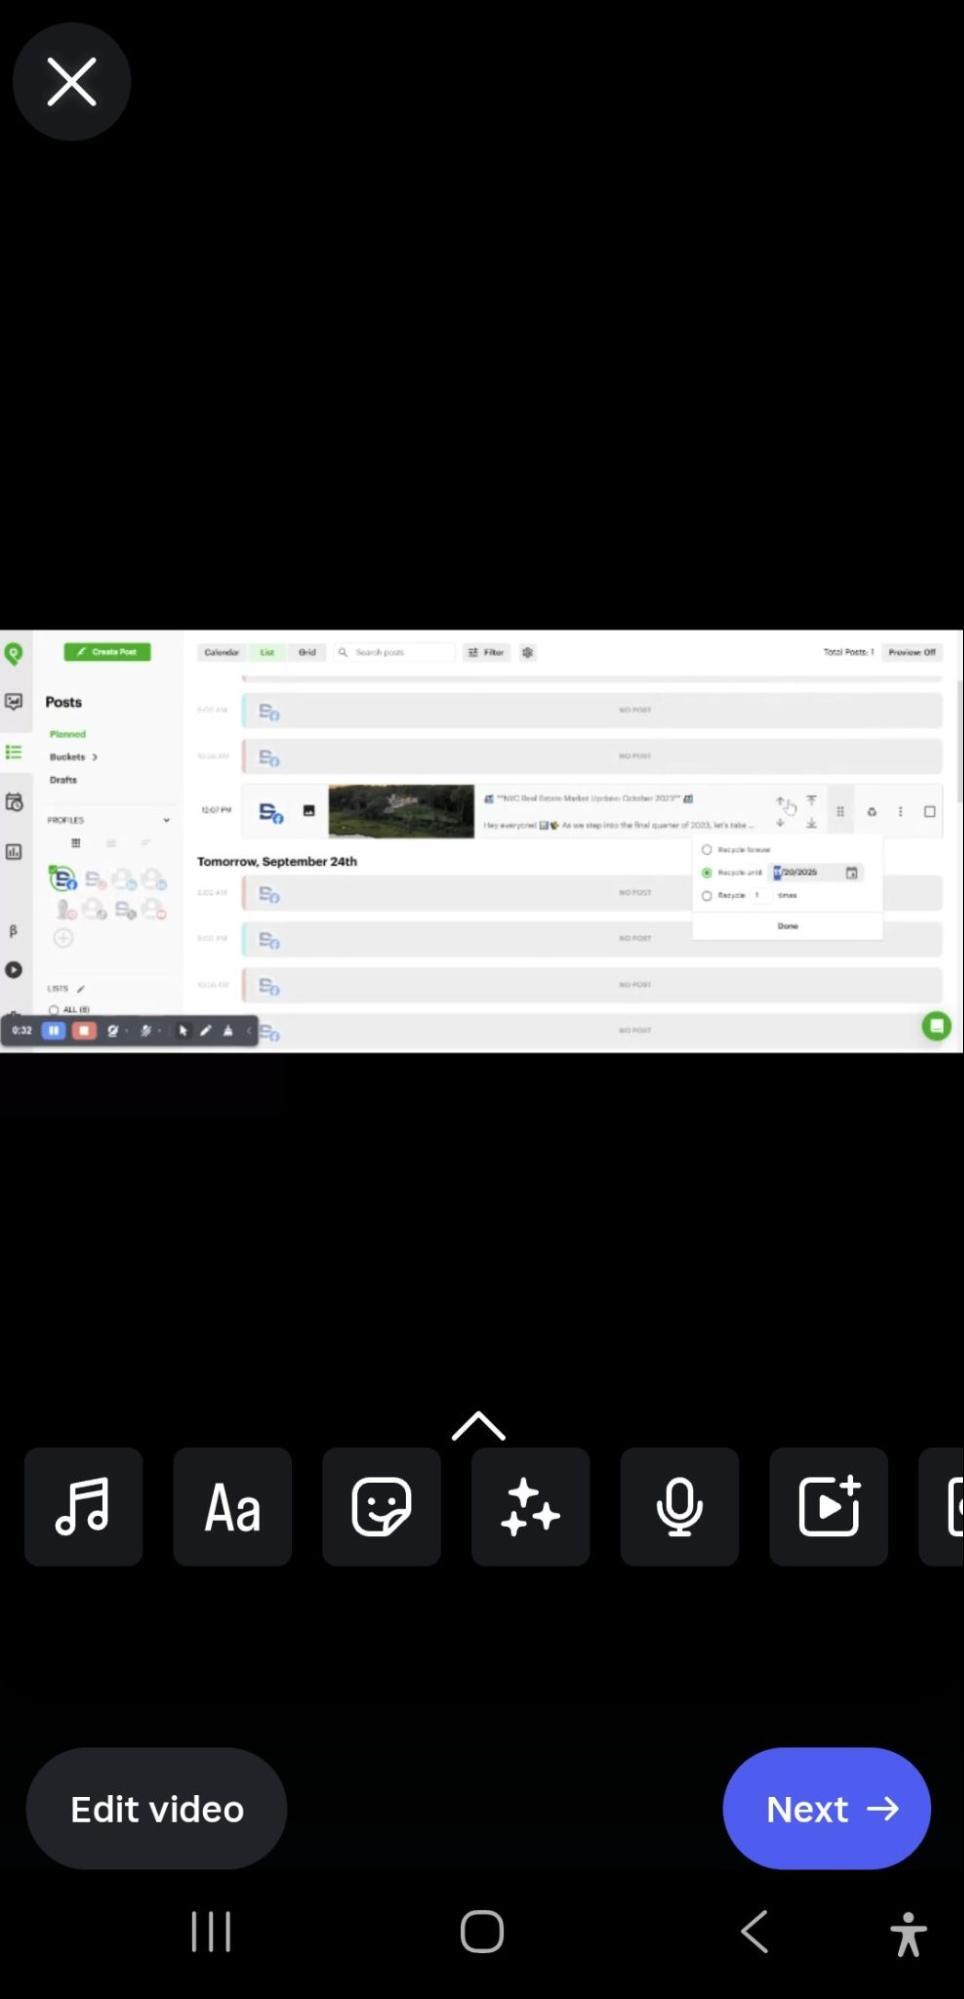
- Add your video, caption, cover, tags, etc.
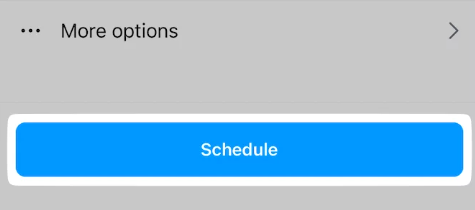
- Before you publish, open the scheduling setting (Instagram places this under “More options” or “Advanced settings,” depending on the device).
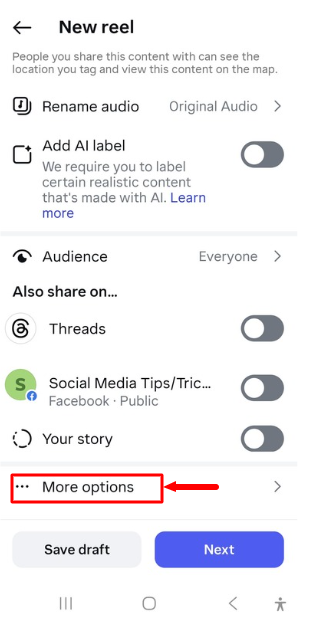
- Turn on the “Schedule this Reel” toggle for your Reel, pick your date/time, then tap Done.
- Click on the back button. Tap Schedule.
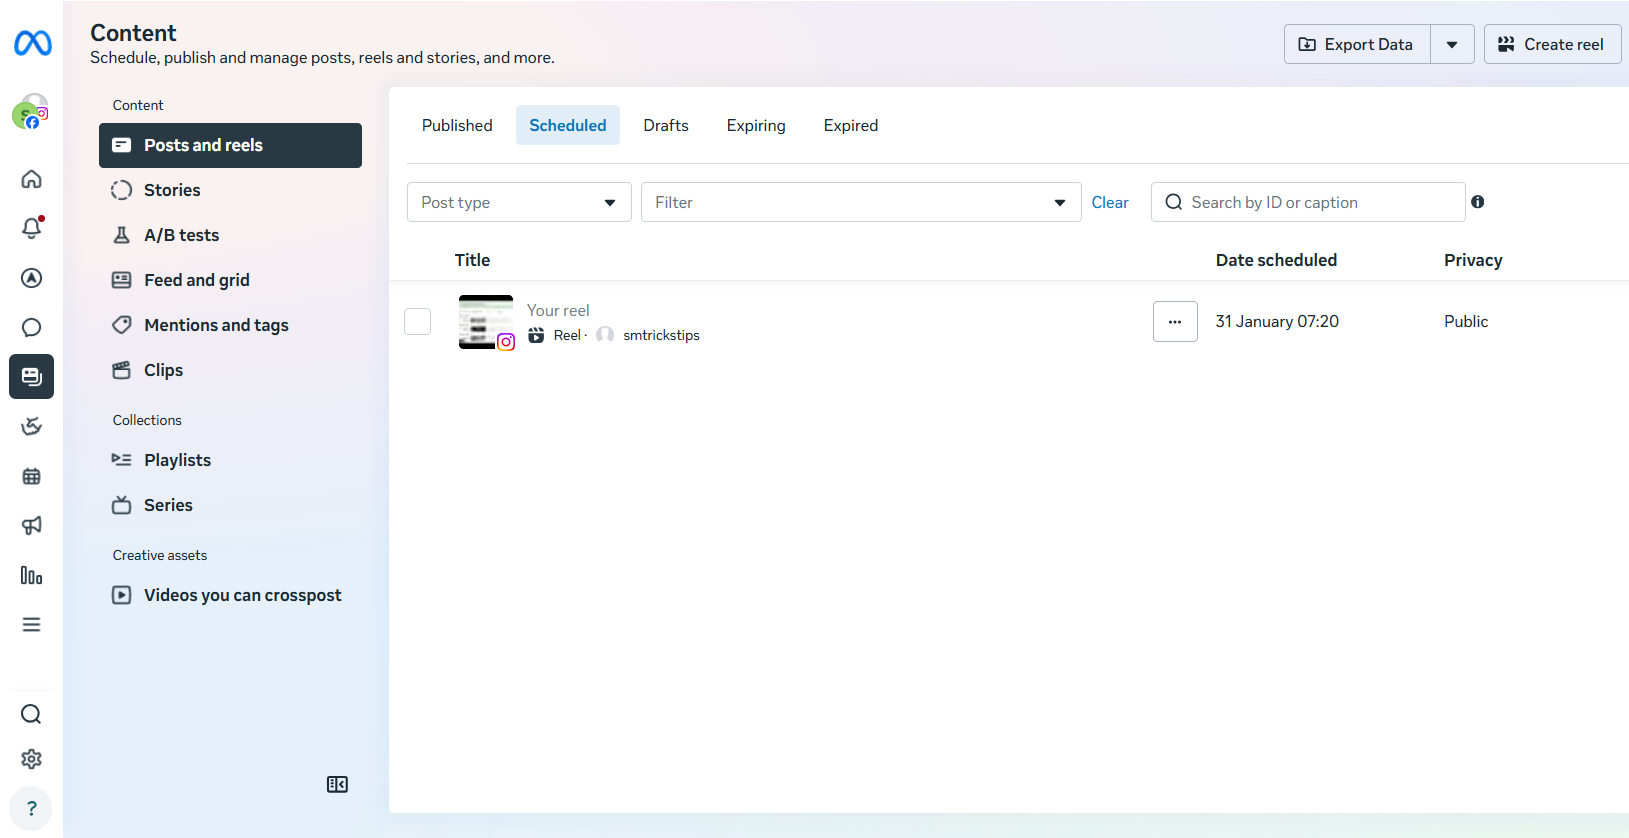
Managing scheduled Reels on Instagram
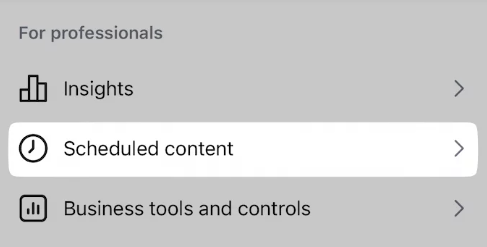
Once you’ve scheduled a Reel, Instagram gives you a “Scheduled content” area where you can review what’s queued and make changes.
To find your scheduled Reels:
- Go to your Instagram profile.
- Tap the menu (3 lines) in the top-right.
- Tap “Scheduled content” under the “For professionals” section.
From there, tap the options (3 dots) next to the scheduled Reel to manage it.
What you can do in Scheduled content:
- Edit: adjust details (when Instagram allows edits) or change the scheduled time.
- Delete: remove it from the schedule completely.
- Share/save: if you need the Reel file elsewhere, you can work from the scheduled draft (exact options vary by device/version).
Quick tip: If you’re scheduling a bunch at once, always run a check after to confirm everything was saved correctly (caption, cover, time).
It takes 30 seconds… and it prevents the kind of mistakes you only notice AFTER it posts.
On the surface, you might feel that you won’t need any other tool beyond Instagram’s native scheduler, but here are a few reasons why it might fall short:
- It’s still very “one account, one device, one person”. So, it’s not ideal for teams, freelancers, agencies, or multi-account workflows.
- You’re locked into Instagram’s scheduling window and daily limits.
- There’s no single planning view for rotating formats, batching across multiple accounts, or keeping your entire month organized in one place.
If you’re just starting and would like to schedule a few Reels per week, the native scheduler is PERFECT.
But, if you want a “repeatable Reel machine,” I recommend the next 2 methods.
How to schedule Reels using Meta Business Suite
Meta Business Suite is Meta’s free dashboard for scheduling social media content across Facebook and Instagram.
It’s a great option if you want to schedule your Reels from your desktop.
The downside (so you don’t get annoyed 3 minutes in): Meta Business Suite is a bit… complicated.
- The interface can feel overwhelming if you’re new to scheduling
- You’ll do more clicking around compared to scheduling inside Instagram
- It’s still not built for multi-platform planning (like Instagram + TikTok + YouTube Shorts in one calendar)
If you only want to schedule content for FB and IG, here’s the quick step-by-step:
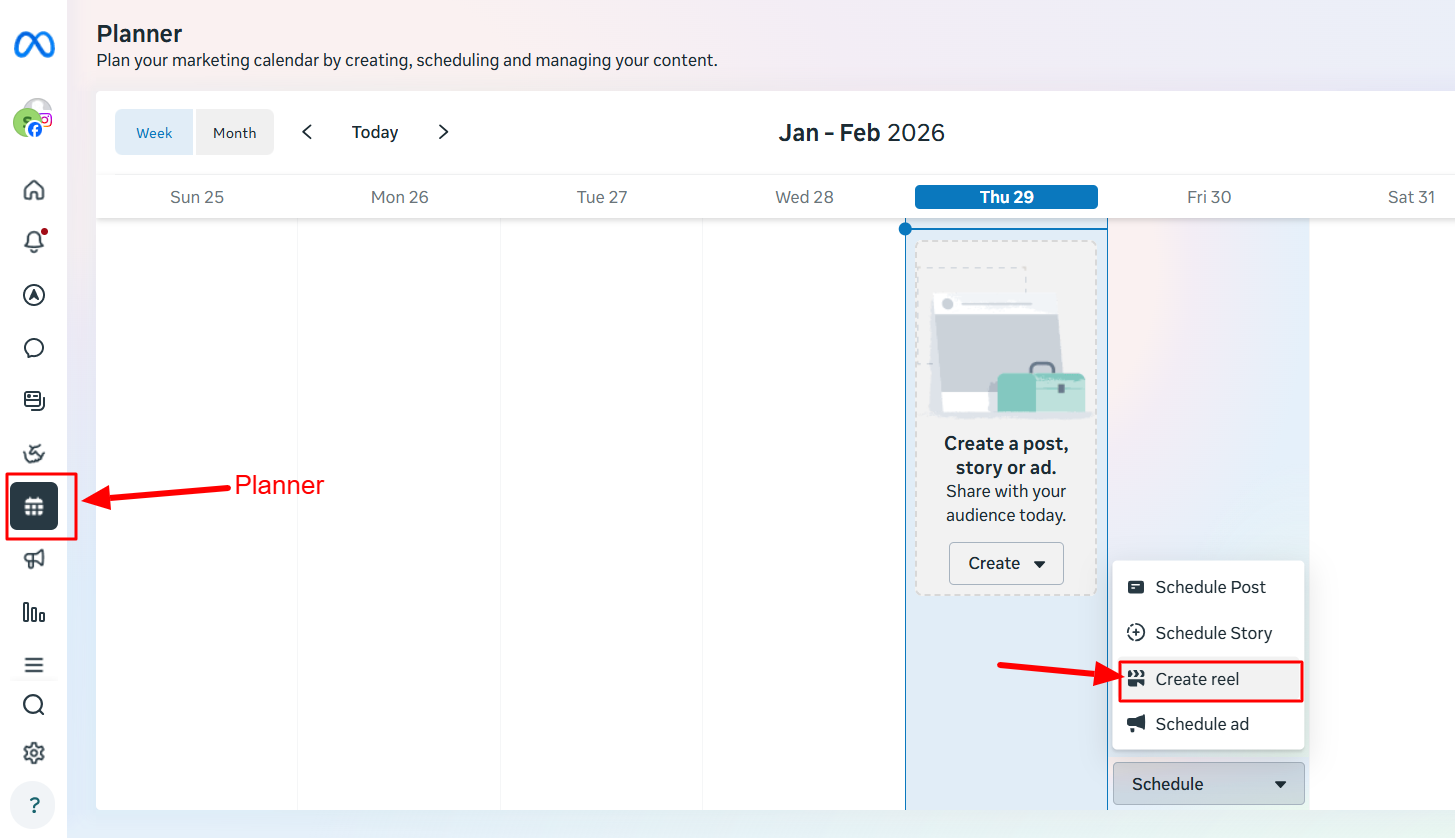
- Open Meta Business Suite and click on the “Create Reel” button on your profile.
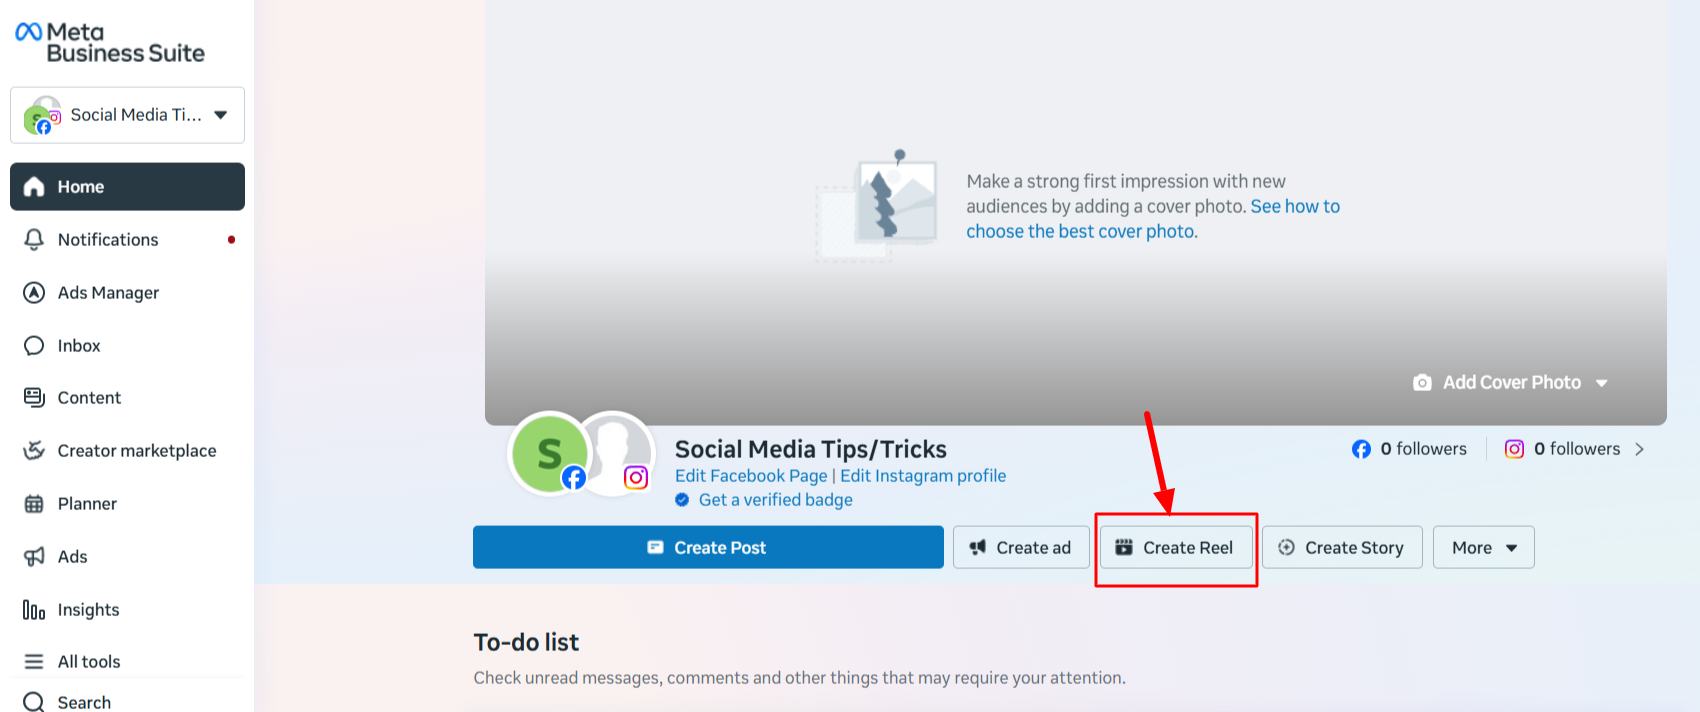
- You can also select “Planner” from the left-hand sidebar, pick the day of your choice, and select “Create Reel” from the “Schedule” dropdown.
- Select the account you’d like to post to.
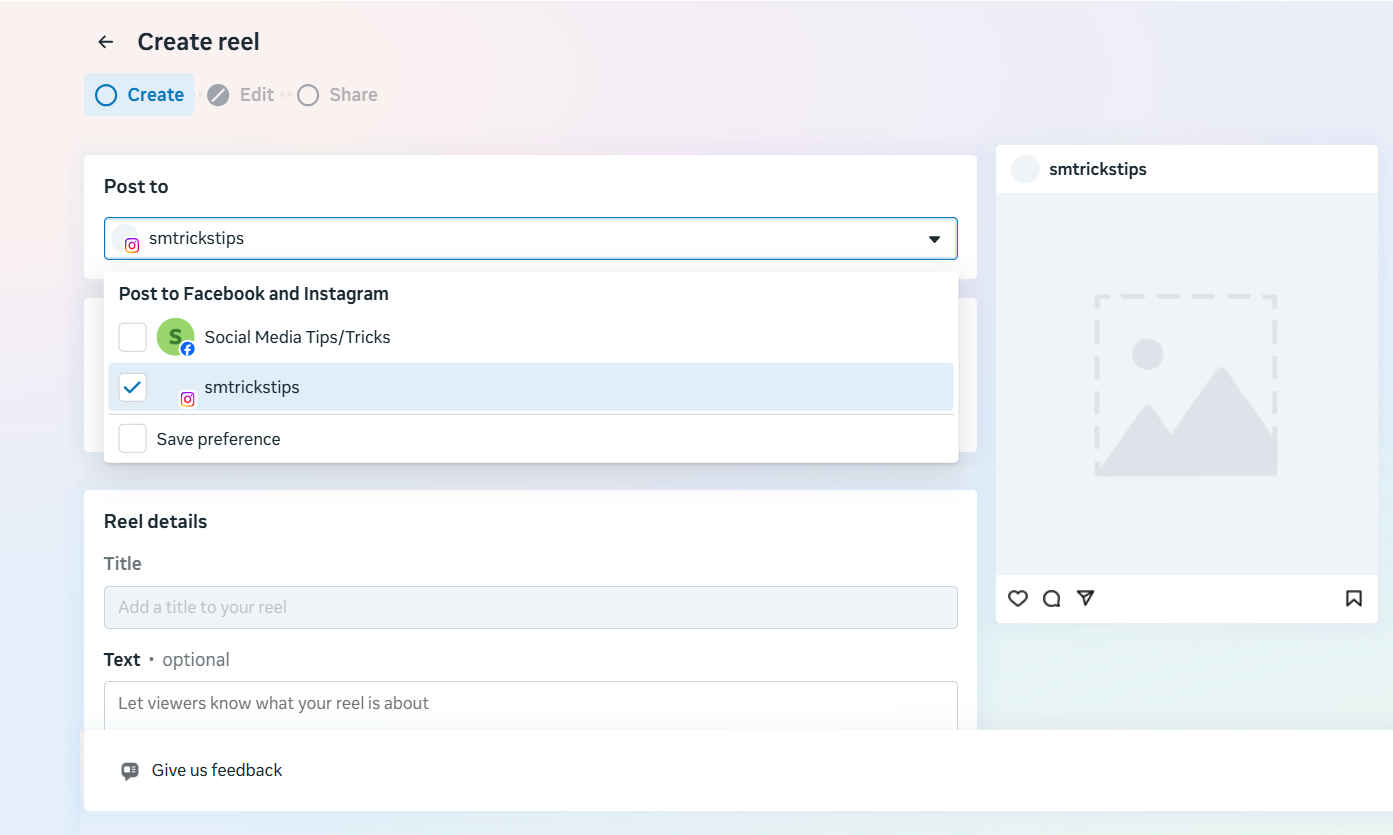
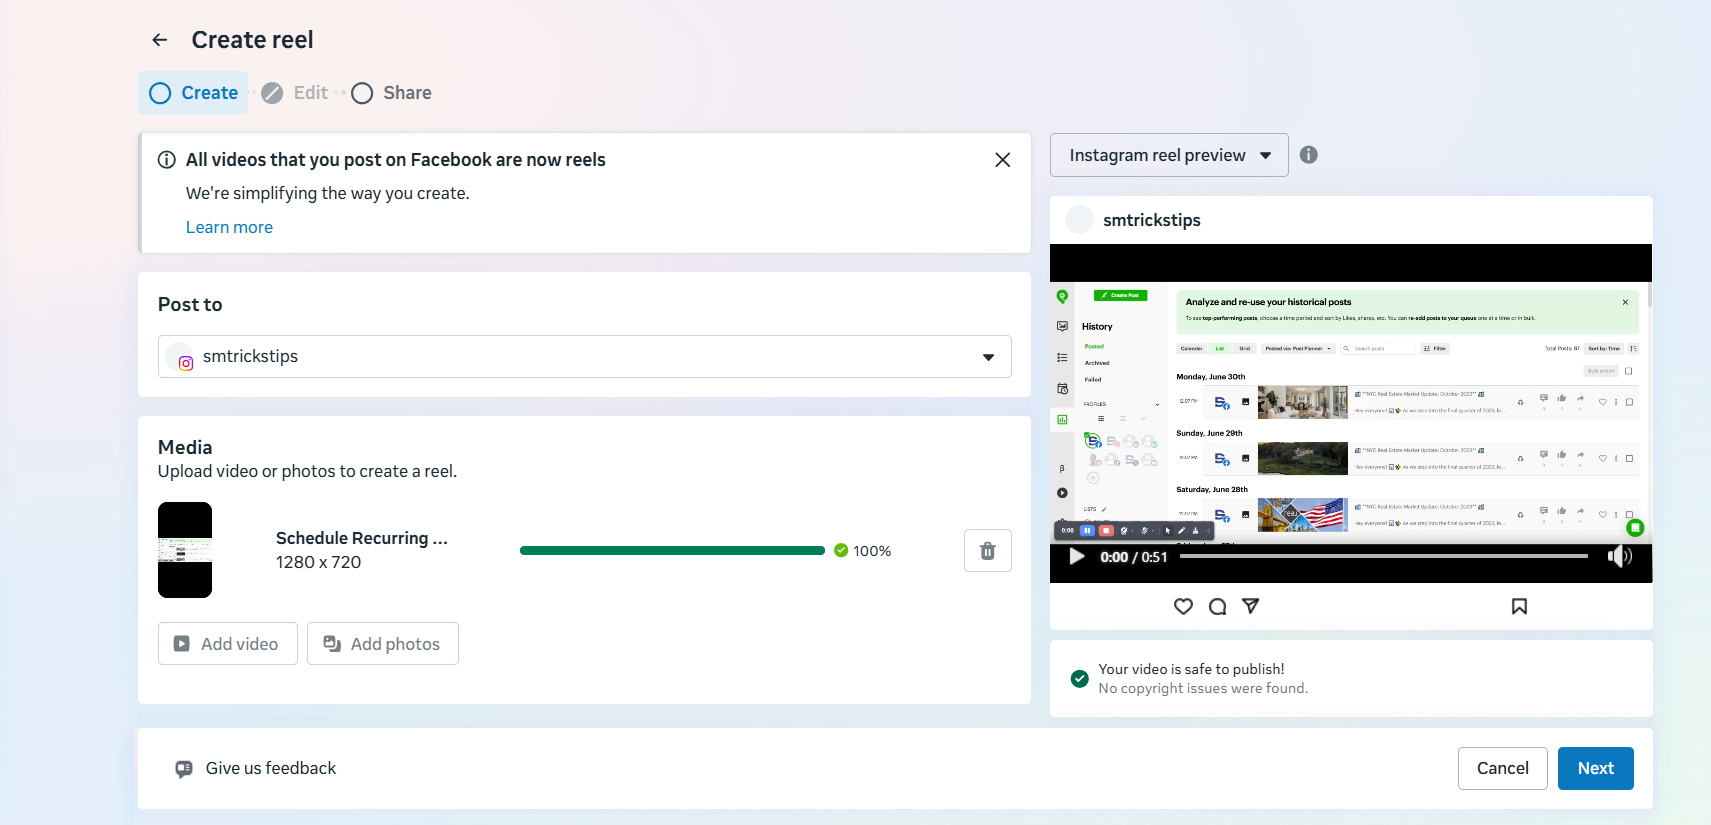
- Click on the “Add video” option under the “Media” tab to upload your Reel. Fill out the rest of the details (caption and thumbnail) and click “Next”.
- Choose “Schedule” under Scheduling options, pick your date/time, and click “Schedule” to confirm. Meta Business Suite only offers a scheduling window of 20 minutes to 29 days ahead, so ensure your scheduled post falls within that range.
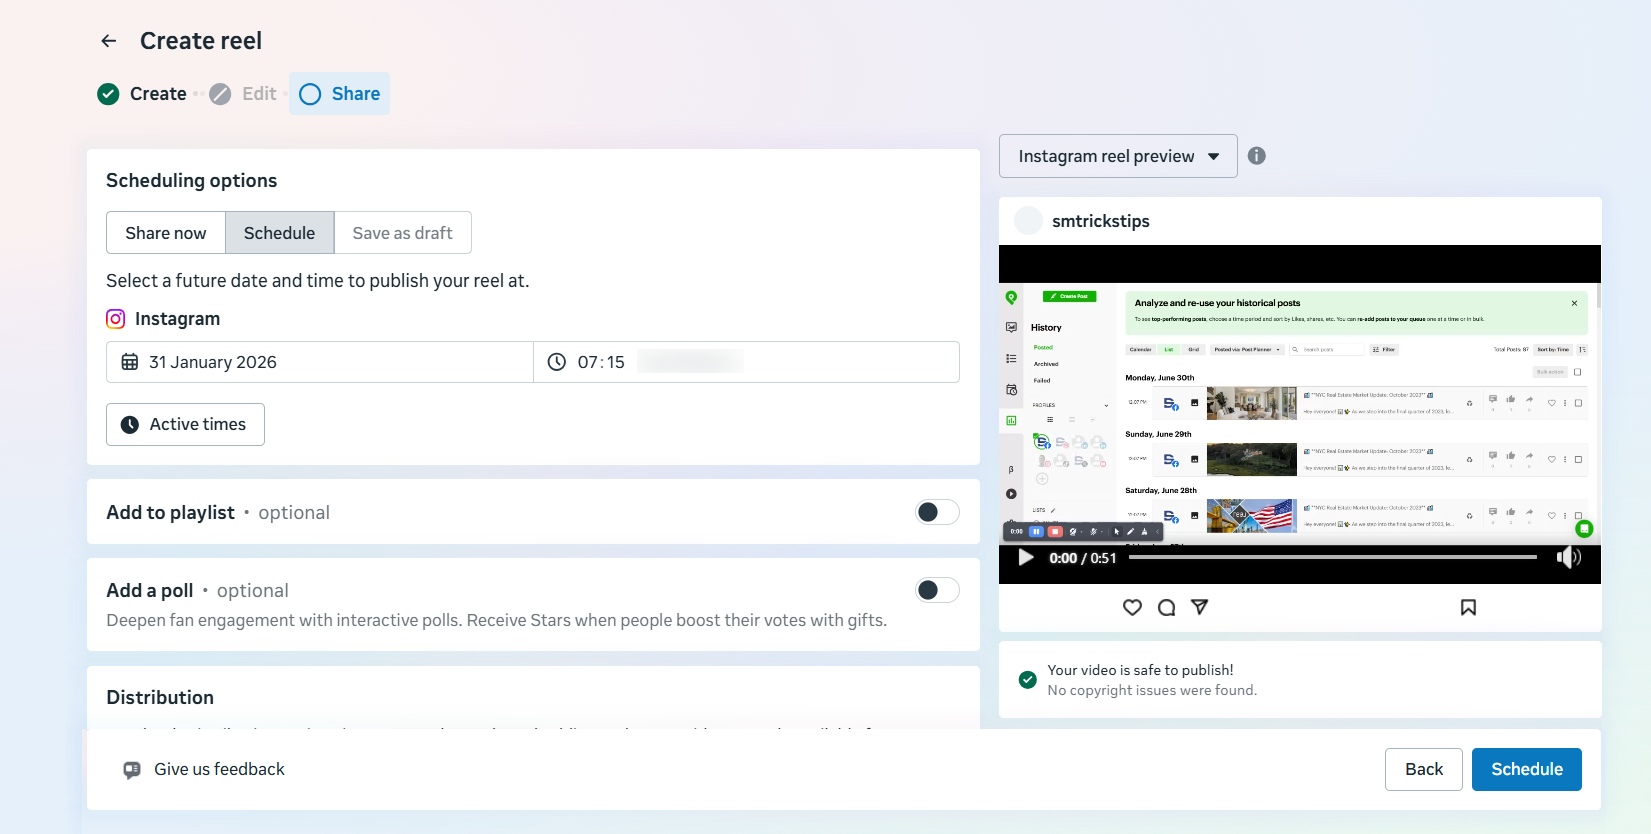
You can also check out the “Active times” button to see when your audience is most active and schedule your Reels at those times.
That’s it. Once it’s scheduled, it’ll publish automatically at the time you picked.
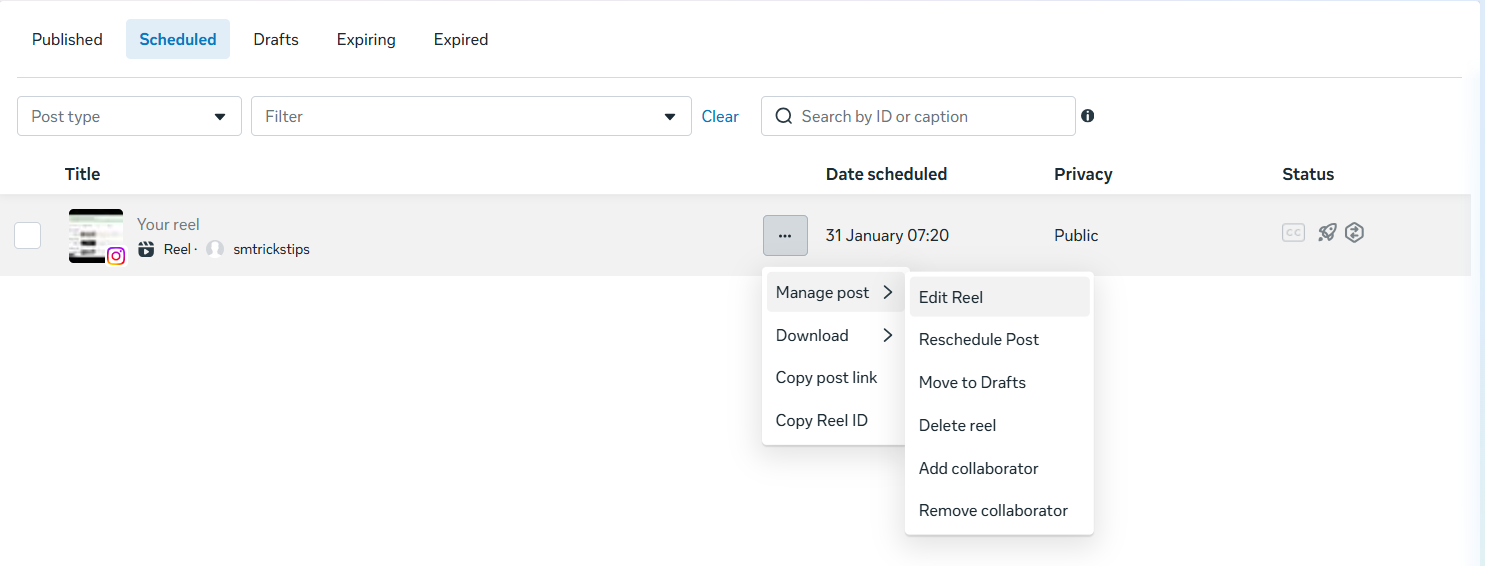
Managing scheduled Reels on Meta Business Suite
This is where Meta Business Suite is actually pretty nice. You can quickly find everything you’ve scheduled and make changes from one dashboard.
To find your scheduled Reels:
- Log in to Meta Business Suite.
- Click on “Content” in the left-hand sidebar.
- Go to “Posts and Reels”.
- Click the Scheduled tab to see everything queued up.
From there, you can manage your scheduled Reel by clicking the three dots next to it. Here are the actions you can take:
- Edit Reel (when available)
- Reschedule to a new date/time
- Move to drafts
- Add/remove collaborators
- Delete it if you don’t want it to be published anymore.
Pro tip: If you’re scheduling a batch, keep a simple naming system in your captions while you’re drafting (example: “Reel 7 – hook about X”). Then, when you’re scanning the Scheduled list, you can instantly spot the one you need to move or replace.
How to schedule Reels using Post Planner
Post Planner is built for people who want scheduling to ACTUALLY feel like a system.
Instead of scheduling one Reel at a time, it lets you plan, queue, and reuse content across accounts from one dashboard.
So, if Reels are part of your growth strategy (not just something you post when you remember), this is where scheduling actually starts saving you hours.
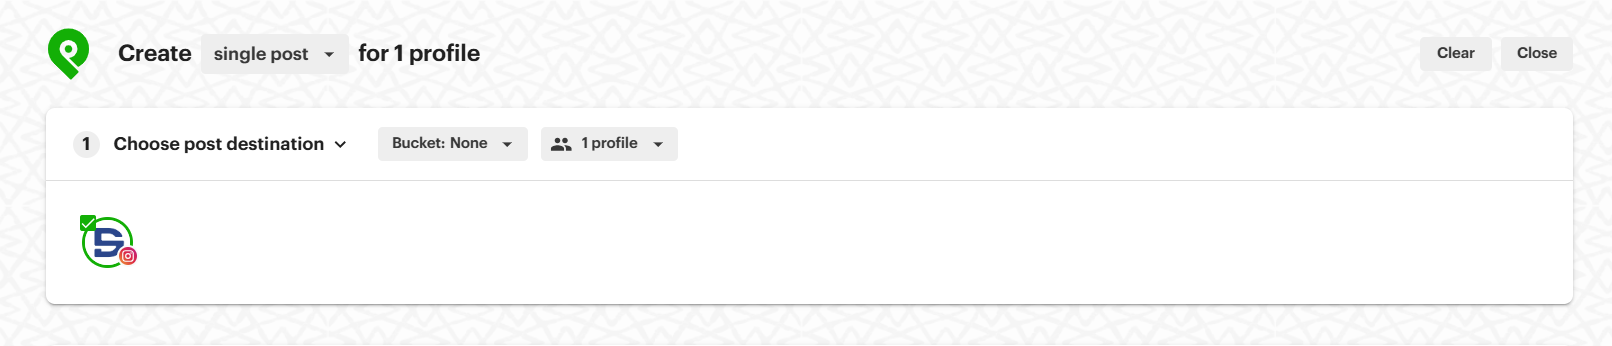
Here’s how you can schedule Reels using Post Planner:
- Log in to Post Planner and connect your Instagram account (Business or Creator).
- Open the Post Composer.
- Upload your Reel video (or pull it from your media library).
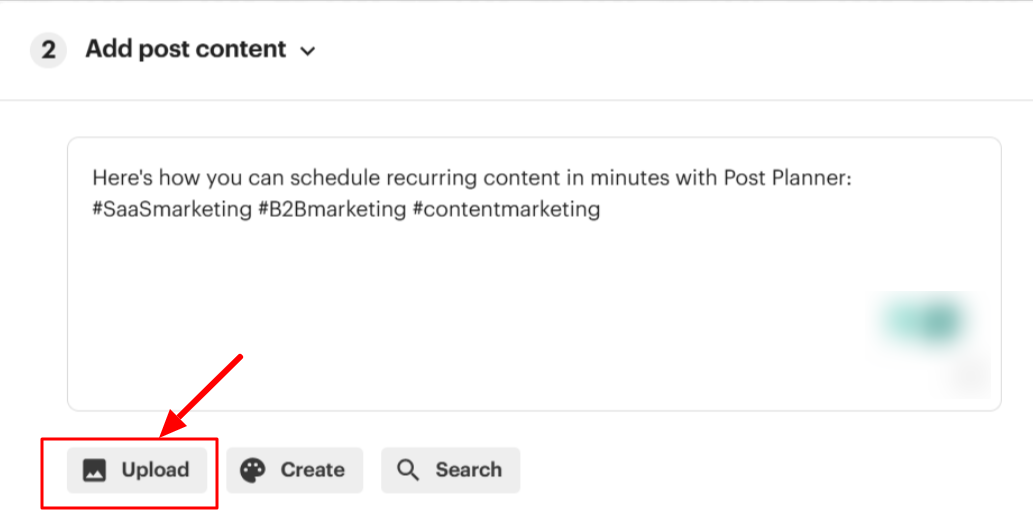
- Write your caption, choose your thumbnail, and hashtags.
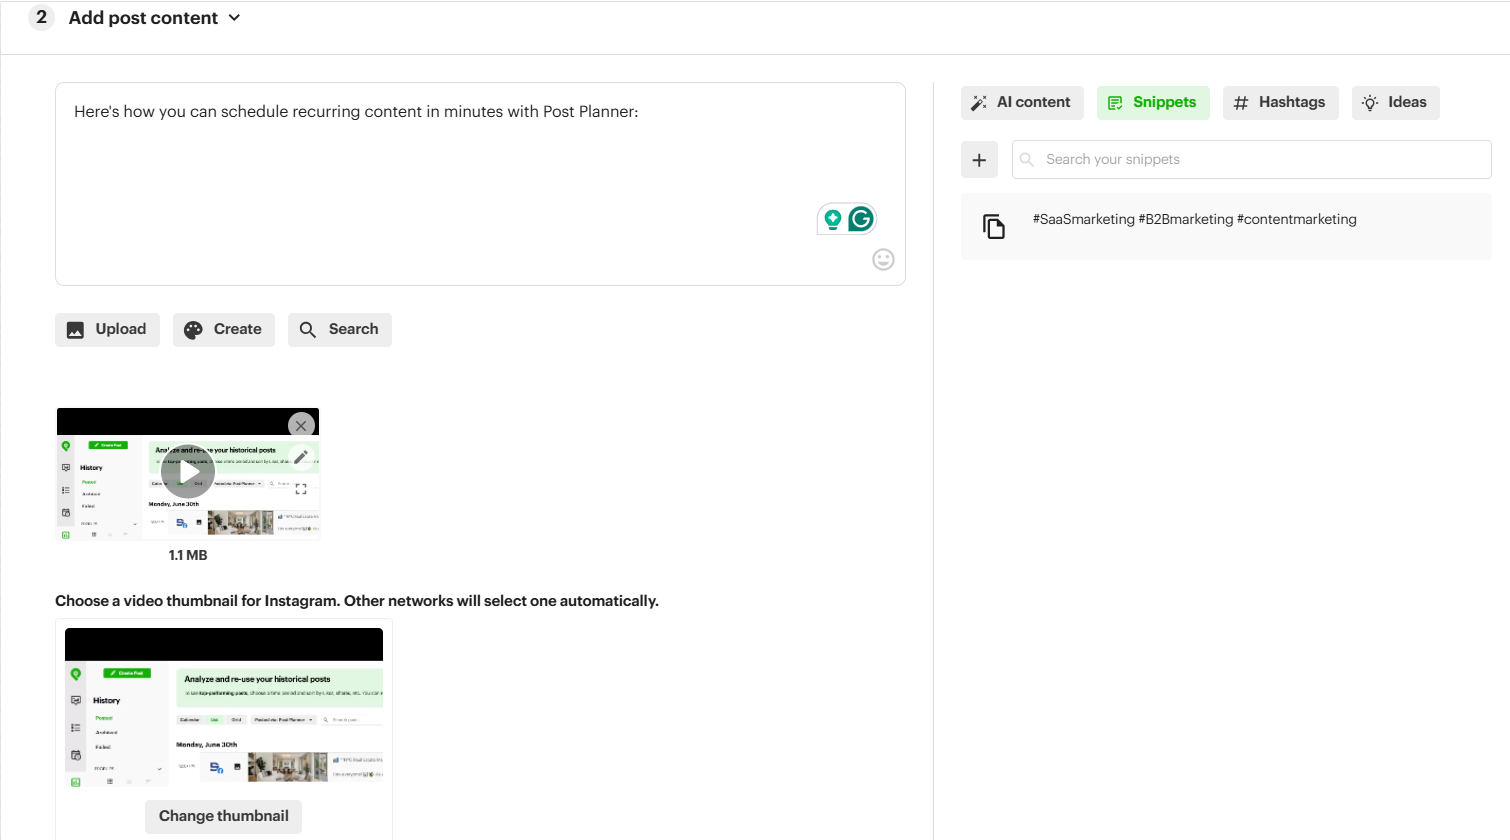
- Select Instagram as the destination and choose Reel as the post type. You can even add a first comment.
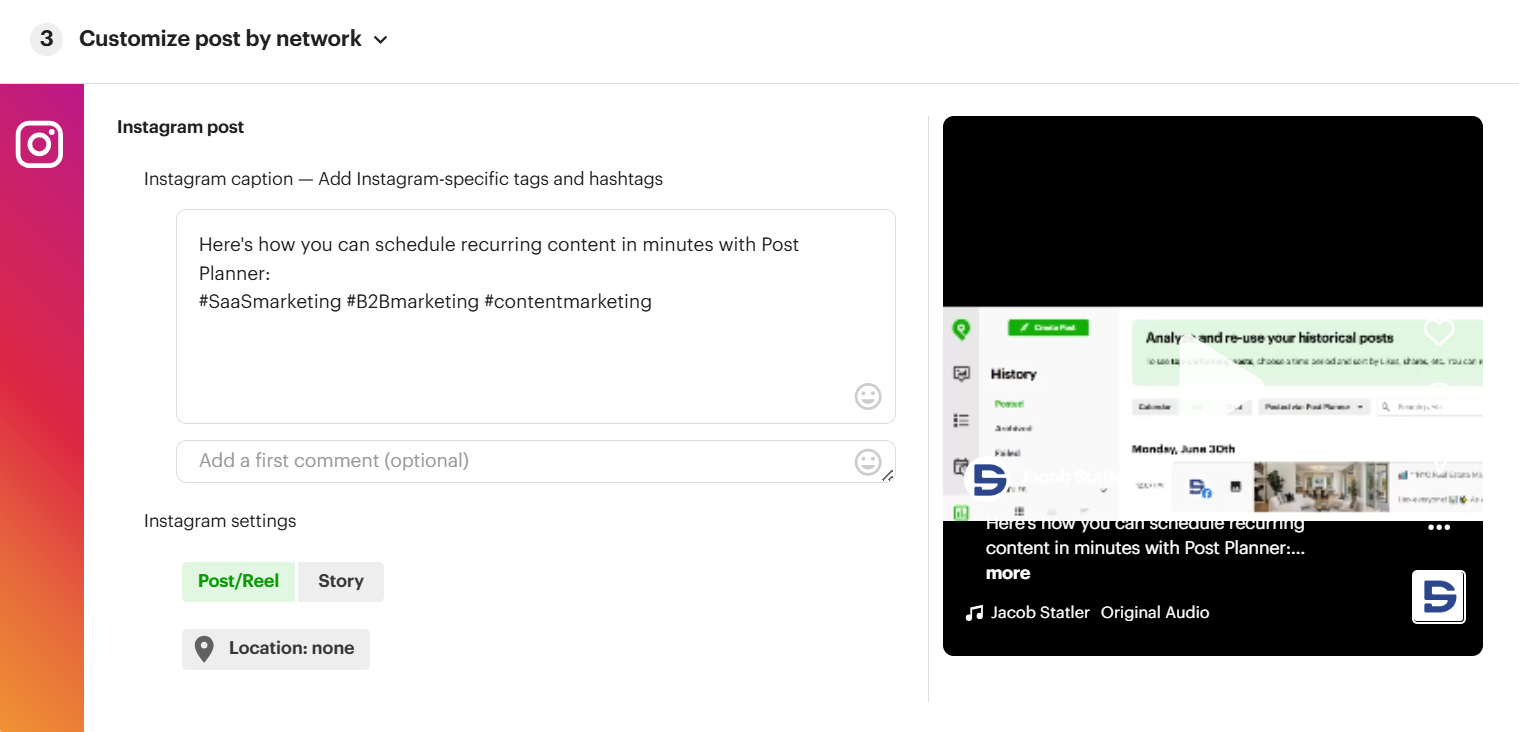
- In the “Create Post” dialog box, click on the “Schedule Post” option.

- Pick a date and time and tap “Schedule”. If this is an evergreen Reel for you, you can check the “Repeat every” box and set the frequency and end date for your recurring posts.

- You can view all your scheduled posts in Posts > Planned.
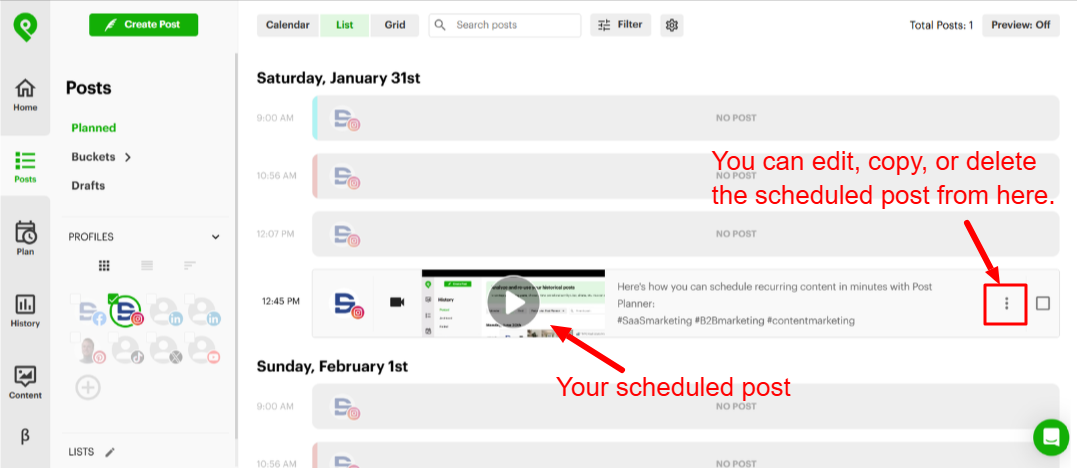
That’s it. The Reel will auto-publish at the scheduled time. No reminders, no manual posting.
Where this starts to feel very different from native Instagram or Meta Business Suite is what happens next.
You can:
- Schedule Reels weeks (or months) ahead in one sitting.
- Reorder posts by dragging them around.
- Reuse high-performing Reels instead of starting from scratch every time.
- Manage multiple accounts without switching logins.
In other words, you’re separating creative work from logistics, which is how people actually stay consistent.
Why use Post Planner to schedule your IG Reels?
If Instagram’s native scheduler is “good enough,” Post Planner is for when you want leverage.
Here’s why people switch:
- Instead of bouncing between apps, you see all your scheduled content in one place. This makes it way easier to spot gaps, overlaps, or missed days.
- You can create and schedule a full week (or month) of Reels in one session.
- Instead of picking times over and over, you drop Reels into a queue and let your set schedule do the work.
- If a Reel performed well, you can re-queue it later instead of reinventing content every week.
- It’s perfect if you’re managing multiple brands, clients, or pages, without juggling logins or devices.
Pro tips for scheduling Instagram Reels
You can save ~6 hours/week if you automate your social media content (and ads)!
To help you save every last minute of those 6 hours, use these scheduling tips to make your IG an unstoppable content machine.
Post when your audience is most active
Scheduling only works if your timing makes sense.
Check Instagram Insights to see when your followers are online, then schedule posts during those windows instead of guessing.
Consistency at the right time beats random posting every time.
Batch your content creation and scheduling
Create multiple Reels in one session, then schedule them all at once.
This keeps you out of the constant “create → post → repeat” cycle and makes it way easier to stay consistent when life gets busy.
Pair scheduling with content format rotation
Don’t schedule the same type of Reels back-to-back.
Rotate formats. These include tips, hooks, behind-the-scenes, talking heads, trends, and carousels repurposed into Reels.
If you’re not sure how long each type of Reel should be, here’s a recommendation from Lucas O’ Keefe:
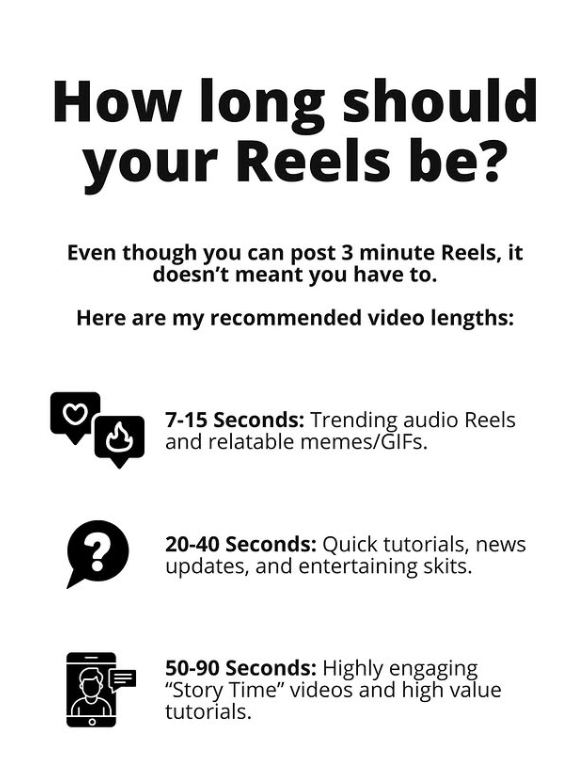
This ensures your feed stays fresh and you don’t burn out your audience (or yourself).
Schedule with trend windows in mind
Not every Reel should be scheduled weeks ahead.
If a sound, format, or trend is blowing up, leave space in your calendar to jump on it quickly.
Scheduling works best when it gives you flexibility, not rigidity.
Use scheduled Reels to test, not just publish
Treat scheduling like a testing tool. Schedule similar Reels with different hooks, captions, or CTAs and see what sticks.
Then double down on what performs instead of guessing what “should” work.
Leave room for spontaneity
Your best Reels won’t always be planned. Use scheduling to handle your baseline content, then layer in real-time posts when inspiration or opportunity hits. That balance is what keeps your account feeling human.
Bottom line: Scheduling should support creativity. When your social media management tool handles the boring parts, you get to focus on making Reels people actually want to watch.
Ready to save time with scheduling Instagram Reels?
If you’re serious about growing with Reels, consistency is non-negotiable. But posting manually every day is one of the fastest ways to burn out or fall off schedule.
That’s exactly why Post Planner offers a free account.
With Post Planner’s free plan, you can start batching and scheduling your Instagram Reels right away, so your content keeps going out even when you’re busy or low on motivation. You’ll spend less time worrying about posting and more time improving your ideas, hooks, and formats.
If you want a simple way to stay consistent without committing to a paid tool upfront, sign up for a FREE Post Planner account and start scheduling your Instagram Reels today.


No Comments