

Tired of posting on Instagram and hearing crickets?
Millions of creators compete for attention from the same doom-scrollers.
If your photos aren’t getting Likes, saves, or comments… there’s a reason.
A “nice” photo isn’t enough to stop someone mid-scroll. You need content that sparks curiosity, emotion, or recognition.
In other words, content that makes someone pause.
The good news? You don’t need to be a professional photographer or influencer to make Instagram posts that stand out. You just need to understand 2 things:
- What makes people stop scrolling
- What your audience wants to see
Once you’ve nailed that, creating engaging Instagram content becomes easier (and more fun). In this guide, you’ll learn 36 ways to take better photos, create eye-catching visuals, and improve your Instagram performance with every post.
Feel free to skip ahead:
- 10 Tips to take attractive Instagram photos (on your phone)!
- 12 Post-production Instagram photo tips & tricks
- 5 Tips on using AI to enhance your Instagram posts
- 9 KILLER Instagram photo Ideas
- 4 Things that happen when an Instagram feed looks good
- Frequently asked questions about how to take attractive Instagram photos
- What's the best way to post on Instagram?
10 Tips on how to take attractive Instagram photos (on your phone!)
Ok, let's do this!
Follow the 10 tips below to learn how to take the PERFECT photo for Instagram.
They'll take the engagement rate on your Instagram posts to another level.
1. Adjust your phone’s camera settings
Before you tap the shutter, your phone’s settings can make or break the shot.
Explore features like portrait mode, pano, HDR, and stability mode. These tools are built to help your photos look more intentional. But 3 settings in particular really matter:
- Manual focus: Instead of letting your camera decide what to focus on, tap your screen to highlight the subject. On iPhones, you’ll see a yellow box — that’s your focal point.
- Exposure: Too bright (overexposed) or dark (underexposed) photos lose detail. After tapping your subject to focus, swipe up or down to adjust brightness manually.

- Flash: Avoid it when you can. Flash usually flattens photos and adds harsh shadows (giving “disposable camera from the 90s” vibes). Stick with natural light or soft indoor lighting for a cleaner look.
Pro tip: If you have to choose between too dark or too bright, go darker. Underexposed photos are easier to fix in editing than blown-out shots.
2. Start by eyeing up good photos
What if I told you that the key to finding moments to capture with your camera requires zero technical equipment?
The only thing you need to find the perfect shots is your eyes. 👀
Learning the skill of "eyeing up" allows you to transcend the limitations of your camera to take photos that resonate on a deeper level.
Although getting good at this takes practice, here’s how to sharpen your instincts:
- Pause before snapping. What’s the vibe or story of this moment?
- Scan for clean backgrounds — too much clutter kills a good shot.
- Find leading lines or natural frames that draw attention to your subject.
- Look for balance, contrast, or patterns in the scene.
- Shift your angle or position slightly to improve composition (I’ll discuss the rule of thirds later, which will help you do this).
In other words, you'll want to follow the rest of the tips in this guide — NATURALLY with your eyes.
Pro tip: Start a collection of photos you love. Review it often, and you’ll eventually start spotting patterns in the shots that catch your eye, which helps you develop your style faster.
3. Leverage depth-of-field
Depth-of-field is a terrific way of standing out on Instagram.
This is essentially when the main subject of your photo is focused on more than its environment.
Here's a good example from a user taking a photo of the Space Needle in Seattle, WA:
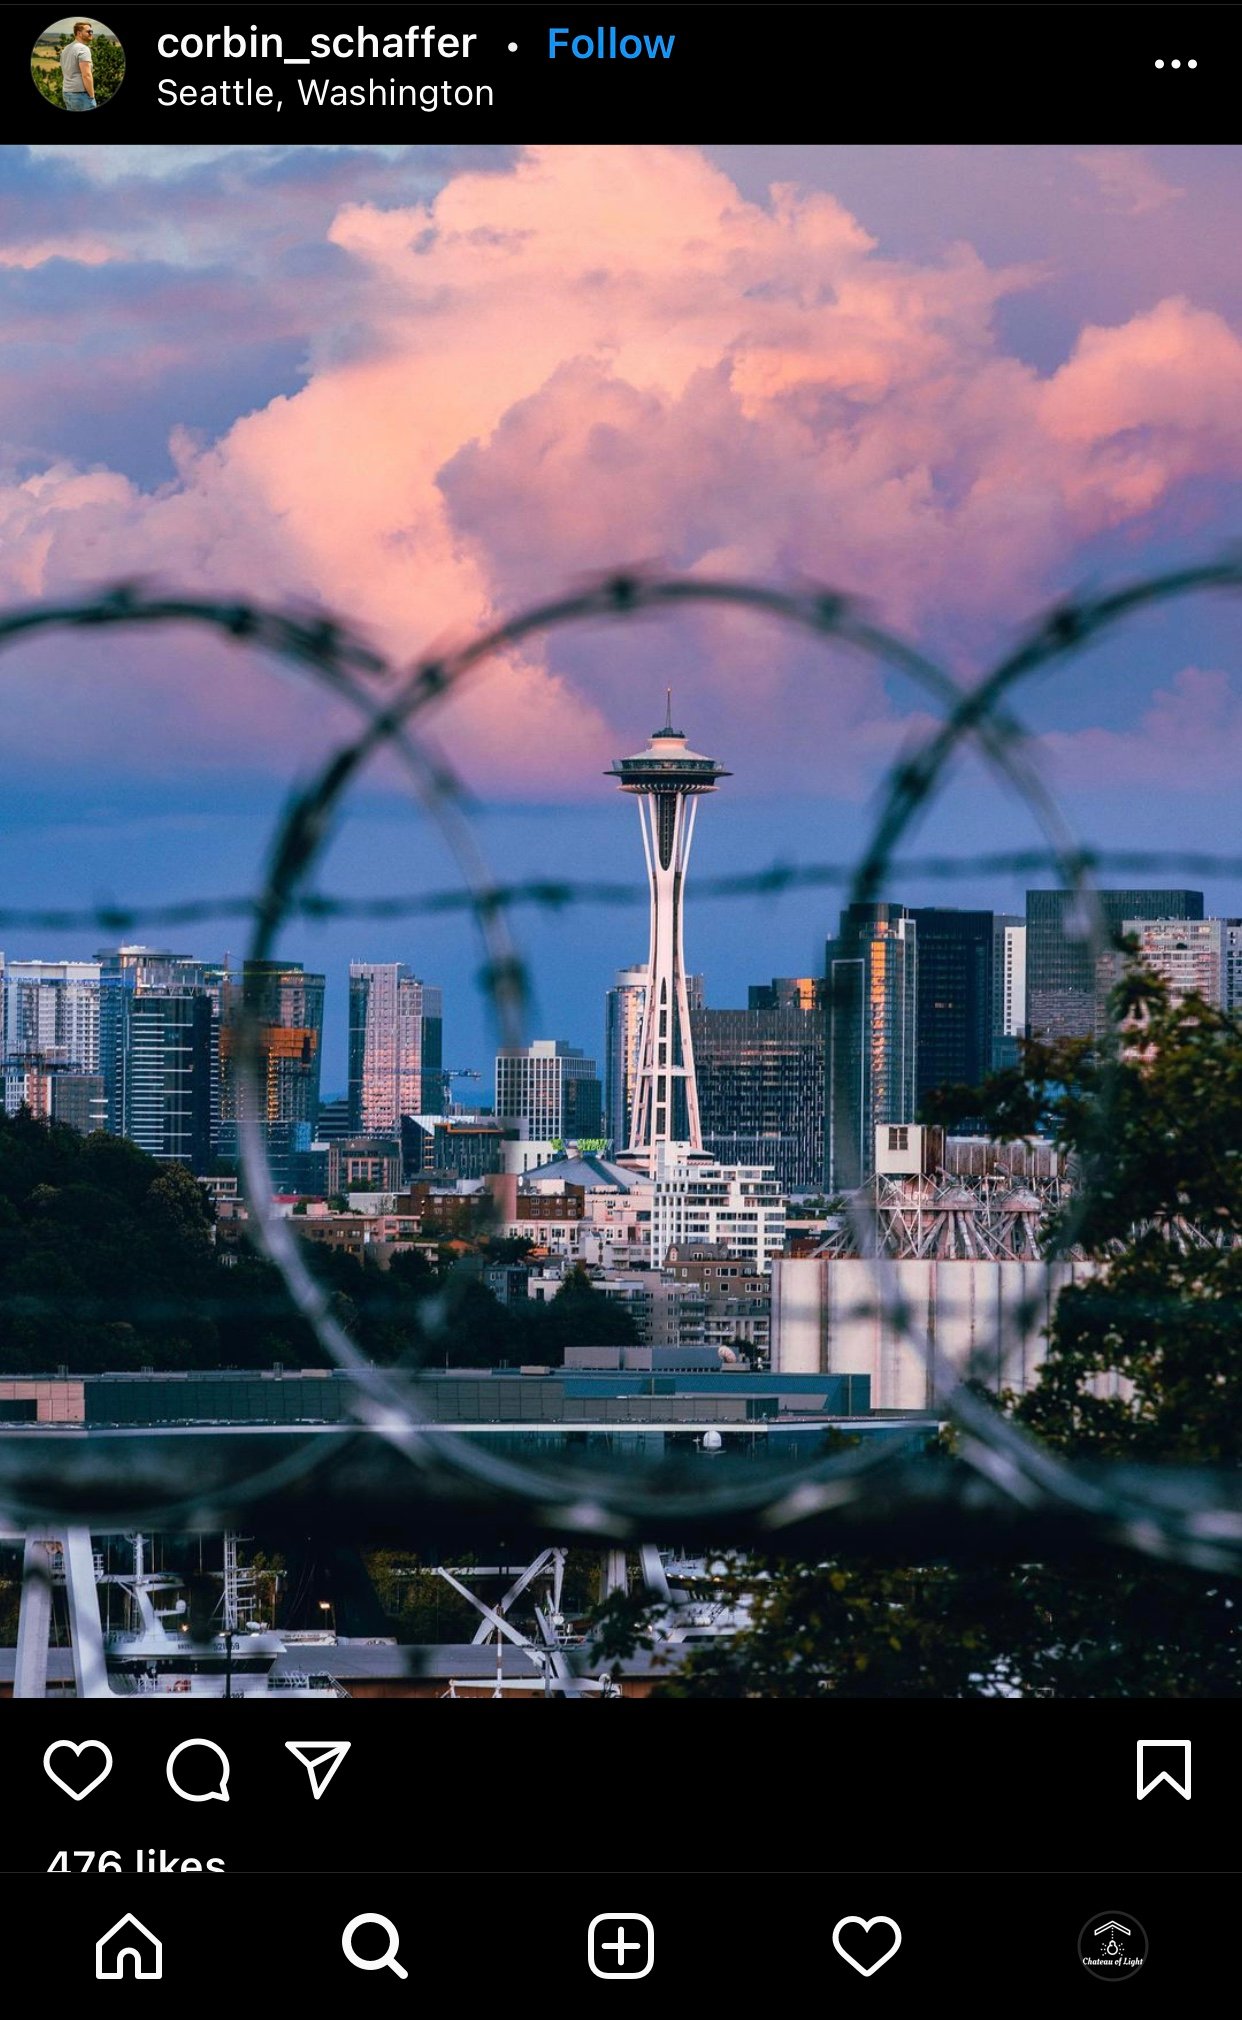 Notice how the Space Needle is far away yet still in focus?
To get a good depth-of-field, practice using your camera’s focus features.
Tap the object you would like to focus on.
Then, move the camera around so that the surrounding objects lose focus.
You've now accomplished an incredible depth of field!
4. Get your lighting right!
Proper lighting is KEY to great photography.
Your lighting source can come from the following:
- Natural light: Light from the sun/nature
- Artificial light: Lamp, selfie light, ring light
- Light patches: beams of artificial or natural light
Lighting can make or break a photo, even if you edit it perfectly.
Here's an example Instagram post with great natural lighting:
If possible, try to get natural light for your Insta pics. Natural light usually looks the best, but try not to be in direct sunlight.
Indirect natural light is the way to go.
You can do this by:
- Shooting when it's overcast
- Using a white sheet to soften the light
- Looking for areas of open shade
5. Change up your angles
Playing with angles is a powerful technique for impacting how people see your post.
Think about your subject and the combinations of ways you can view it.
 Angle your camera from the top, middle, or bottom of the frame.
You can even turn your phone upside down to create a foreground element.
Some successful content creators suggest flipping the phone upside down and taking pictures of your subject from the ground.
 This is one of the best ways to add the ground as a foreground element.
Don’t limit this tactic to just the ground, either. You can turn your phone upside down to incorporate any element at the bottom of your shot (like a desk, railing, flowers, etc).
6. Use colors that complement each other
Complementary colors increase your chances of stopping your followers’ scrolling.
 So, what are some colors that go well together?
According to Design Wizard, these complementary color combos make MAGIC:
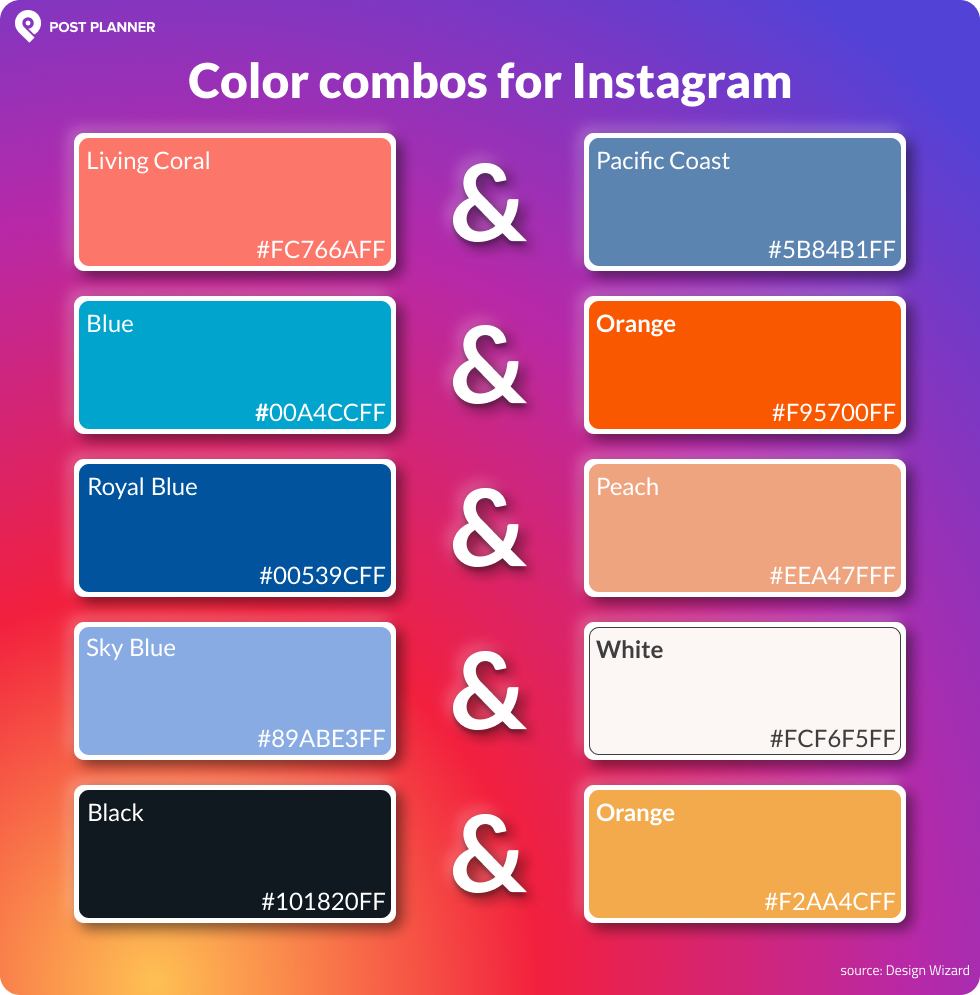
Test these combos and try to take photographs that naturally contain them.
Remember: the color shades don't have to be EXACT.
Use this list as inspiration, not a rule book.
7. Use burst mode for moving object photos
Have you ever wanted to take a picture of a fast-moving object?
Then (after trying a few times), you gave up because of all the blurry results?
There's a way around this.
The "Burst Mode" feature can help you take great still photos of moving objects.
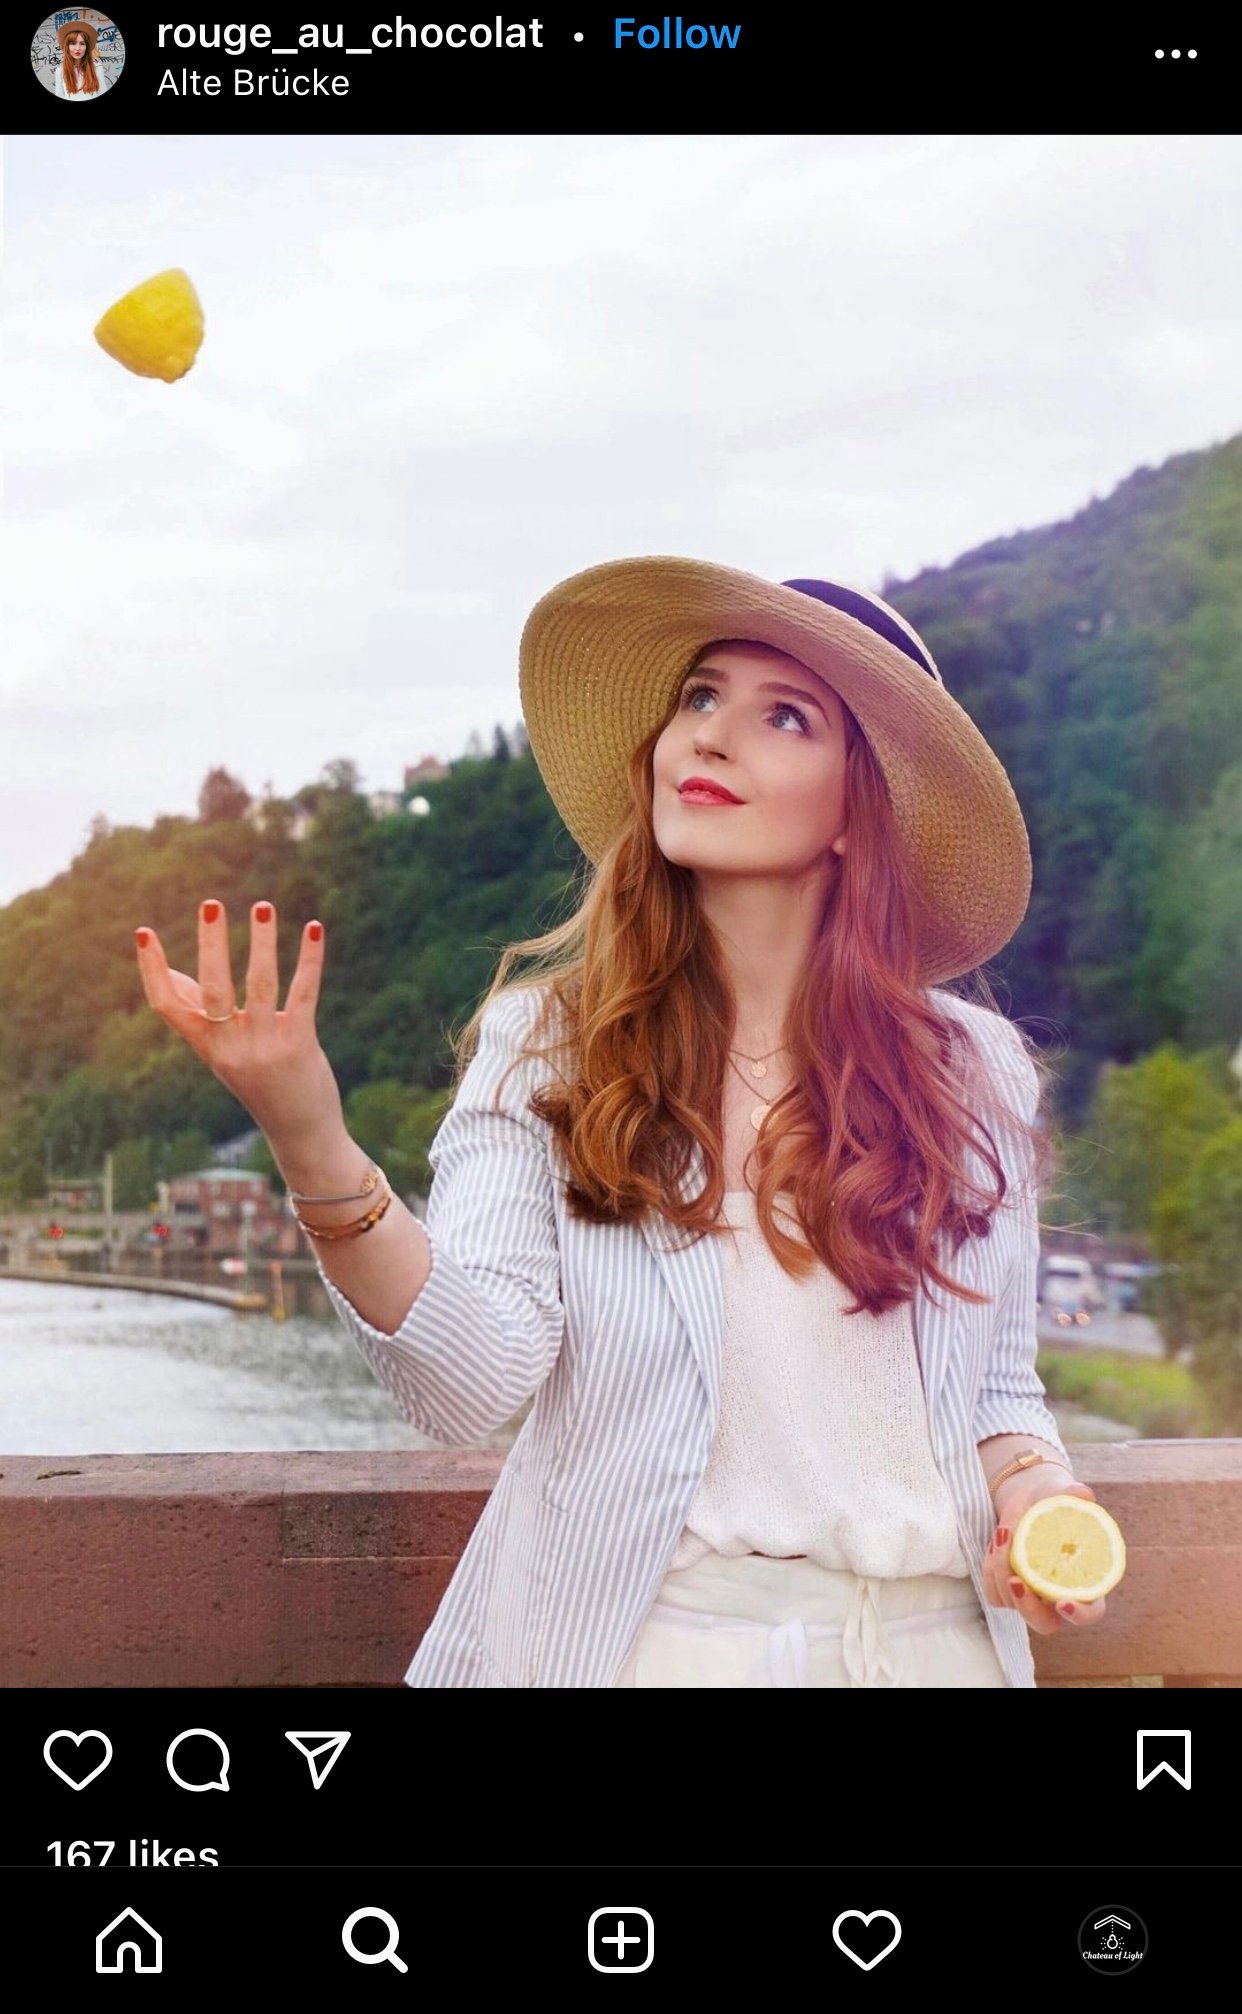
This camera setting takes about 10 photos a second, increasing your chances of capturing the perfect shot.
Activating burst mode is super easy.
Here's how to do it:
1. Open your camera app.
2. Slide the shutter button to your left.
3. For iPhones 11 and up, slide the shutter button to your left.
 Source: 9to5Mac
4. When you're done shooting your burst photos, your phone will group them in your camera roll, and you can pick the best one.
If you ever see a UFO one day, now you know what to do!
8. Make use of grids (the rule of thirds)
Your smartphone's camera likely has a grid feature you can activate.
Grids can help you center your subject precisely in the middle of the frame.
You can also follow the rule of thirds to enhance your picture composition, which says you should aim to put your subject on one of the grid lines instead of in the middle.
Check your camera settings to make sure that your grid feature is enabled:
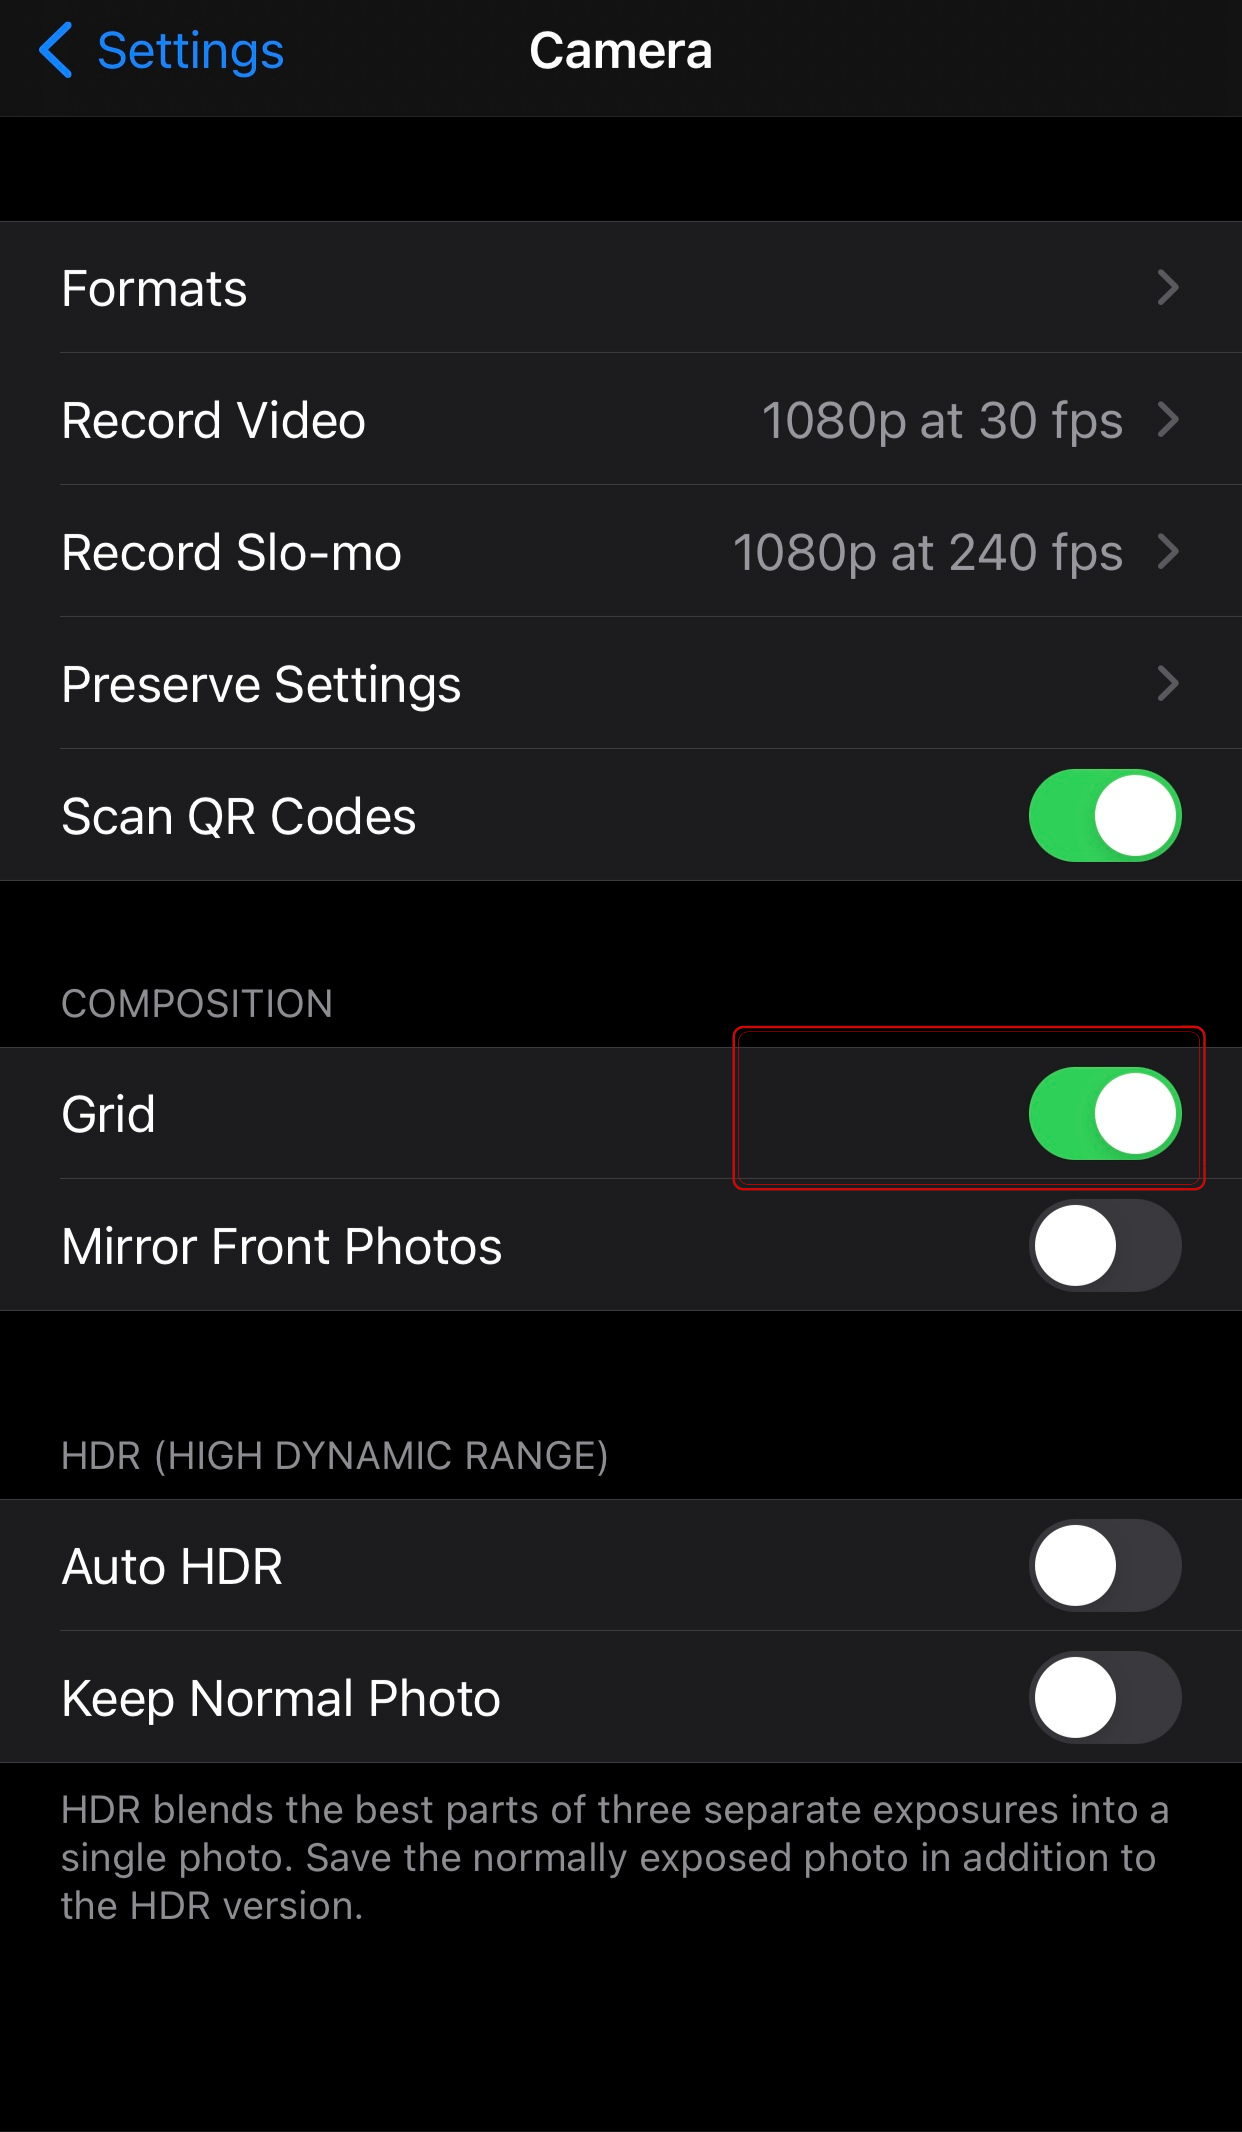
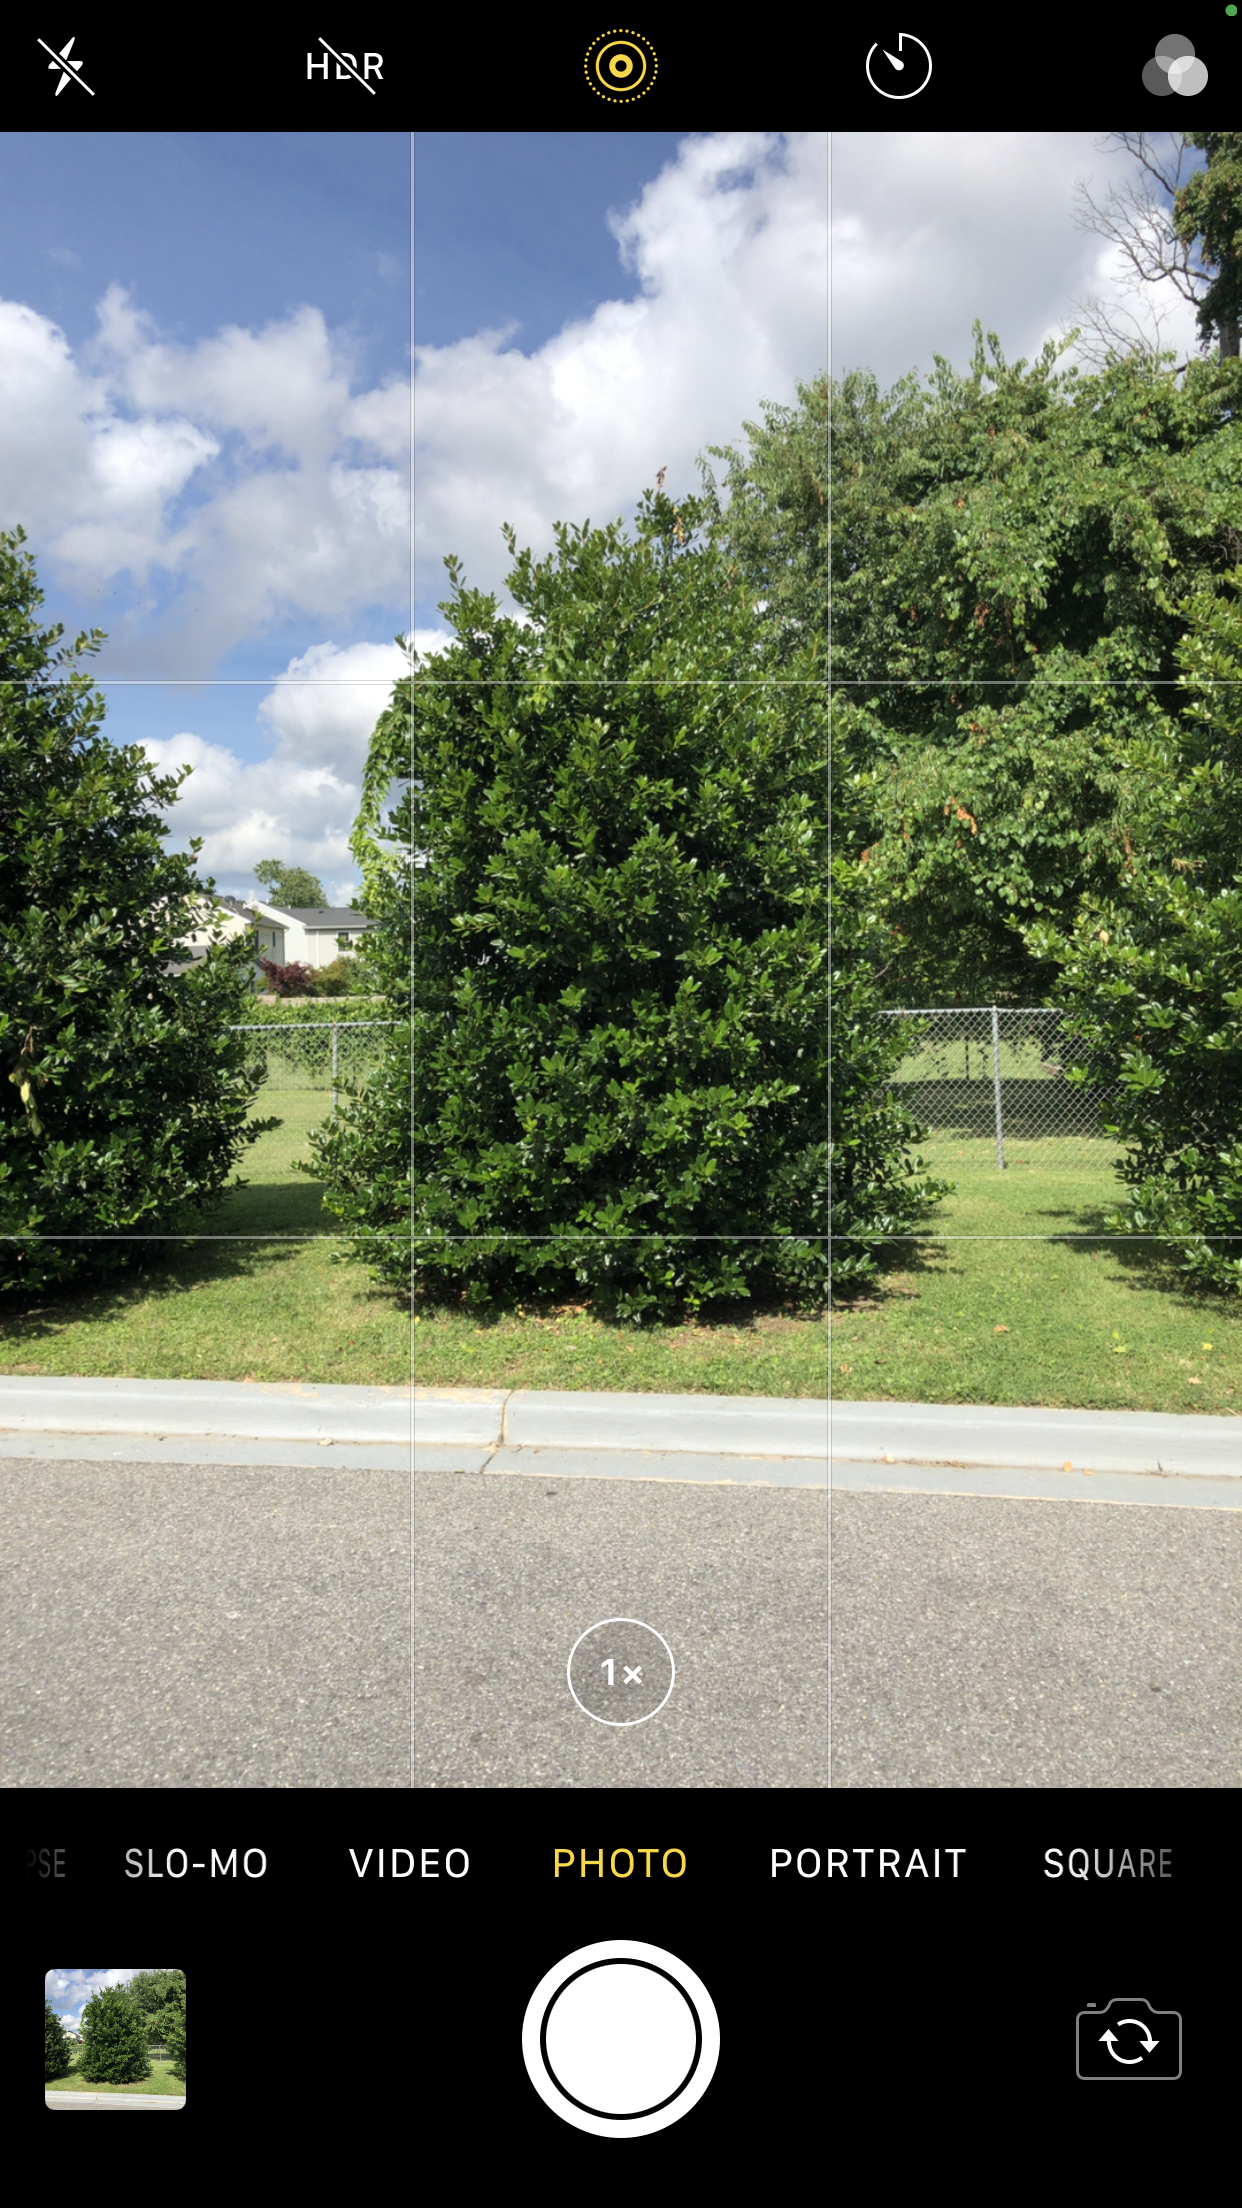 Using grids will also help you maintain consistency when cropping your pictures.
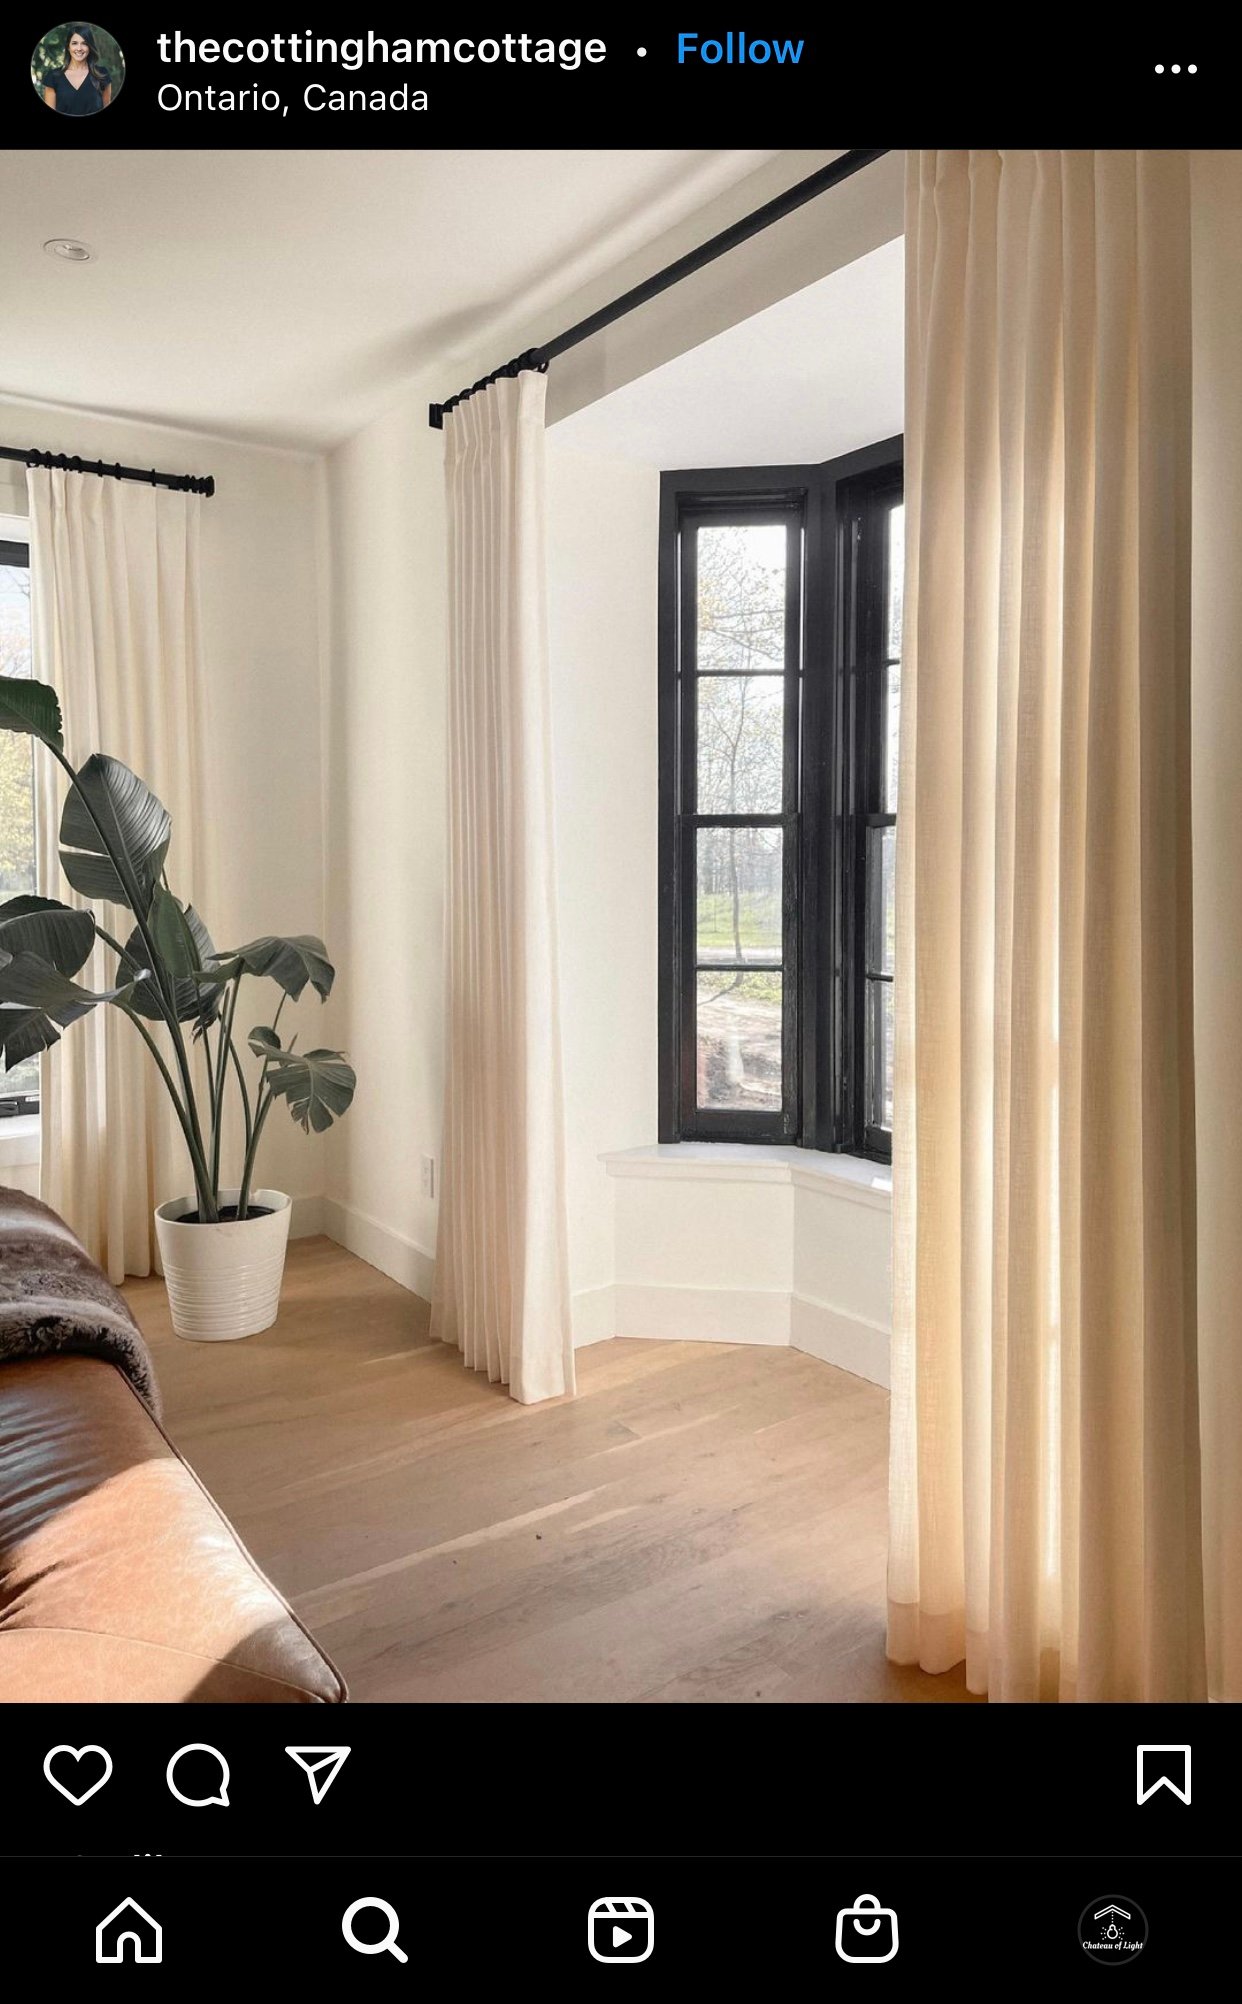
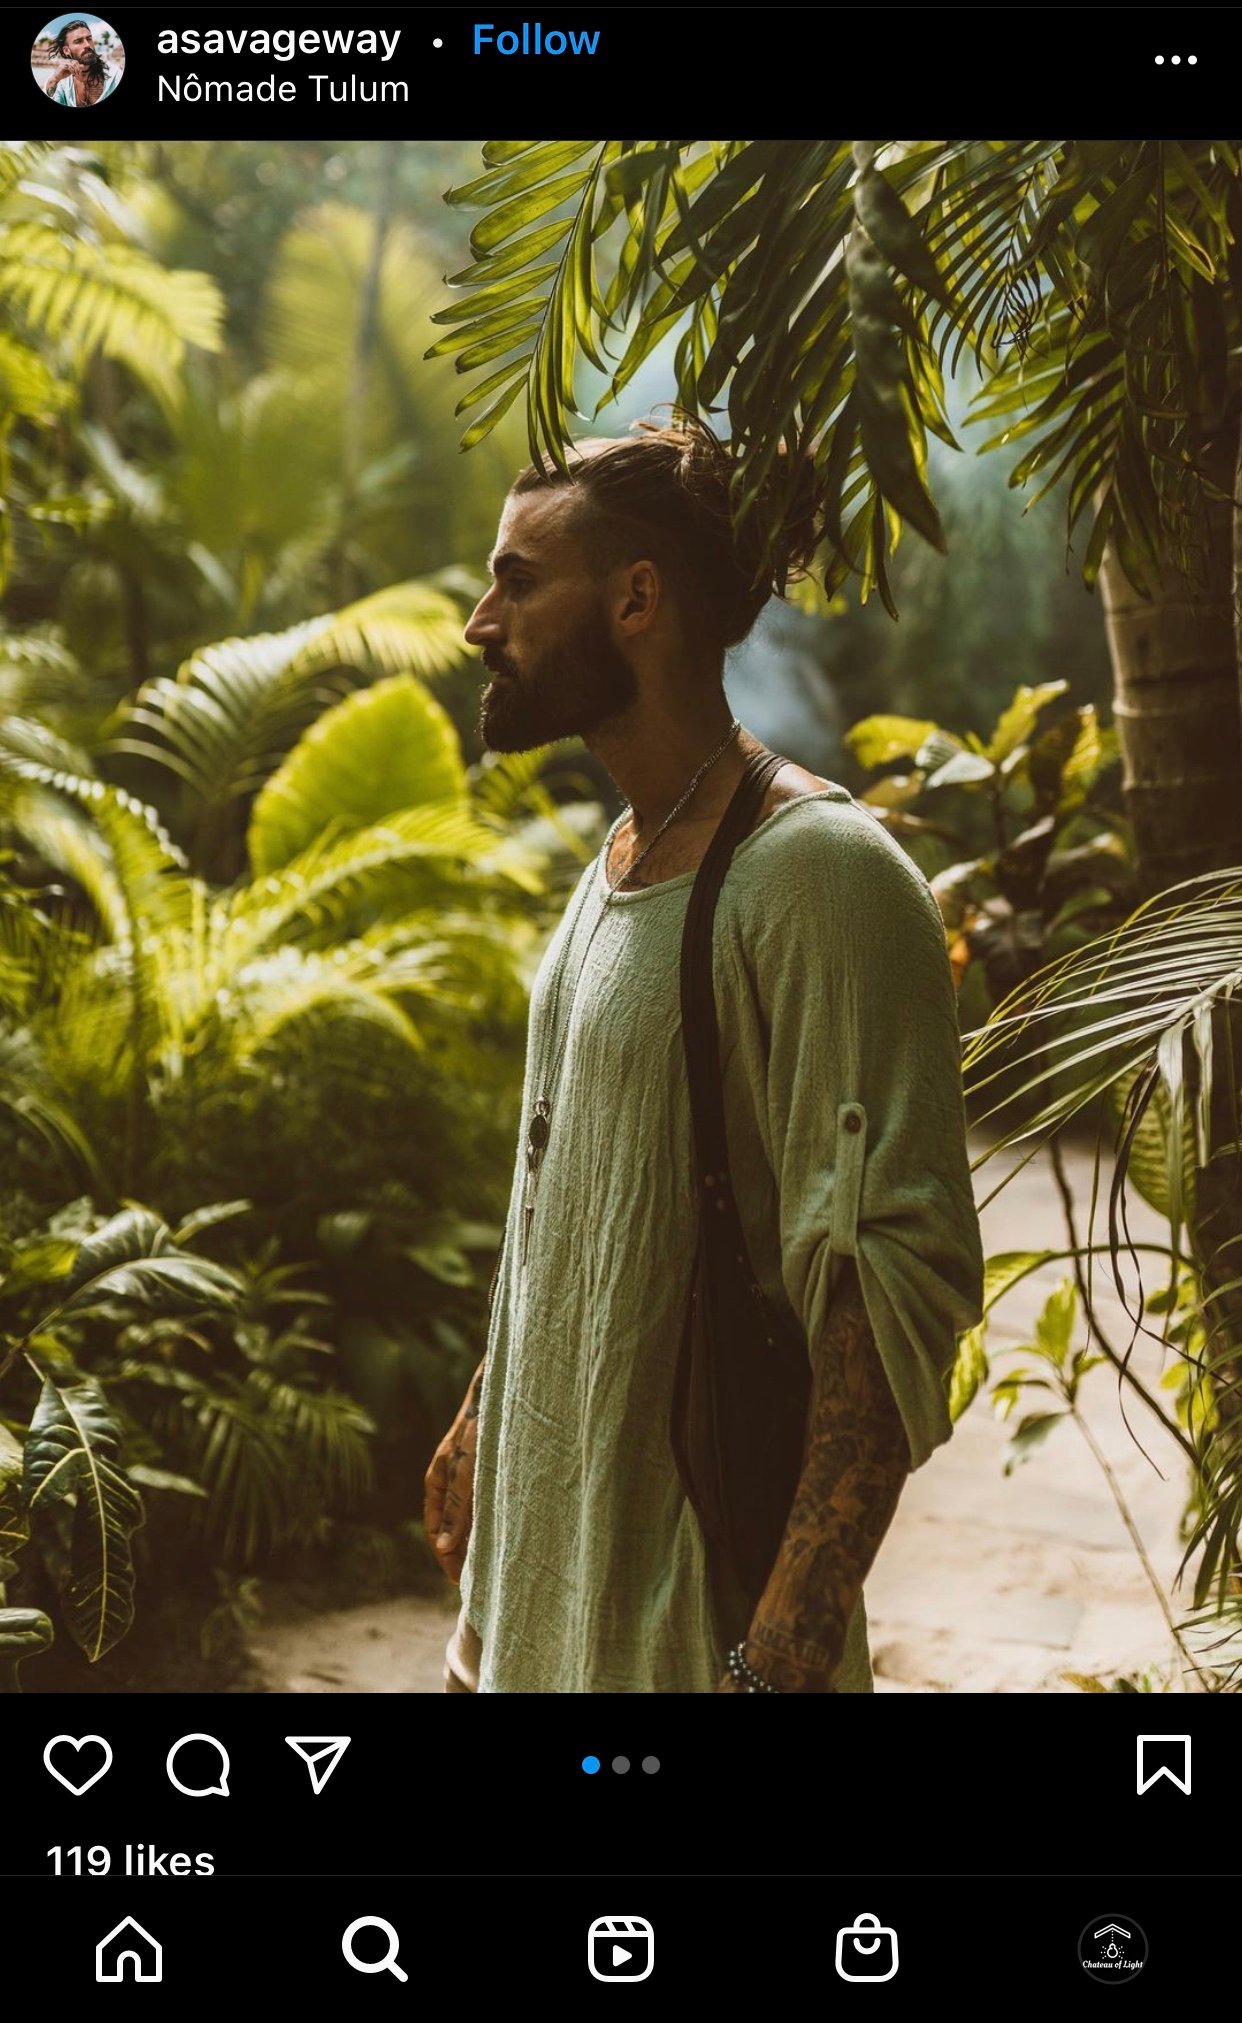
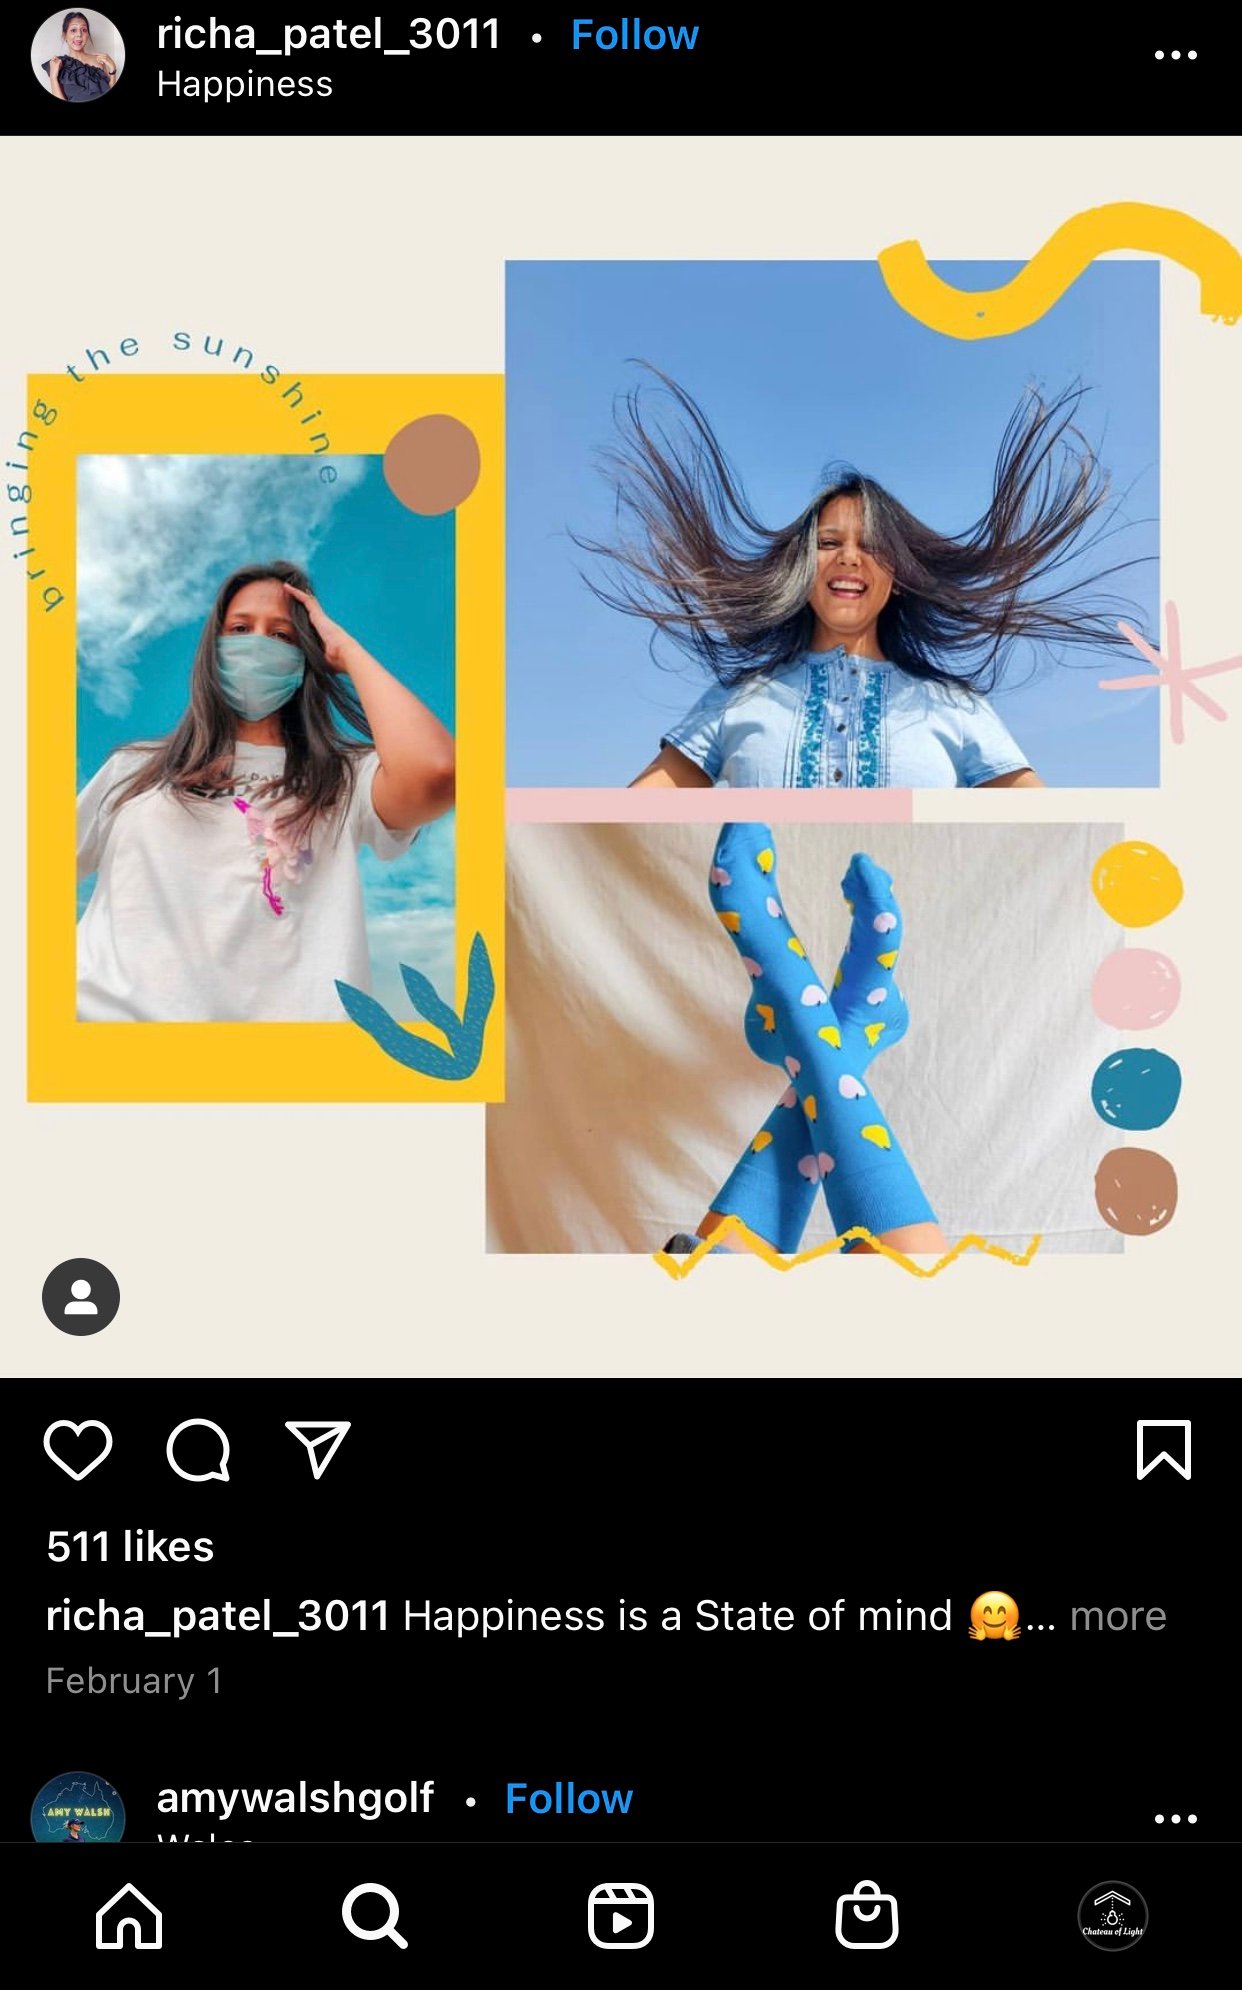
9. Leverage white space (to draw attention)
White space can guide the viewer's eyes to focus on the subject.
Using white space is an excellent way of having a singular focus on your photo.
Too much going on in one picture can be distracting for the viewer.
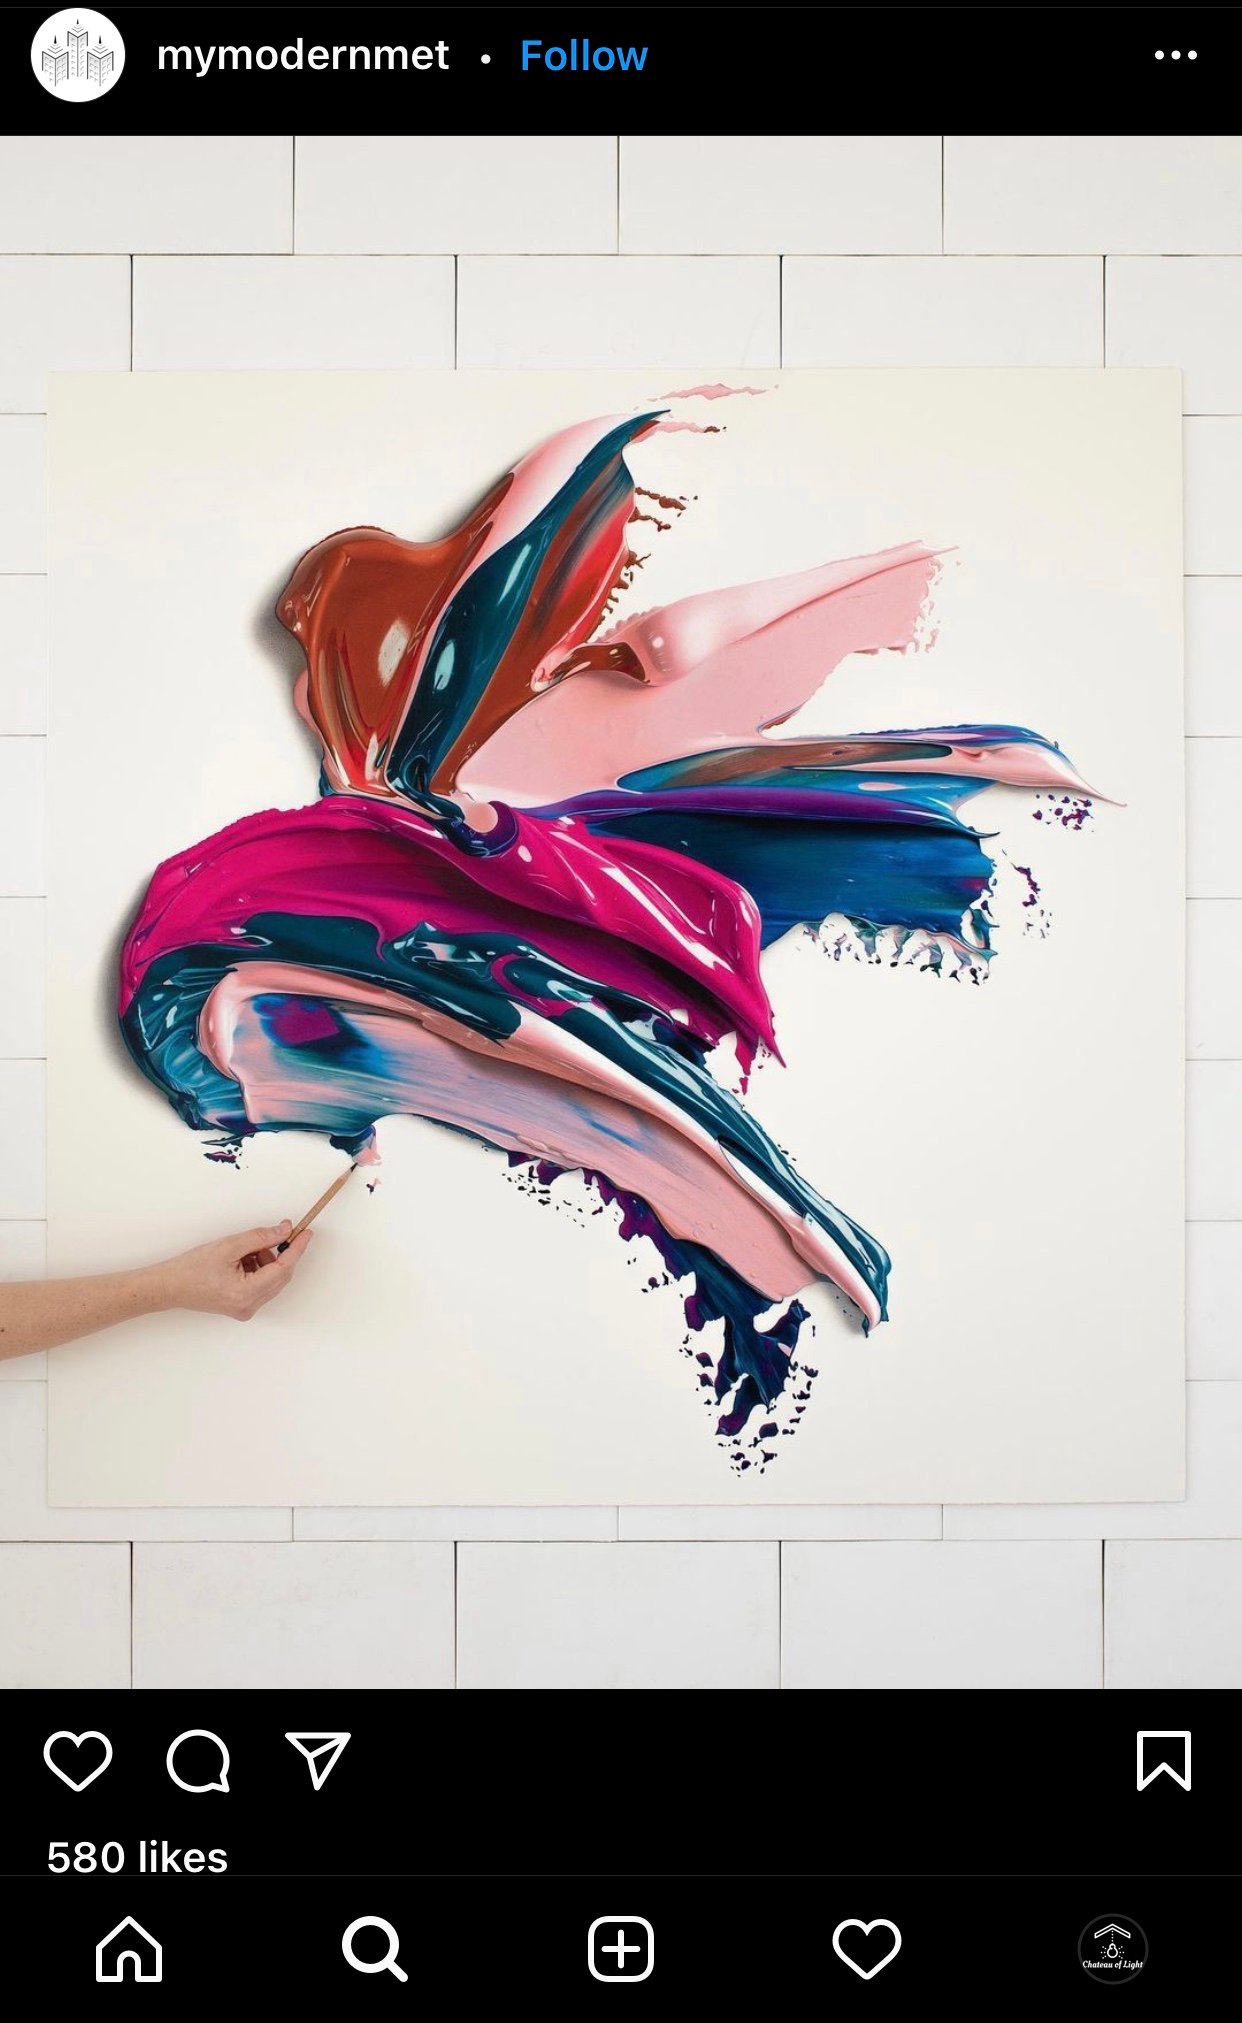
Here's an example of an Instagram photo effectively using white space:
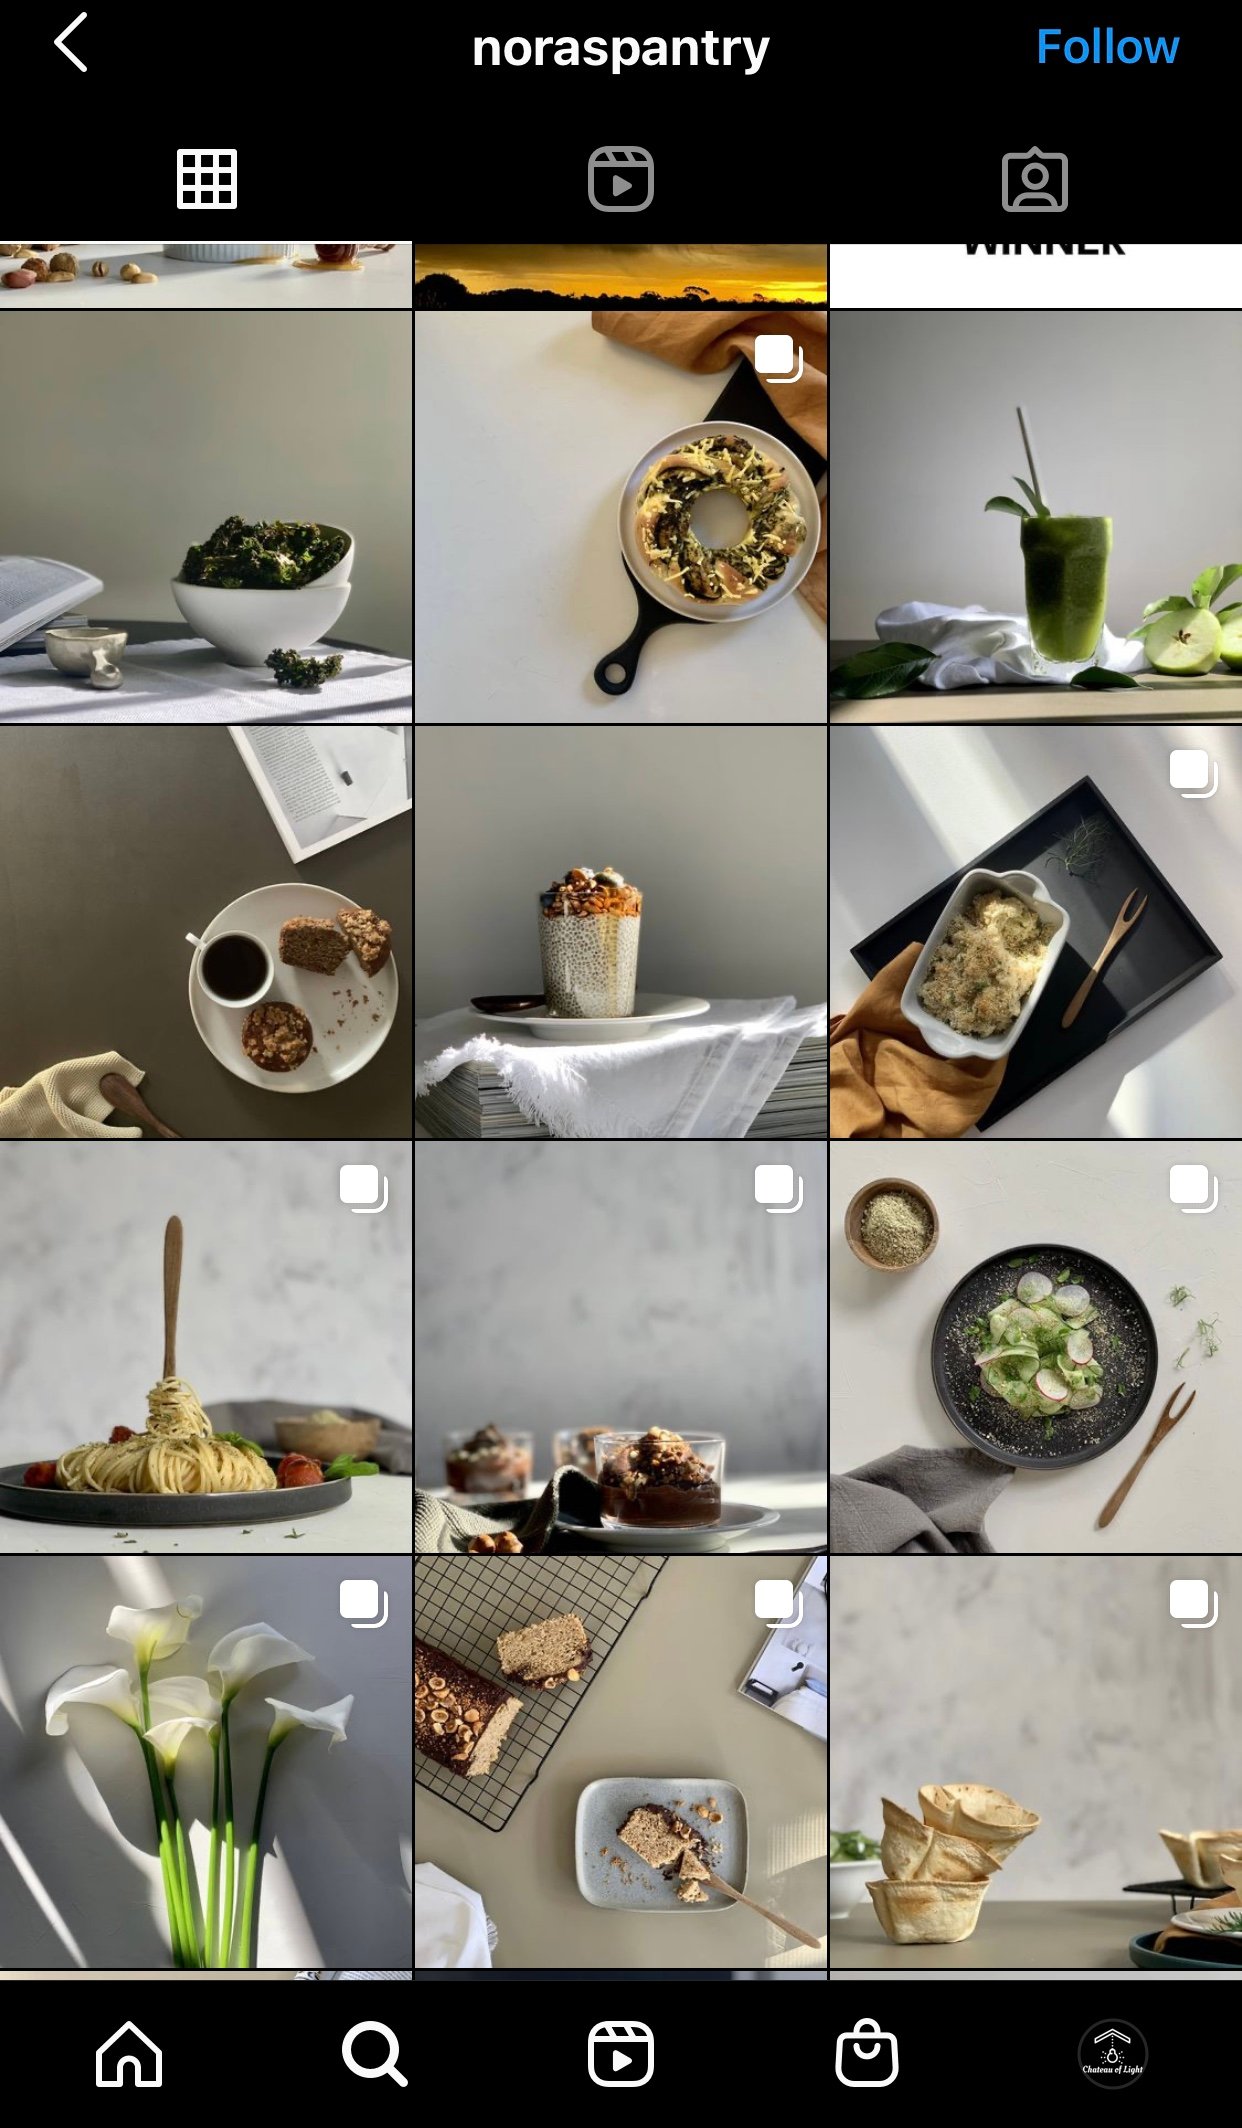
 Here’s an example of an account that frequently uses white space to highlight the photo subject:
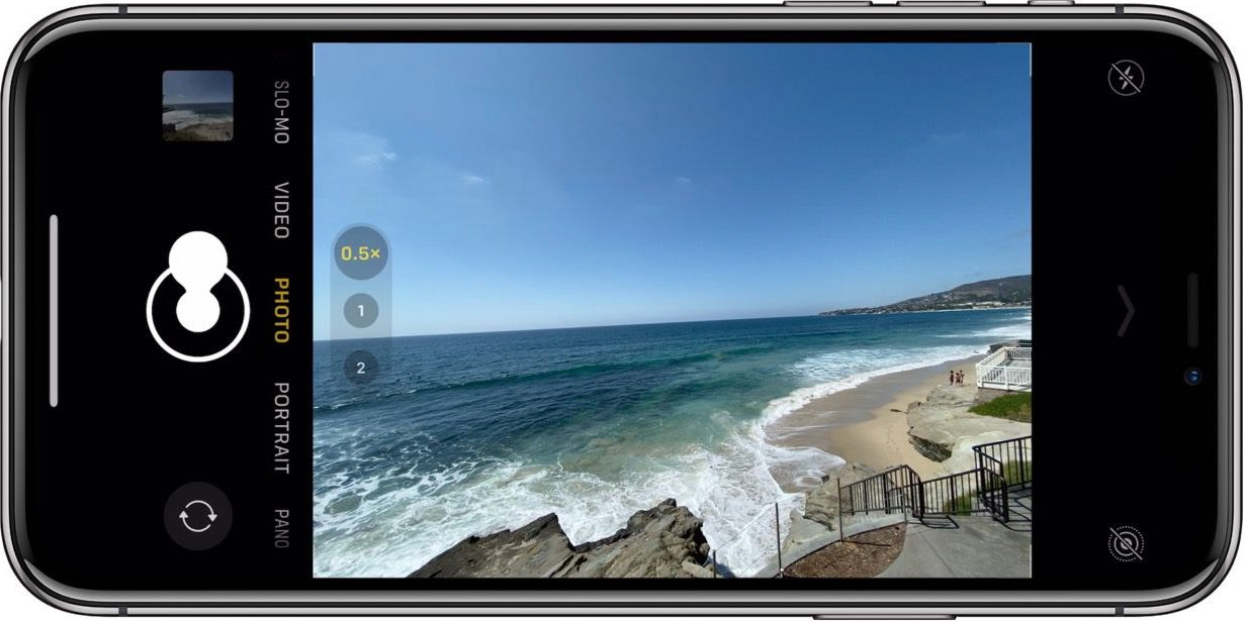
 10. Choose the right photo mode
Today’s smartphone cameras are becoming increasingly savvy.
But you want to make sure you’re using your powerful camera correctly.
When taking your Instagram photos, be mindful of the photo mode you are in.
Photo modes are different from camera settings.
Photo modes are designed to take certain types of pictures.
For example, portrait mode is a great option for a close-up picture of your friend.

Panorama works well for capturing vast scenery:
The best way to learn how to use your photo modes?
Experiment with all of them!
You might be surprised by what you find.
12 Post-production Instagram photo tips & tricks
Some of these tips will be super simple that you can do from your phone's gallery app, while others might require different software.
But the good news? You can enhance and improve your photos AFTER you've taken them.
Tip: Before you start editing your photos, make sure you save an original copy. This can help you use it as a point of reference to ensure you don't overedit any of your photos.
1. Include graphics
You can embed graphics into your photos to announce giveaways, events, or products.
Canva is an EXCELLENT graphics and photo editing tool!
Check out the following example for some graphics inspiration:
OR if you're a Post Planner user, you can use the Content Studio tool to spice up your posts before scheduling them. 😀

2. Filter your photos like a pro!
Filters are probably one of the first things you think of when you hear "Instagram photos."
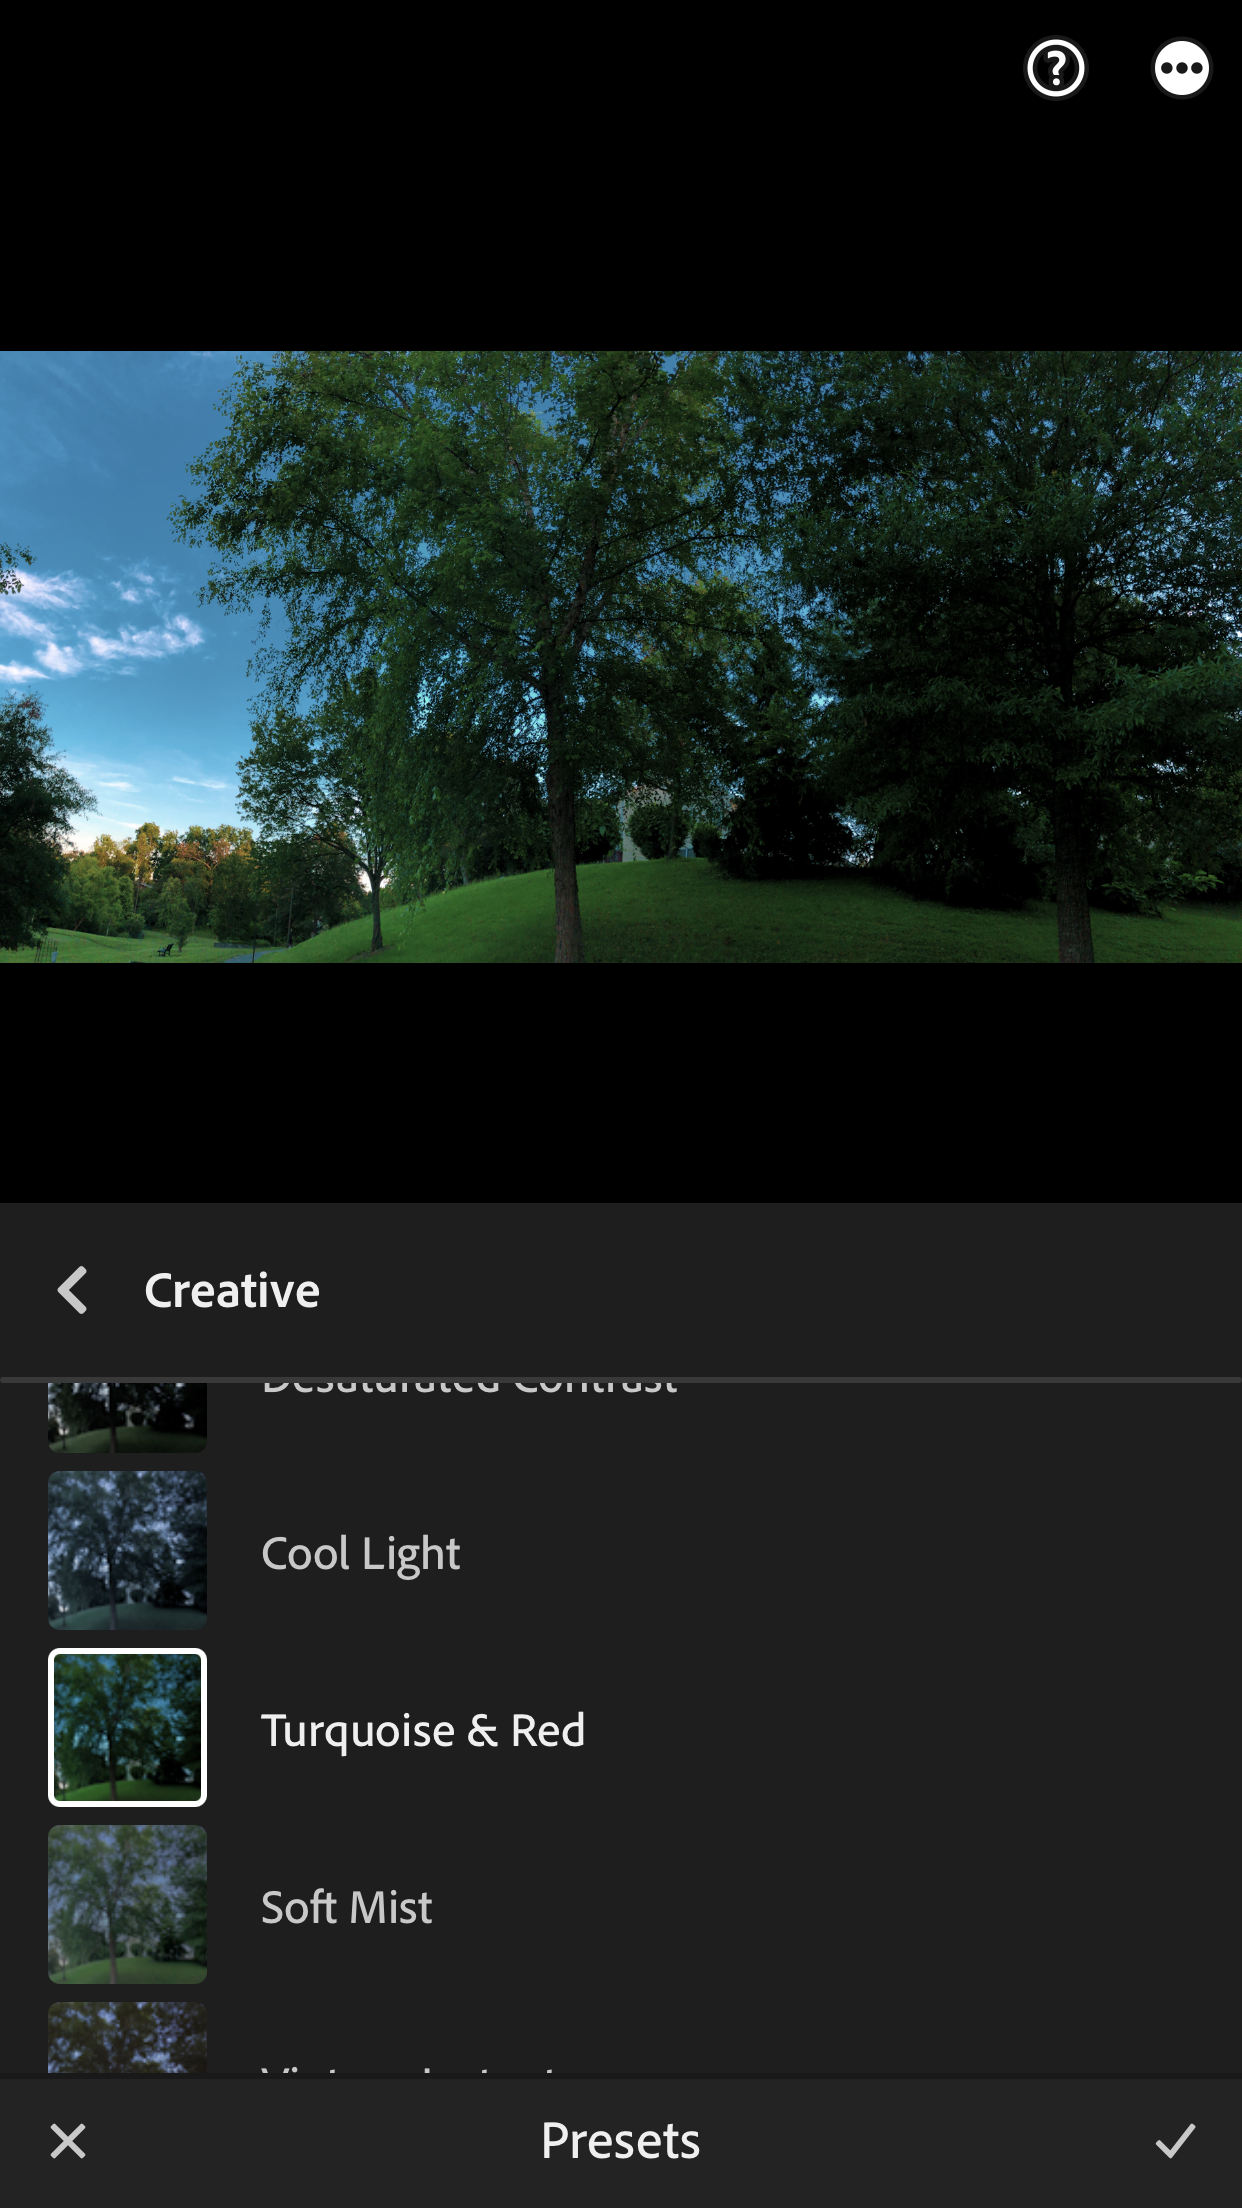
Filters are a quick way to upgrade your photo, but they can ruin it when overused.
Instead of sticking to the default Instagram filters, try apps like:
- Lightroom: For pro-level presets and detailed control
- VSCO: For aesthetic, moody filters that feel more natural
- Afterlight: For quick edits and easy effects
- Facetune: Ideal for subtle touch-ups (especially selfies)
- Pixlr: If you want a free photo editor with Photoshop-like and AI capabilities
- Post Planner: For quick filters and other photo editing tools within a social media scheduler.
A few quick tips:
- Don’t crank your filter to 100%. Dial it back for a more natural look.
- Adjust settings like contrast, warmth, and sharpness instead of relying solely on presets.
- Aim for consistency across your feed. A unified look makes your page more attractive at a glance.
3. Adjust exposure and contrast
Getting the perfect exposure while you're taking a picture is ideal, but if your picture isn't perfect, you can still make edits.
Adjusting your exposure and contrast allows you to:
- Highlight details
- Create depth
- Focus attention
- Adjust the mood
- Fix lighting issues
For exposure, increase exposure to brighten dark areas or decrease exposure to darken bright areas.
For contrast, gradually increase contrast until there is a pleasing balance of separation between bright and dark areas.

You can control contrast in Post Planner’s Content Studio. Head to the “Adjust” tab and fiddle with the brightness, exposure, and contrast sliders until it looks good!
Pro tip: Don't go too extreme with any adjustment. You want your photo to still look natural. So, avoid excessive harsh shadows or blown-out highlights.
4. Correct white balance
White balance controls the color tone of your photo.
In other words, white balance determines whether your photo leans warm (yellow/orange) or cool (blue).
If you get it wrong, your image can feel totally off.
Correcting white balance does 3 big things:
- Makes colors look more natural
- Keeps your skin tones accurate
- Gives your feed a consistent aesthetic
Most editing apps have a “temperature” or “white balance” slider. Use neutral areas (like white or gray surfaces) as your reference point. If your image looks too yellow, shift it cooler. Too blue? Nudge it warmer.

For example, I nudged the picture above toward the bluer end of the spectrum to highlight how the temperature slider works in Post Planner’s Content Studio.
Pro tip: Pay close attention to skin tones. Even if your photo looks good overall, weirdly tinted skin can make a photo feel off.
5. Sharpen or reduce noise
Sharpening enhances details and edges to make your photo look crisper.
Reducing noise smooths out the graininess in photos that low lighting conditions can cause. This can help make photos clearer.

Notice how I took the sharpness up to 100 on this picture in Post Planner, causing it to look grainy. Backing off the sharpness would make this photo look softer and more pleasing on Instagram.
Adjust your photo’s sharpness until it is clear but not grainy!
6. Crop & straighten
Cropping and straightening allow you to make your photos more visually engaging, focused, and overall more aesthetic.

For cropping, crop out any unnecessary or distracting elements.
For straightening, correct any tilted lines that should be horizontal or vertical.
Also, consider that each social media channel and post type has an ideal size. Use a tool like Post Planner to get your image to the ideal size for your post type to improve engagement.
7. Touch up with saturation or vibrance
Touching up your photos with saturation or vibrance adds more color depth and vibrancy, which helps you convey more mood and emotion!

Saturation enhances every color in your photo.
And vibrance only enhances parts of your photo that aren't that colorful.
Increase saturation to make colors more vivid and your photo pop more.
Decrease saturation to make your photo softer and calmer.
Increase vibrance to add more balance to the vibrance in your photo and prevent oversaturation of already-vibrant colors.
Decrease vibrance to decrease the intensity of less vibrant colors, allowing you to focus your palette.
8. Enhance details with clarity
Adjusting the clarity of your photo edits the sharpness of edges in your photo.

Enhancing clarity helps you:
- Add sharpness to enhance fine details
- Make your point of interest pop
- Add realism
Reducing clarity helps you:
- Add a soft, dreamy effect
- Evoke feelings of nostalgia, romance, and mystery
- Deemphasize distractions
9. Adjust highlights and shadows
Adjusting your photo's highlights and shadows helps you balance exposure, create depth, guide your viewer's eyes, and set moods.

Increase highlights to add more details to shadows and balance exposure.
Decrease highlights to reduce the brightness of overexposed areas.
Increase shadows to create deeper, more dramatic shadows.
Decrease shadows to brighten dark areas and reveal details.
10. Remove blemishes & distractions
Did you know you can remove the parts of your photo that you DON'T like WITHOUT coming off as unrealistic to your followers?
That's what removing blemishes and distractions is for!
Blemishes on a person or anywhere else in your photo can sometimes take away from the real meaning behind your photo by distracting your audience.
One of the easiest ways to do this is with some of the AI editing tools available these days. Adobe Photoshop offers several AI-powered tools that allow you to instantly select areas of the photo you don’t like and remove them automatically.

Note: When using blemish removal tools, ensure the end product appears realistic (some tools are automatic, while others allow for manual adjustment).
11. Add subtle blurs
Adding subtle blurs to your photos helps you:
- Add depth and dimension
- Make your point of interest stand out
- Reduce distractions
- Create a sense of romance, mystery, and softness
Some of the software capable of doing this includes Lightroom, Photoshop, or even Canva.
Depending on your editing software choice, applying a subtle blur to specific parts of your photo may require some skill and learning.
12. Optimize for Instagram
The last thing you want to do is take an awesome picture, just for it to not work on Instagram. 😖
Here are the basic rules you MUST follow:
- Crop your photo to an aspect ratio between 1.91:1 and 4:5
- Set your resolution to at least 1080 pixels
- Save your photo as a JPEG
- Compress your photos to reduce file size without losing quality
- Add a caption
- Add relevant hashtags
- Preview your post on Post Planner before you post (you can post on Instagram from your computer with Post Planner)
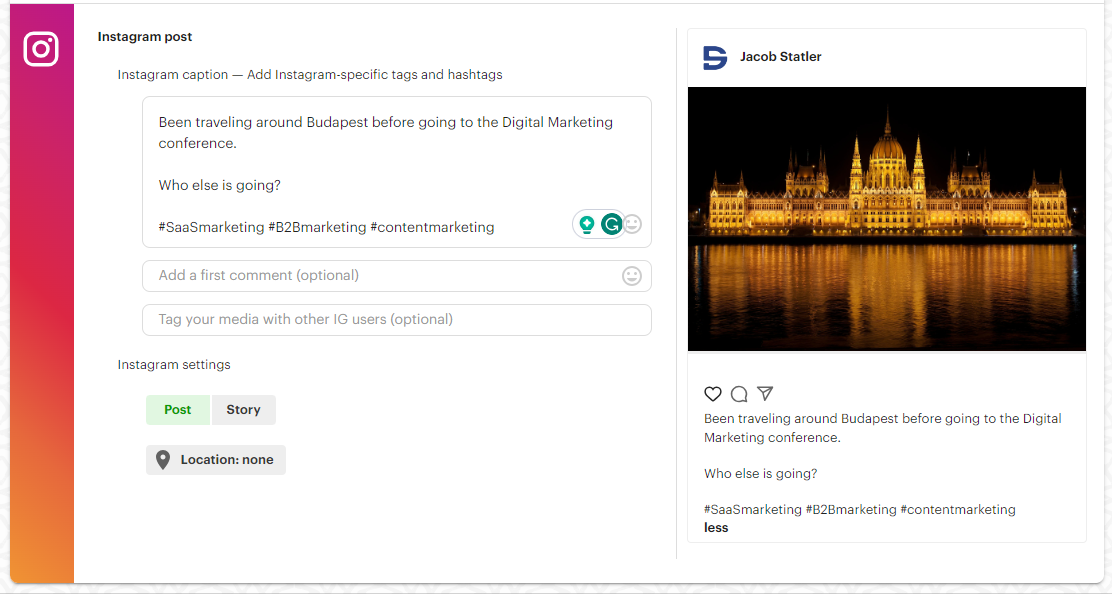
One of the benefits of posting your Instagram images from Post Planner is that it alerts you if any of the essential elements are missing (as shown above) or are not optimized for Instagram, giving you the chance to fix them before posting.
5 Tips on using AI to enhance your Instagram posts
Wondering if AI deserves a spot in your Instagram workflow?
It definitely does!
From cleaning up photos to generating killer captions, AI tools can help you create more engaging Instagram content FAST.
And the best part? You don’t need to be a tech wizard to use them.
Below are 5 practical ways to use AI to make your posts stand out, look cleaner, and get more engagement (without spending hours editing or overthinking).
1. Generative fill/automatic removal
Ever taken a great photo… only to realize there’s a trash can, tourist, or awkward shadow ruining it?
That’s where generative fill comes in.
Tools such as Photoshop and Lensa let you remove unwanted elements from your photos OR ADD wanted elements in seconds.
If you want to remove something, just highlight the area, click remove, and let AI rebuild the background like it was never there.
Or you can use AI to add details like extending the sky, cloning a texture, changing colors, or filling in gaps around your subject after cropping.

The result?
You get to keep your original photo, but now it’s more complete.
2. Changing your photo’s style
Noticed people online posting pictures in different animated or cartoon styles?
That’s AI, and it’s super easy to do yourself!
With just a few taps, you can turn a regular selfie into a Pixar-style portrait, a dreamy watercolor, or even a dark, moody cyberpunk scene. It’s eye-catching, it’s fun — and it stops the scroll.
Here are a few tools that can do the heavy lifting:
- Lensa – Known for its viral AI avatars

- Picsart – Great for stylized portraits and themed edits

- Remini – Uses AI to enhance, animate, or stylize your face
Pro tip: These AI styles work best when used sparingly. Try them for profile photos, creative reels, or themed content, but don’t use them daily.
3. Caption ideas
You’ve got the perfect photo… but now you’re stuck staring at the caption box.
Don’t sweat it. AI can help you beat the blank page.
Use tools like ChatGPT and Post Planner to instantly generate multiple caption options based on your prompt, tone, or target audience.
Want something witty? Sentimental? CTA-driven? Just ask.
In Post Planner, head to the Content Composer and click the “AI Content” button. Input your prompt, select the social media channel you’re targeting, and select the number of outputs.

In ChatGPT, input your detailed prompt and tell it how many suggestions to make.

From there, tweak the results until it sounds like you! You should never post AI text to your social media without first editing it to ensure it fits the tone, style, and voice of the rest of your Instagram page!
4. Generate hashtags
Hashtags are still one of the easiest ways to get discovered on Instagram.
But only if you use the right ones.
Instead of copying and pasting the same generic list (#coffee #vibes #goodmorning), use AI to find hashtags tailored to your post.
Tools like Post Planner’s AI hashtag generator or ChatGPT can give you fresh, relevant options in seconds.
Post Planner automatically generates hashtags based on your caption, or you can enter a keyword to get personalized results.

If using ChatGPT, try a prompt like:
“Give me 15 Instagram hashtags for a cozy café photo with a latte. Focus on aesthetic and lifestyle vibes.”

You’ll get a mix of high-volume tags like #latteart or #coffeetime, plus niche ones like #cafécorners or #warmuphere, which often drive better engagement.
5. Generate background images for text posts
If you’re posting quote graphics, tips, or carousels with text (aka TOBI: Text Over Background Images), AI can help you create scroll-stopping visuals FAST.
Instead of spending 20 minutes searching for the perfect stock photo, use AI image generators like DALL-E (in ChatGPT) to create precisely what you want.
Just describe the vibe with a prompt like, “A minimal background of a rustic coffee table with natural light for text overlay.”

Boom. You’ve got a clean, aesthetic background that’s on-brand and original.
Pair your new background with Post Planner’s built-in Content Studio to add text, logos, or effects, then schedule it right to your feed.
9 KILLER Instagram photo Ideas
You now have a war chest of amazing IG photo hacks to increase your engagement rate.
Now what?
Apply what you’ve learned to spark engagement with these Instagram photo ideas!
1. Weather
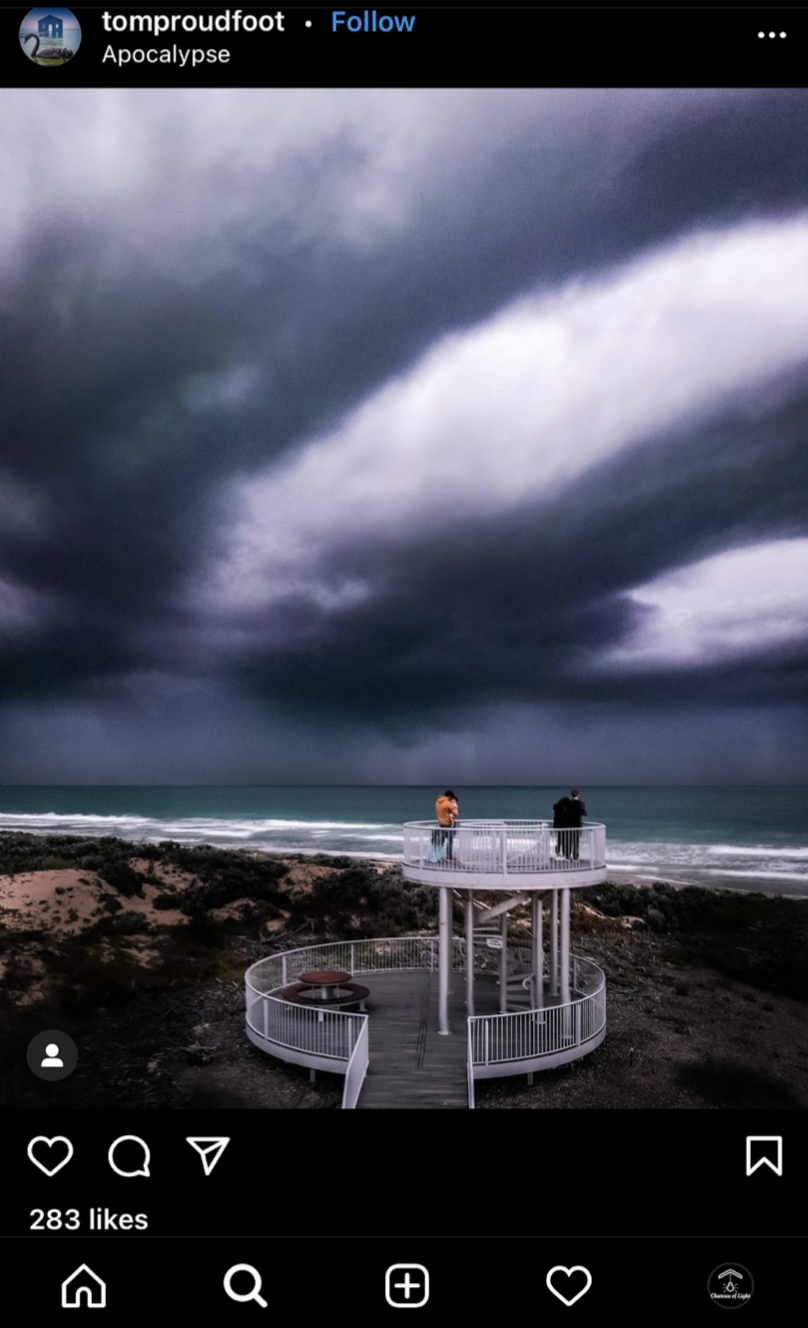 It’s hard NOT to like a fantastic Instagram weather photo.
Practice your filters, angles, and lighting with unique weather pics.
Post your best weather shots on Instagram!
Make sure to engage in the comments (people love their clouds)!
2. Flat Lay photo
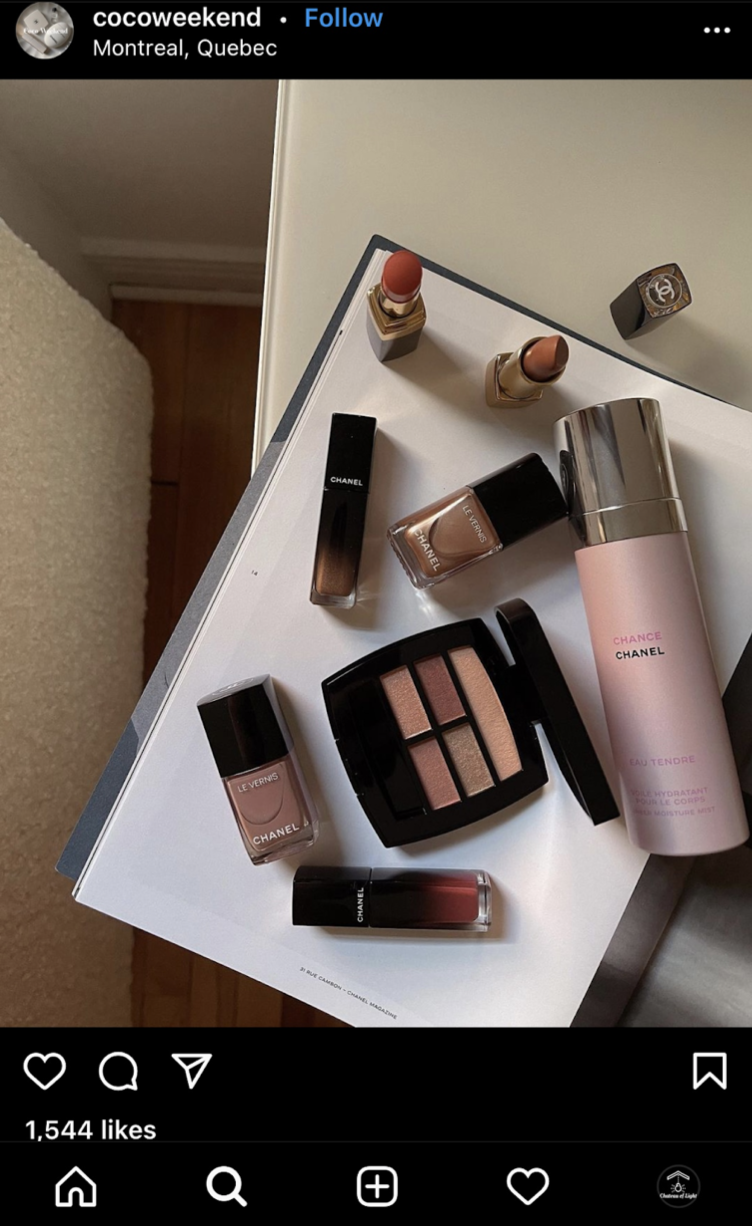 Flat lay photos work well to show off a product.
Use white space to emphasize the subjects of your flat lay pics.
Ask your followers to pick out their favorite items in the photo!
Then, reply to their comments to keep the conversation going.
3. Animals/pets
 There are few photos people love more than pet and animal pics.
Play with depth of field to emphasize a pup in the foreground (like in the pic above).
Got a spunky fur baby you want to show off?
Use burst mode to catch them in action!
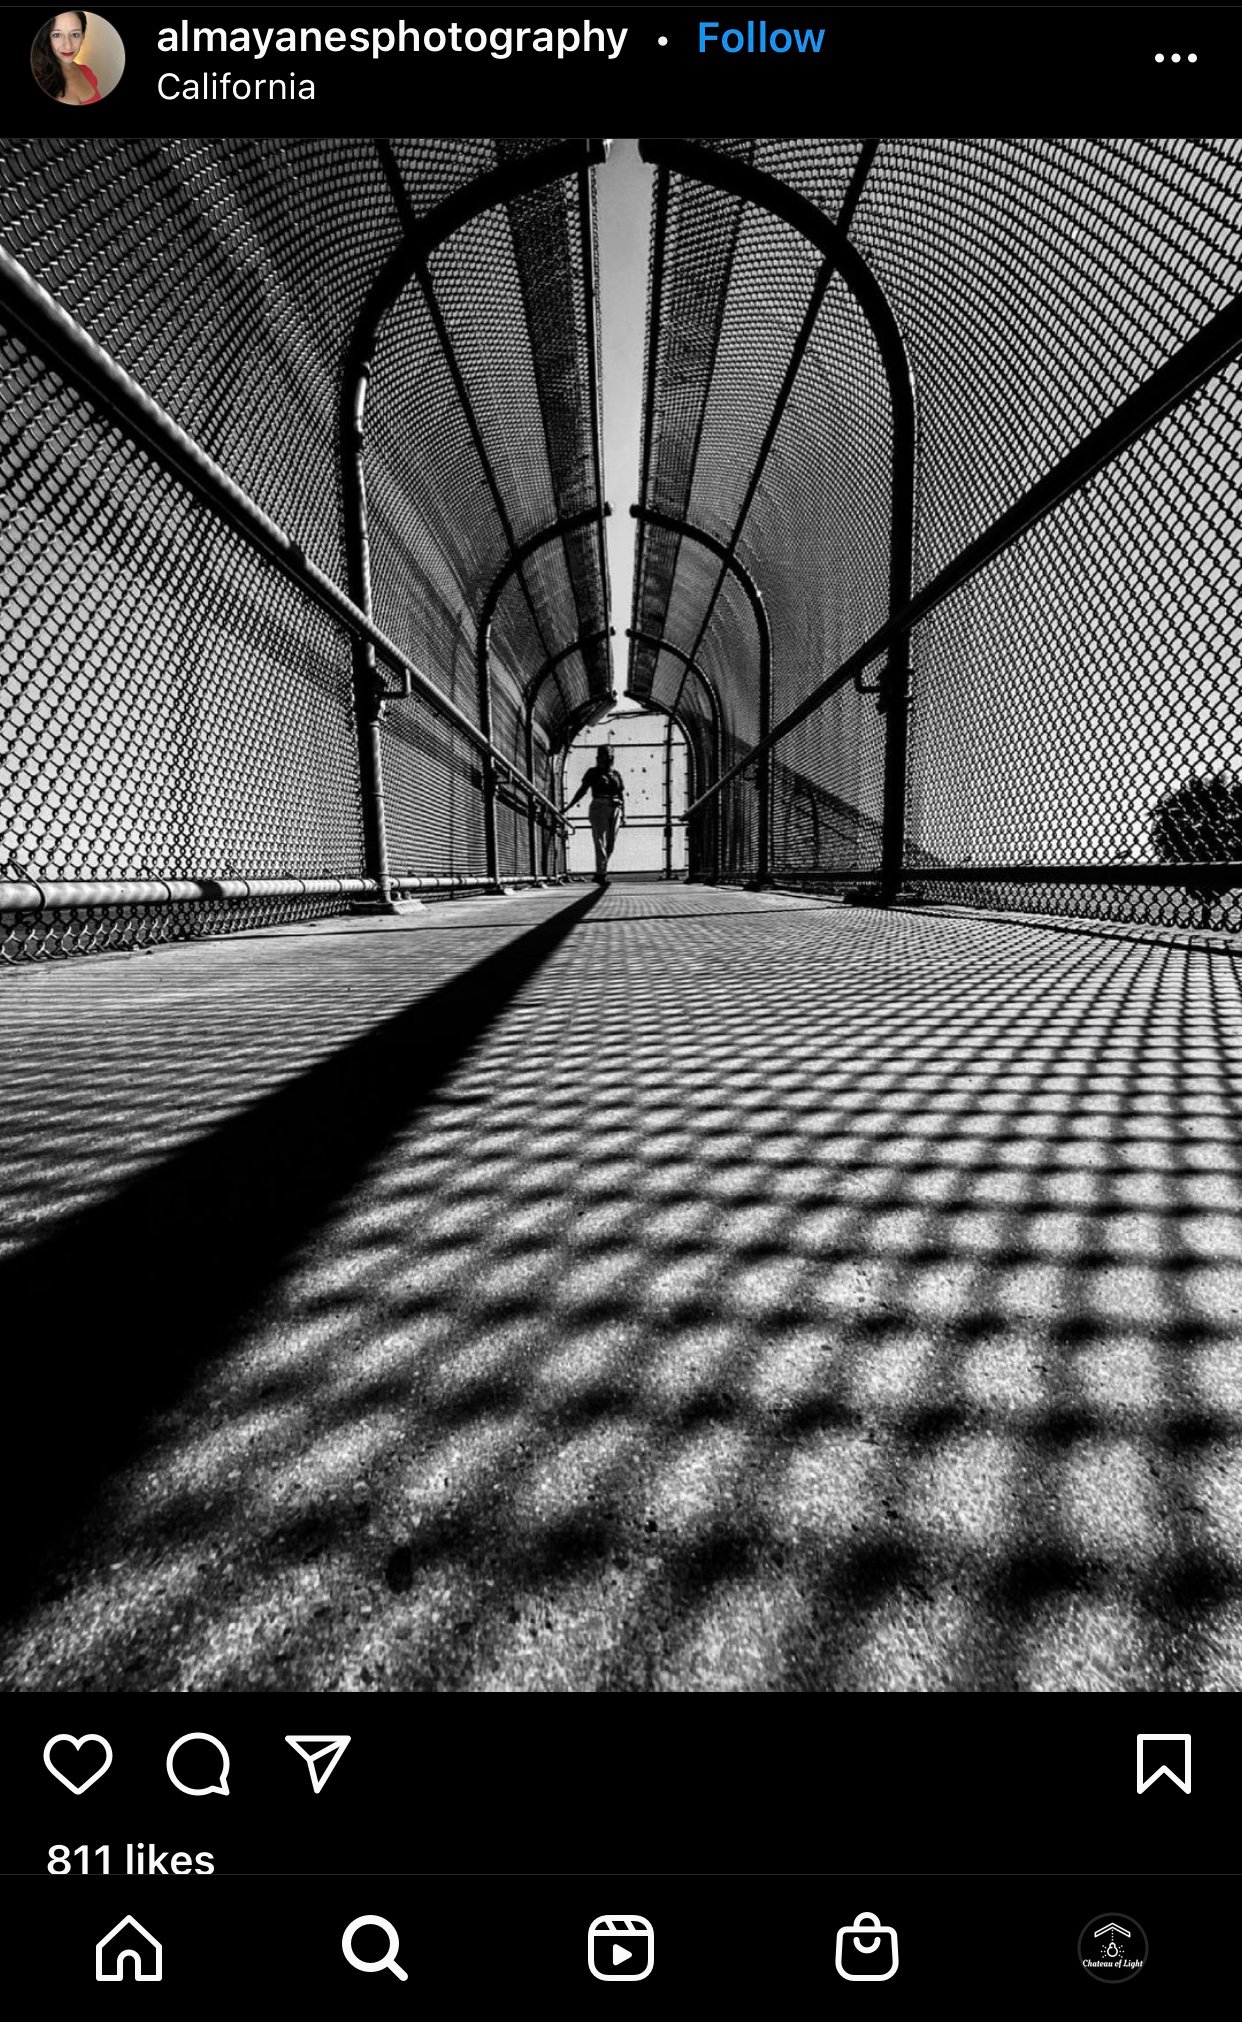
4. Location
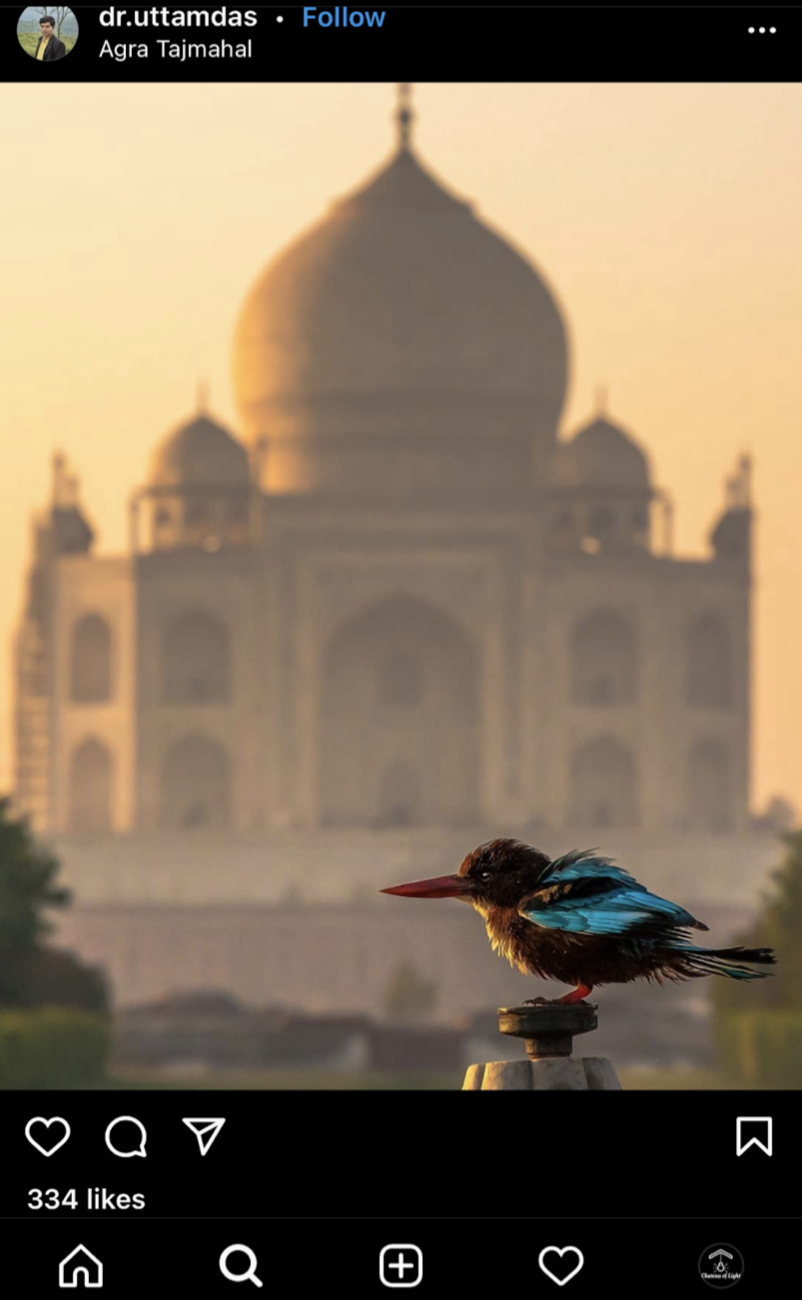 Location photos have the potential to be STUNNING. But they can also be boring (especially if you’re capturing someplace famous).
Use unique angles to showcase a location in an interesting way.
You can also play around with depth of field (like in the example above).
Remember, your goal is to stand out.
Help your followers see the same old location with fresh eyes!
5. Portrait, close-up photos
 Don’t underestimate the power of a good portrait shot.
Believe it or not, people want to see YOU (at least occasionally).
In fact, your followers want to know that your brand is HUMAN.
Use portrait shots to introduce yourself, your team, or customers who love your brand!
6. Food
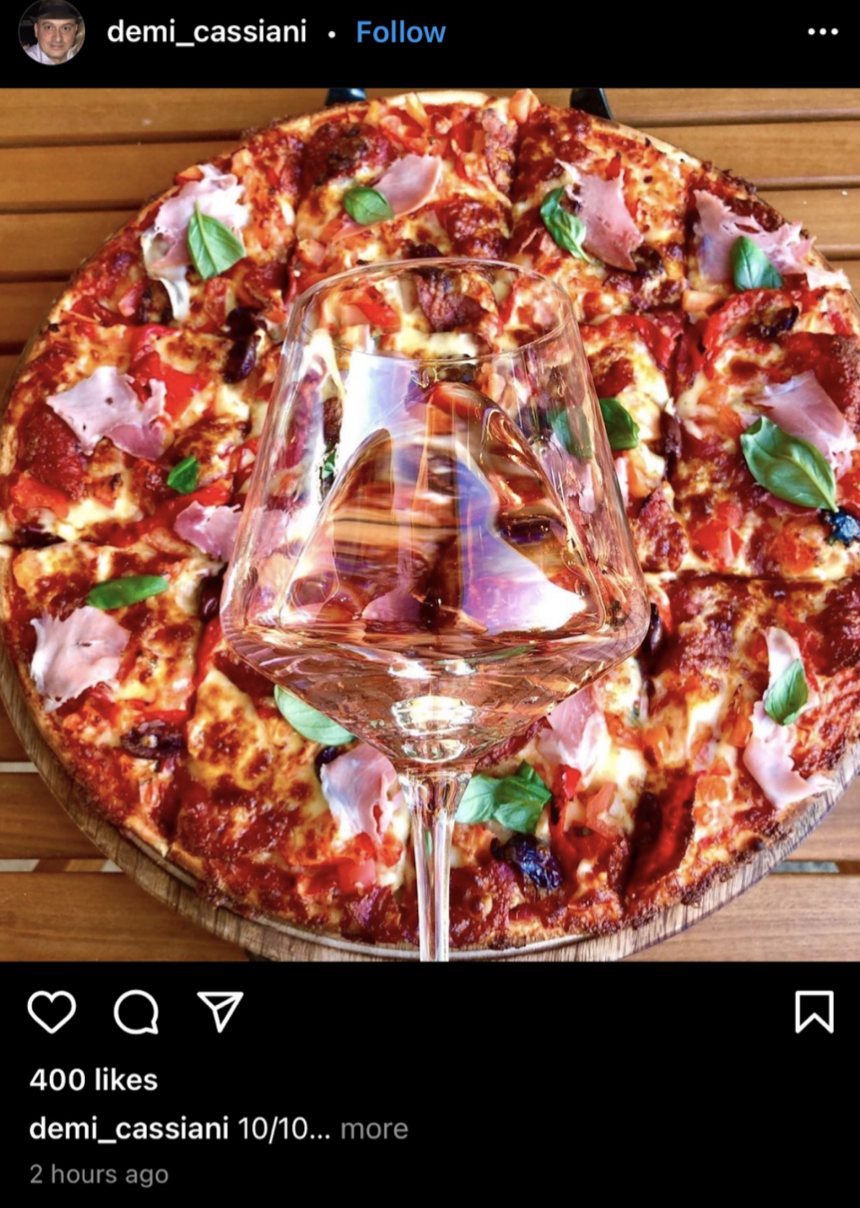 Food photos are fan favorites.
But that’s if you can master at LEAST these 3 photography elements in your pics:
- Lighting
- White space
- Colors
In the pic above, your eyes are drawn to the vibrant colors on the pie.
Those colors pop because the background is “white space.”
I know, I know.
It’s technically brown. But it’s plain (so it emphasizes the ingredients).
And all of that is made possible because of excellent lighting.
The lighting appears natural — there aren’t any glares (not even in the glass).
The photographer likely used SOME kind of external light source, but the outcome is what counts!
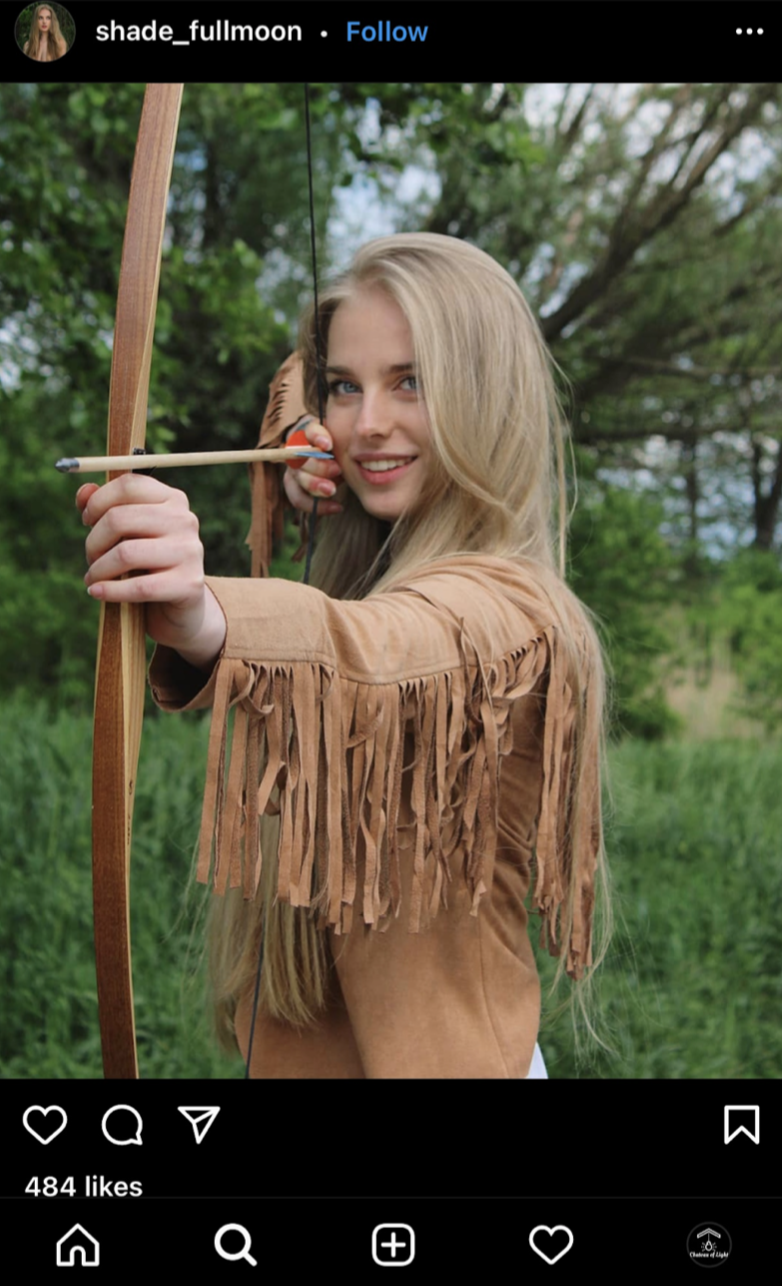
7. Clothing
Want your followers to notice the fit?
 Ensure your photo is styled to focus on the clothes — not just the person wearing them.
The trick is to frame your shot so the outfit becomes the star. That could mean:
- A neutral or slightly blurred background that doesn’t compete for attention
- A full-body shot that shows the entire outfit (including shoes and accessories)
- A pose or crop that draws the eye to the textures, patterns, or color contrast
(Notice how the image above accomplishes all 3 of these goals.)
You can also use body language to shift focus. Things like sunglasses, hands in pockets, or a downward gaze can help de-emphasize the face and bring attention to the clothes.
8. Try adding humor
"Why so serious?" 🤡
Have you considered taking and posting photos that are infused with your humor?
Jokes and comedy are a great way to get engagement.
Try this with different comedic styles:
- Memes
- Funny pictures (like the one shown below)
- Funny captions
- A funny personal story told in Reel format
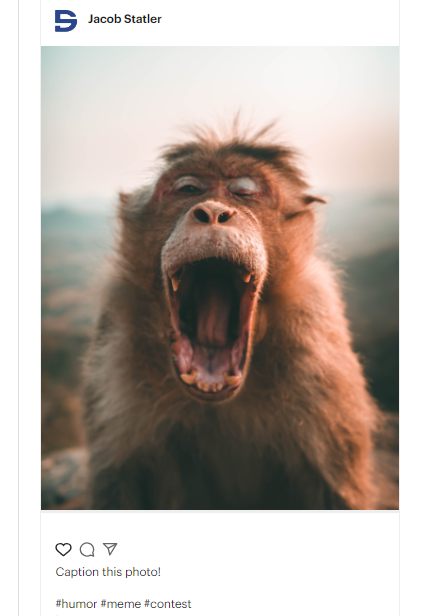
So consider snapping a picture of a funny moment.
Humorous photos also make for the perfect "caption this" contest!
9. Look at the analytics on your old photos to find what works
One of the smartest ways to come up with photo ideas is to identify what photos get the most attention!
You can do this by spying on other people's Instagram.
Or you can review your old posts to see which ones got the most engagement.
Then you can create a new version of those posts (or recycle the old ones).

If you use Post Planner, you can easily filter through your most popular posts. 😉
4 Things that happen when an Instagram feed looks good
1. You get more followers
A by-product of a great Instagram feed is more followers.
Apply Post Planner's hashtag tips to maintain a successful Instagram feed.
2. Engagement goes up
People will likely engage with an attractive Instagram feed because it grabs their attention.
Hold someone’s attention for long enough, and you’ll get more likes and comments.
Some people may even use Instagram's "save" feature on their best posts.
Engagement gets even BETTER when you post your Instagram pictures at the right time!
Here’s what I mean:
There are peak hours when your followers are online.
Posting during those times is one of the best ways to get your post seen.
But what if your peak hours happen at a time that’s not convenient for you?
Do what countless Instagram users do and use a post-scheduling tool!
For example, Post Planner lets you schedule Instagram posts in advance and automatically publishes them for you.
So enjoy your coffee and read a book while your posts go live at the PERFECT time!
You can save even more time by browsing Post Planner’s MASSIVE content library for beautiful images!
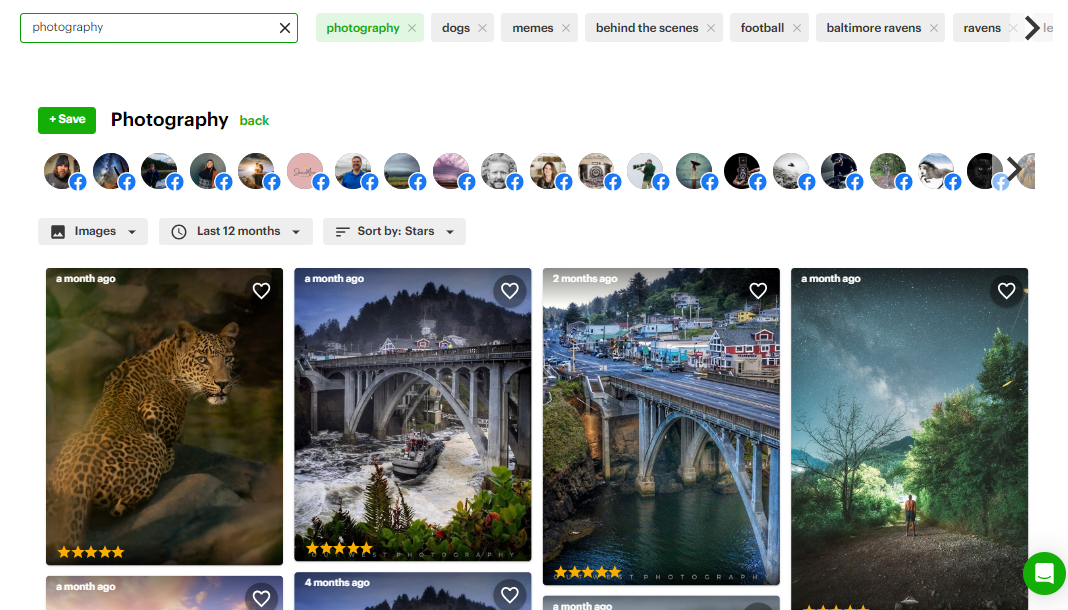
You can even save profiles that post great content into groups called Content Streams to consolidate the best content on the web into a single place!
3. You build authority & credibility
An outstanding Instagram feed adds authority to your brand.
Why?
Because you appear above-average compared to most profiles.
Think about it.
You can tell when an influencer puts a lot of thought into their photos.
In fact, that’s what makes an influencer’s page unforgettable.
That type of impression makes you seem trustworthy.
If you’re selling a product or service, that trust can grow your business.
4. Partnership opportunities increase
As your following grows, brands will reach out, wanting to collaborate with you.
If forming brand partnerships is one of your business goals, post STUNNING photos.
The better your IG feed looks, the more followers you get.
The more followers you get, the more influential you become in your niche.
The more influence you hold, the more people will want to work with you!
Frequently asked questions about how to take good Instagram photos
How do influencers make their photos so clear?
Influencers typically take clear photos using high-quality cameras or smartphones with advanced camera capabilities.
They pay attention to lighting conditions, shoot in well-lit environments, and use software to enhance sharpness, clarity, and overall quality.
Why do my photos look worse on Instagram?
Instagram's compression algorithms can affect image quality.
Optimize your photos before uploading to mitigate this by using appropriate resolutions, aspect ratios, and compression settings.
Also, remember Instagram's formatting guidelines to ensure your images display correctly.
Check out our tip #12 in our "12 Post-production Instagram photo tips & tricks" section.
Is Instagram worth it for photography?
Yes, Instagram is a great platform for photographers to showcase their work, connect with a global audience, and gain exposure.
It allows photographers to share their artistic vision, receive feedback, and potentially attract clients or collaborations. However, success on Instagram requires a balance of quality content, engagement, and consistent effort.
What’s the best way to post on Instagram?
Creating Instagram photos that look good comes down to 4 principles:
- Applying photo-taking fundamentals
- Knowing your audience
- Standing out
- Publishing consistently
A post-scheduling tool can go a LONG way and help you practice most of these principles.
Why?
Post scheduling makes your IG marketing strategy SUSTAINABLE and EFFICIENT!
Ready to save time and money and boost Instagram engagement at the same time?
Create a free account with Post Planner today!
Got other photography tips for increasing engagement?
Drop them in the comments below!


ViewHide comment (1)