What are the benefits of Facebook for business? Should you use a Facebook business page for marketing?
In this article, I explain 19 HUGE benefits you may not know.
Bottom line: Should your business be on Facebook in 2024?
ABSO - FREAKING - LUTELY!
Need more convincing?
Not a problem. I make a bulletproof case below.
(P.S. If you're looking to grow your Facebook business page, create a FREE Post Planner account to start creating, curating, and automating VIRAL content.)
Top 19 Benefits of a Facebook Page for Business
There’s quite the “anti-Facebook mob” these days despite it being the world's largest social network.
Facebook is apparently "dying" because of the news feed algorithm.
Users are saying it's becoming harder and harder to get more Likes and engagement on the platform.
Some "experts" are even saying to forget about having a Facebook business page entirely…
I completely disagree!
The numbers and facts don't lie:
160 million businesses and 2.89 BILLION users are on Facebook MONTHLY.
%20(1).webp?width=454&height=681&name=benefits_of_facebook_for_business_1.3%20(1)%20(1).webp) What does this mean?
What does this mean?
It’s a no-brainer for your business to be on it!
BUT what exactly are the benefits of having a Facebook business page?
Glad you asked! 😉
Feel free to skip the section you're most interested in:
- Top 19 Benefits of Facebook for businesses
- 2 Main disadvantages of Facebook
- Wait, Is Facebook good for business-to-business companies (B2B)?
- Create, curate, & automate Facebook posts with Post Planner
- Frequently asked questions about the benefits of Facebook
Why use Facebook for business? 19 benefits of a Facebook business page
1. Reach BILLIONS of potential customers
2.89 bill— ok, let's just round it up...
(Nearly) 3 BILLION USERS!!
Need I say more?
This is the number of your fellow earthlings who log in to Facebook at least once a month.
You may be saying in your head, "Once a month??.... That's not very often!".
I agree. So how about this number:
2 BILLION USERS!
That's the number of Daily Active Users (DAU) on Facebook.
Yes, 2 BILLION people log in to Facebook. Every. Single. Day.
If that's not a big enough swimming pool of potential customers for your business, you should rethink your line of business... or rethink your thinking!
Here are some more mind-blowing stats about the incredible scale of Facebook:
- 3 billion monthly active users (8% growth, year-over-year)
- 2 billion daily active users (9% growth, year-over-year)
- 3 billion family daily active users (11% growth, year-over-year)
- Users 65 years and older are the fastest-growing group on Facebook
- Only 10% of Facebook users live in the U.S. or Canada
- 75% of Facebook users are high-income earners
- Facebook users in the U.S. are on the site 1.5 hours per day
2. Turn fans into an email list
I'm going to say it…
Getting people to like your page is NOT enough to give your business a long-term, sustainable path to success.
Sure, it’s good for building brand awareness, social proof, and a social media presence that people can trust.
BUT what if Facebook does, in fact, *poof*, disappear one day?
What if Facebook drastically reduces business capabilities on the platform?
Or what if Facebook jacks ad costs up?
If any of this happens without you capturing your followers’ contacts, then your business might be in HUGE trouble.
That's why smart and savvy businesses collect emails from Facebook fans — so they can contact their community outside of Facebook.
Collecting emails is powerful because you can dynamically engage your fans from a different marketing channel.
Many businesses do this through valued contests, irresistible giveaways, and must-read newsletters.
It's a proven system (89% of marketers reported that they mainly generate leads through email).
BUT you also need to be careful about how you use your leads.
Have a system for your email marketing, things like:
- Creating nurturing automation
- Tracking your metrics
- Segmenting your subscribers
- A/B Testing emails, subject lines, and templates
- Testing different offers and CTAs
- Mixing up your emails (educational, product-related, testimonial, etc.)
However, keep in mind, you should send emails according to a carefully designed plan.
Don’t just blast your email list with random emails!
By turning your Facebook followers into an email list, you take control of your audience and gain the ability to meet fans in their inbox.
3. Lower your marketing expenses
Starting a Facebook business page costs you a whopping...$0.00.
Sure, you may pay a fancy graphic artist to design your profile picture and cover photo (although it’s not a necessity).
Using photographs you take of your business works just fine.
And in some cases, it's better than a creative image from a designer.
My point is this:
Getting rolling with a page costs you NOTHING until you start paying for ads, boosting posts, and running Sponsored Stories (all of which you SHOULD be doing with your page).
However, even if you run ads, Facebook is reported to cost a fraction of what other ad platforms like Google would cost.
Now, let’s compare it to offline marketing...
Facebook ads are still relatively inexpensive when compared to traditional print, radio, or T.V. ads, while letting your target audiences a 1,000x better:
You can target by:
- Interests
- Age
- Behavior
- Device(s) used
- Occupation
- Marital status
- Location
- Lookalike audiences
And so much more!
The volume of people you can reach — mixed with the ability to segment your audiences — makes Facebook a great low-cost marketing tool for your business.
There are countless case studies of businesses using Facebook Like Ads and other ad types to drive business results.
One great example is the Pura Vida page.
.jpg?width=1880&name=download_(14).jpg) The artisanal jewelry company showed Facebook photo ads to a lookalike audience to attract new customers and increase sales.
The artisanal jewelry company showed Facebook photo ads to a lookalike audience to attract new customers and increase sales.
(Oh, btw, lookalike audiences are people that resemble the characteristics of a custom audience that you share with Facebook.)
The campaign resulted in a 2.8X lift in return on ad spend!
Pura Vida had a simple goal: Increase holiday sales.
More specifically, they wanted to double the number of new customers acquired between Black Friday and Cyber Monday 2019, compared to the previous year's same period.
You can read more about how they accomplished their goal here.
But suffice it to say, they got:
- 2.8X lift in return on ad spend
- 2X increase in sales, compared to previous sales record
- 28% increase in average order value, compared to 2018
Impressive!
If they can do it? So can your business! It comes down to a sound marketing strategy.
4. Target specific audiences
I hinted at this earlier...
This is a continuation of #3, and it's super important.
Just because 2 billion people use Facebook every day doesn't mean they ALL want to Like your page.
You don't want all of them to Like your page anyway (because only a tiny percentage of them will engage with your posts).
You want people who genuinely want to check out your page when you're using Facebook for business purposes.
So, the answer?
Target your ads to specific people!
If you're a local business, I recommend directing your ads to target customers within a 10-15 mile radius (Facebook calls this radius targeting).
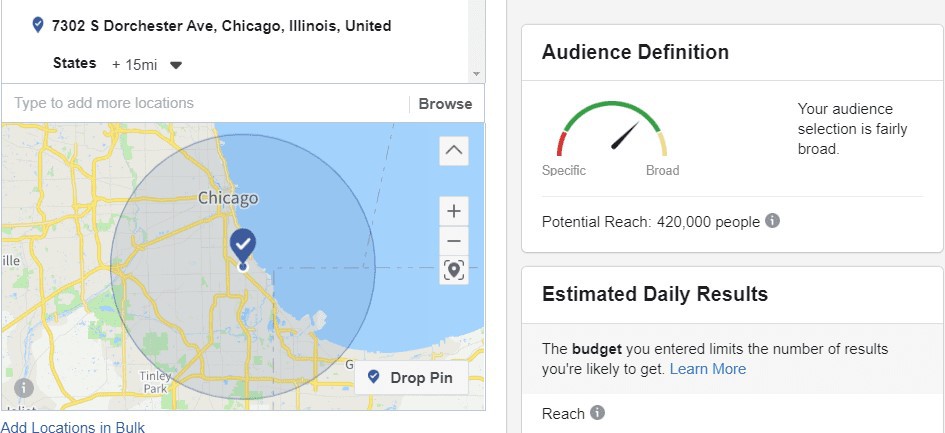 The ads might cost you more, but the Likes and potential customers are laser-targeted.
Not to mention, you may get the "local celebrity" effect, where people in your area start to recognize your business because of your Facebook ads.
If we compare T.V. ads to running an ad on Facebook, you'd be hard-pressed to know whether your ad targeted the right people for your business.
T.V. commercials tend to be more of a brand awareness marketing campaign.
Facebook on the other hand?
You can target broad or hyper-target your market as much as you want!
Btw, you can even target your Facebook posts (I mean the organic, free ones!) by creating content for your ideal customers!
5. Gain in-depth audience insights
Not all of us are numbers people.
But you don't have to be a math wizard with 1,000 IQ points to love the Insights provided on Facebook business pages.
So when you're thinking:
"What are the advantages of a Facebook business page," your insights should pop to mind...
Why?
Because they're easy to understand, even for non-technical people.
And they provide great information for business owners!
Just take a quick peek at the Insights on the Post Planner fan page below.
Just on the "Page Overview," you can see some cool data:
- Page Views
- Post Reach (not too shabby, right?)
- New Page
- Likes
- and much more
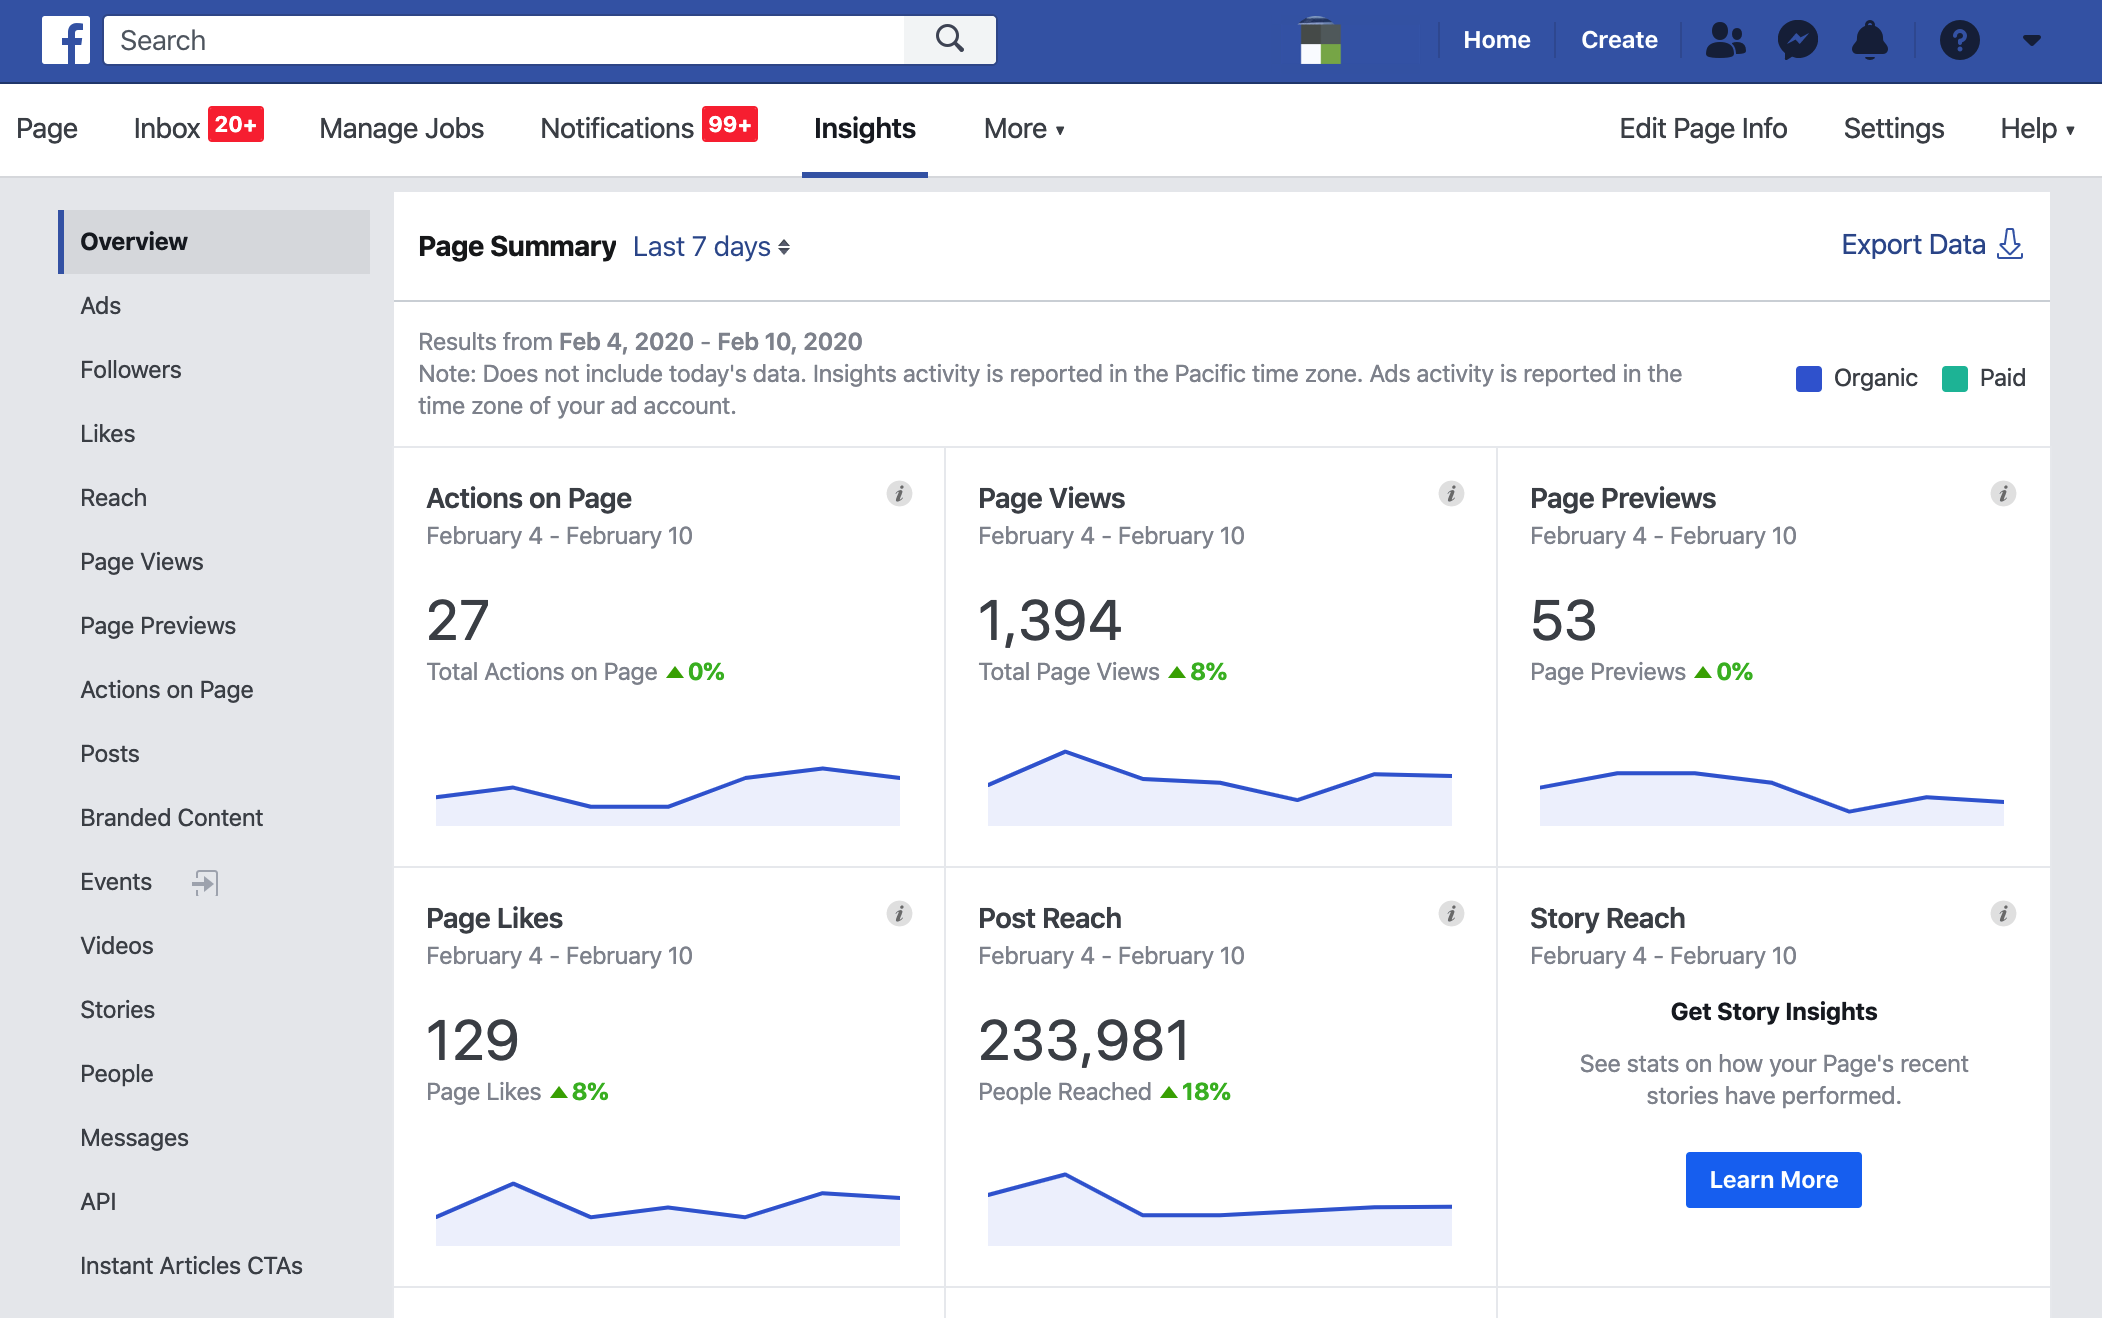 You can dig around in the left sidebar and drill down to find out how specific posts are performing, the demographics of your fans, etc.
(Your most successful posts should be the ones you boost to more people because they're already proven to get engagement.)
Compare this to running an ad in your local paper:
Are you given any comparable stats in terms of how many people visited your business based on the ad?
Can you track the impressions on your newspaper ad?
Not a chance.
6. Build brand loyalty
Besides being a place to build a customer base and sell products, a Facebook business page can do wonders for helping you build brand loyalty.
What does that mean, exactly?
Well, if you consistently provide valuable and entertaining content, your followers will stay loyal, even when you mess up.
(But, your product quality is still important!)
Someone else can have pretty much the same business as you, with the same services.
But because you stand out more, people will want to do business with YOU.
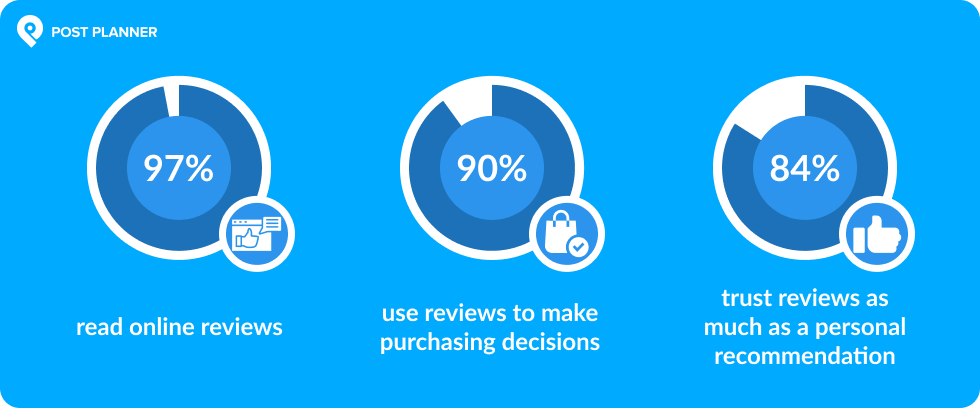
These days, people look online to find businesses to buy from:
And guess what?
Social media is one of their first pit stops!
If your followers see you being active & responsive, they're much more likely to do business with you than a company with no Facebook presence or a poorly run page.
Consider this example from Airbnb's Facebook page.
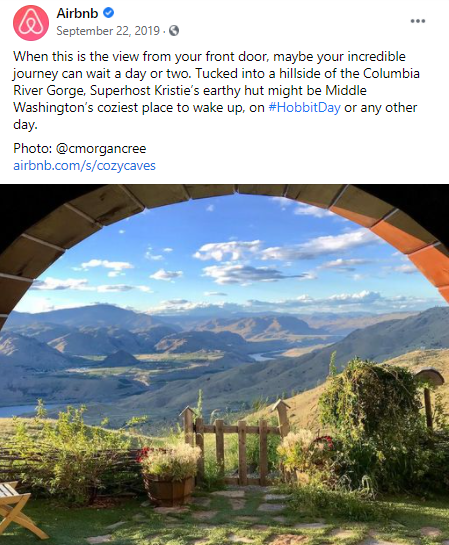 Airbnb uses user-generated content (UGC) from their happy customers to fill their feed.
This lets them show off unique, exotic locations that their followers can fall in love with.
And get this:
Since Facebook's algorithm LOVES visual content (compared to simple links), Airbnb's strategy SERIOUSLY boosted their organic post reach.
Additionally, the brand uses every campaign as a chance to interact with customers.
By highlighting customer care and getting to know their fans' wants and needs by asking questions, Airbnb's posts get tons of engagement as a result.
So, for your business, Facebook can bring brand loyalty that’ll keep customers long-term.
Not to mention:
The likelihood of selling to a current customer is between 60% and 70%!
7. Increase your website traffic
Smart Facebook page owners use their pages to drive traffic to their websites.
If all you're doing on Facebook is getting engagement on your posts, then you're not really achieving many business goals.
You're just being an entertainer.
One way to convert your Facebook following into revenue is by having them visit your website. (It's one of your best-selling tools!)
So, start using link posts to drive traffic to your site.
The great thing about link posts is Facebook generates a nice, big, full-sized image if your website makes one available.
These wide images get clicked A LOT!
This post from the Post Planner fan page is a good example. Notice the vibrant, bright, and compelling featured image on the linked post:
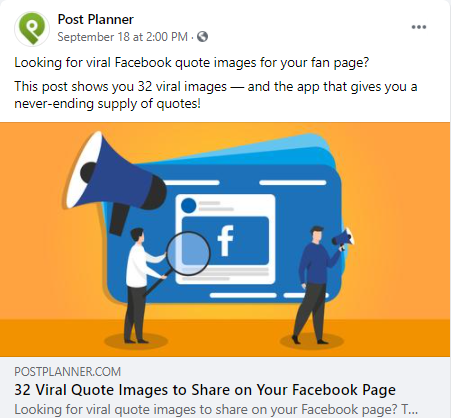 Posting links to your website is an essential part of any Facebook content strategy.
On the Post Planner page, you'll notice we consistently post links to blog posts and mix in 2-3 light-hearted posts to get people talking.
The Likes, comments, and shares are lower on the link posts.
And that's completely fine because our goal is to drive traffic with those posts, not necessarily get engagement on Facebook.
The bottom line?
Having a Facebook page will significantly increase your web traffic if you use the right posting strategies.
8. Improve your SEO
The topic of SEO and Facebook gets debated quite a bit.
Some argue that the info in the "About" section of business pages is scraped and thus searchable by Google.
It's hard to verify or dispute this claim. I've searched with various keywords for our page and did not find results related to Post Planner's Facebook page.
But when someone searches for "Post Planner," our Facebook page shows up on page 1 of the Google search results.
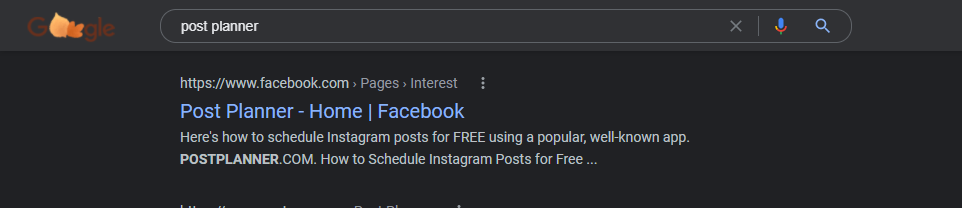 I believe the more ways people can find you, the better!
Plus, with an optimized Facebook business page, people who search for your company can see what your brand is all about.
9. Reach people on their phones
Here’s the truth:
The vast majority of Facebook users are accessing the platform via their mobile devices (98.5%).
And many of them ONLY access it with their mobile device.
As this trend grows, it becomes more important for your business to have a presence on Facebook.
The benefit of a Facebook business page is that Facebook does the heavy lifting for you.
How?
It optimizes your page for desktop and mobile devices AUTOMATICALLY.
When people view your Facebook page on a mobile device, it shows users:
- Hours of operation
- Address
- Reviews
- Phone number to call directly from the Facebook mobile app
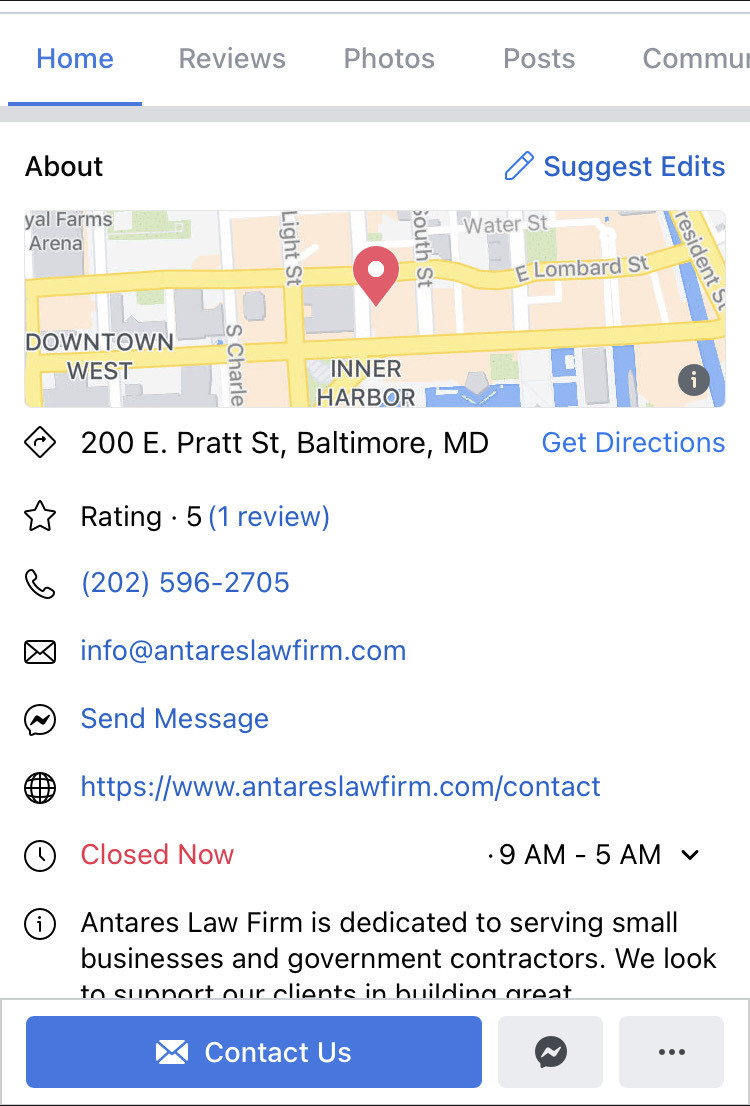 This is why it's so essential to put all your contact information on your Facebook page.
You don't want customers to search around to figure out how to give you money!
10. Spy on your competitors
Competitors may take your business, but they also can help make your business better!
An interesting feature on Facebook pages lets businesses spy on competitors.
Now, this doesn't mean you can look over their shoulders and check out sales or results from their ads...
But it's a great way to see how others in your area and niche are growing on Facebook.
Just go to your page's Insights overview (see the Insights screenshot below) and then scroll to the bottom.
Once you add some competitor pages, you'll see something like this:
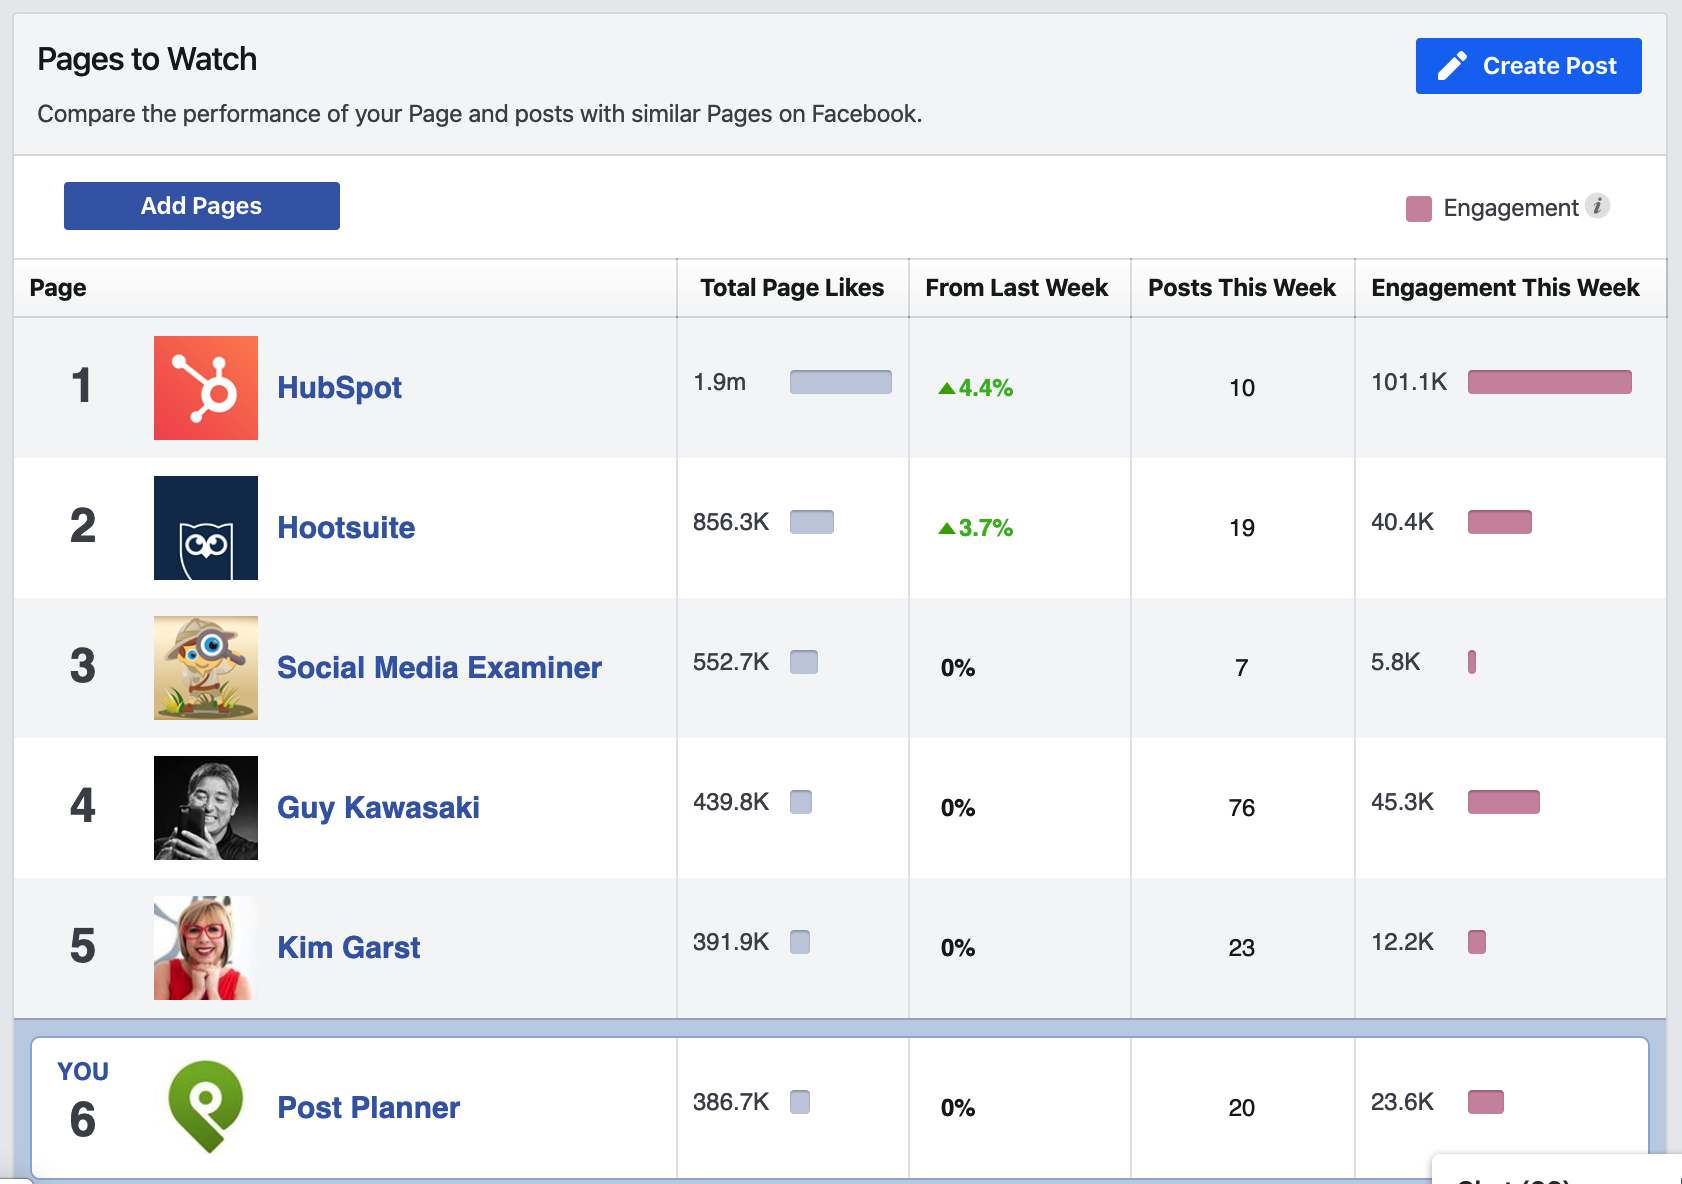 You can add multiple pages to keep an eye on. 😉
If you have difficulty finding competitors, Facebook will suggest pages based on competition in your area or industry.
Choose pages by clicking "Watch Page" or search for pages in the search box.
Then, you can benchmark your page performance against competitors.
For example, I can quickly see that our competitor Hootsuite is getting about 70% more engagements than us.
But I can also see that they have 120% more fans.
So I think we're holding our own!
"Pages to Watch" is also great for getting posting ideas.
For example, if you see a page that has EXPLODED and gained lots of new likes, you can visit that page to see what they're doing right.
Perhaps a post had tremendous success, and you can copy what they’re doing on your page to gain more likes and engagement.
This may not give you a ton of insight, but sometimes, just a little motivation can cause you to break bad habits on Facebook and improve your posting and advertising.
After all, no company wants a competitor beating them to the Likes!
Lastly, check out the Facebook ads library to see which ads perform well if you're running paid marketing.
Companies in the B2C space, like eCommerce companies, can gain a lot from this when they're doing competitor research.
11. Connect your favorite business apps
.jpg?width=1321&name=download_(12).jpg) Are you a restaurant? Online business? Service-based business?
Are you a restaurant? Online business? Service-based business?
Facebook has rolled out some cool features that let businesses connect apps straight to Facebook to make things easier for customers.
Facebook lets you use apps for:
- Appointments
- Reservations
- eCommerce
For example, you can connect your Acuity scheduling app, allowing your customers to book an appointment with you straight from Facebook!
If you're a restaurant, having an app to book reservations is a great way to get new customers who find your Facebook page via Google or a Facebook ad.
These apps allow your business to make the customer buying process easier!
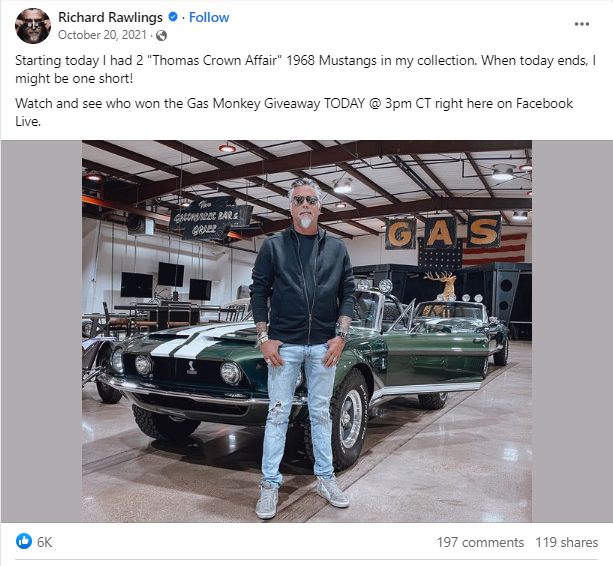
12. Host and gain revenue through paid events
.jpg?width=1342&name=download_(13).jpg) Facebook allows your business page to run paid exclusive live events.
Facebook allows your business page to run paid exclusive live events.
This is a pretty good idea if you run high-demand live training and you have a sizable Facebook audience.
Facebook does have ground rules if you want to use this service, though (after all, you’re using their platform).
Check out their Partner Monetization Policy for more information on hosting paid events (not a long read btw).
13. Networking
Want to guess the purpose of social networks?
That's right. Networking. And Facebook is no different — except it's the largest, so you better be on it.
Here are some ways you can use Facebook to network:
- Join Facebook groups to meet people with similar interests
- Engage in discussions in comments and live streams
- Share content to start conversations
- Find interesting networking events through Facebook
- Attend Facebook Live sessions
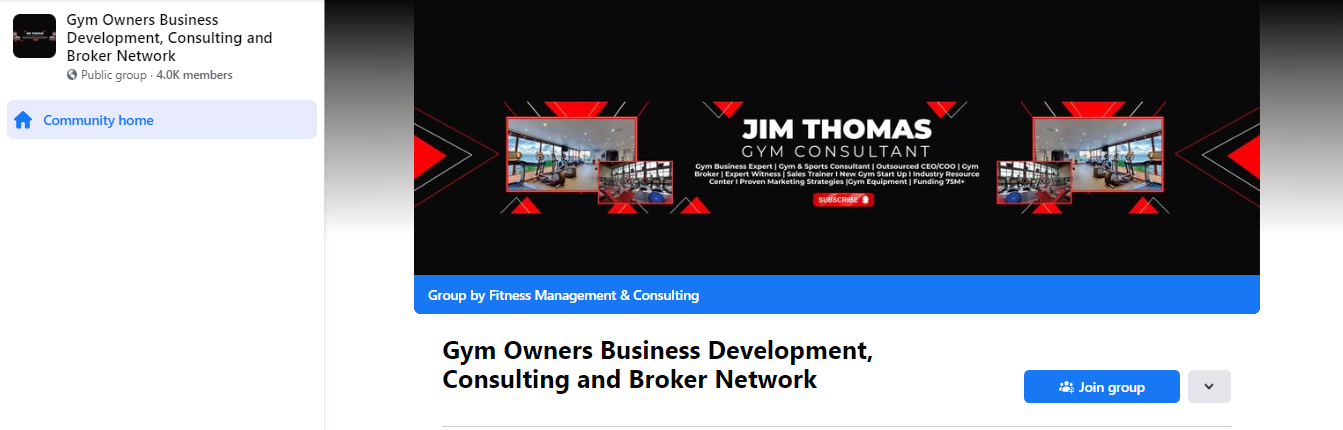
And these are just the most obvious ways you can grow your network on Facebook!
14. Live shows & Reels
Videos are the hottest type of content on Facebook.
And the latest and greatest way to stand out is with live shows and Reels!
Now is the time to host your live show on Facebook.
Not convinced yet?
Facebook Live videos get 6X the engagement compared to standard videos!
And need I say more about Reels? I think we've all been guilty of getting sucked into watching those videos for HOURS.
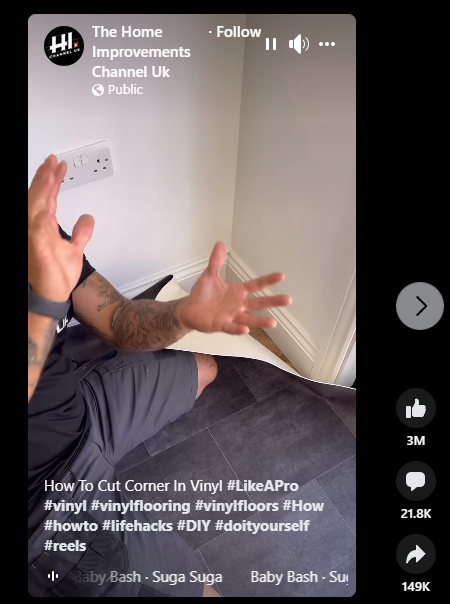
Facebook Reels get played 140 BILLION times EVERY DAY. (Sorry, I had to write that in caps so you didn't miss it!)
15. Keep your audience up-to-date with news
If your audience is on Facebook, you should have a Facebook business page.
And your fans probably want to stay up-to-date with what you're working on!
You can use your Facebook page to create posts about:
- The latest news in your industry
- The latest products you're working on
- The latest accomplishments in your business
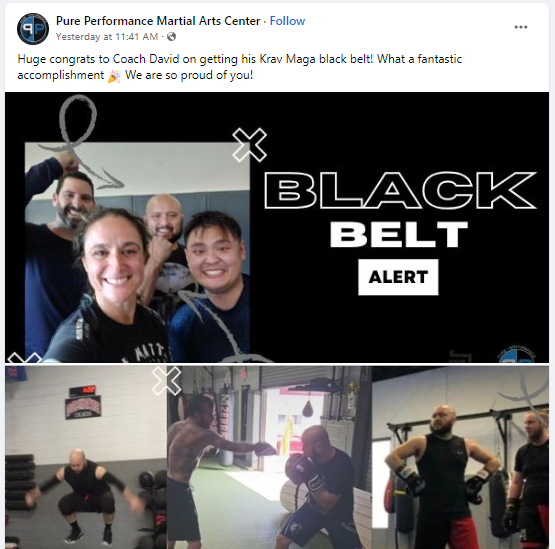
Don't leave your audience disappointed. Share the good news. 😎
16. Use it as a way to share your portfolio
It doesn't matter if you're a:
- Beautician
- Barber
- Photographer
- Artist
- Freelancer
- You name it!
You NEED to be sharing your work on the world's #1 social media platform!
It'll help you grow your brand, demand, and clientele!
And the best part is, Facebook allows you to do it in various ways...
- Albums
- Photos
- Videos
- Stories
- Live shows
- Reels
- Any type of post really...
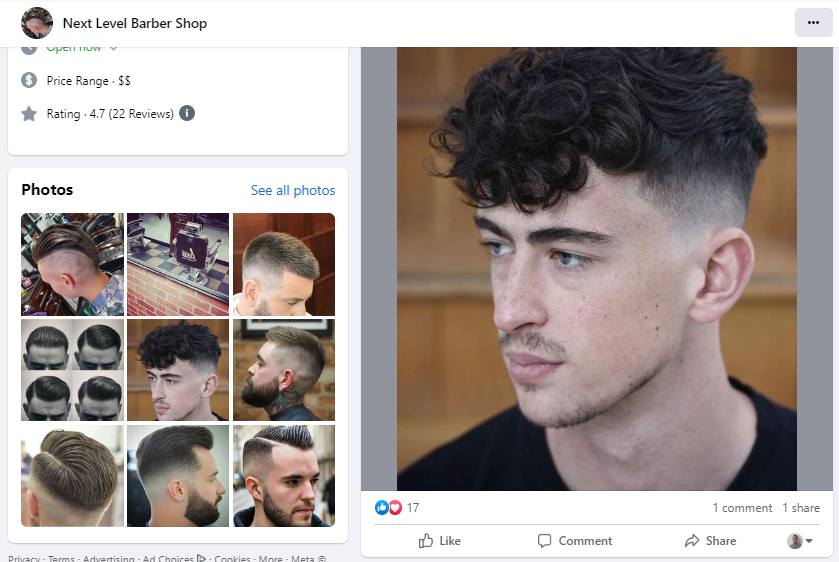
17. Manage your online reputation & presence
Facebook is essentially a business directory, meaning people are SEARCHING for brands like yours.
You just have to set up your profile for them to be able to find you.
But not only should you have your business profile set up so you're findable...
You should also work on improving your reviews and reputation on Facebook so you can build the trust you need to get more customers!
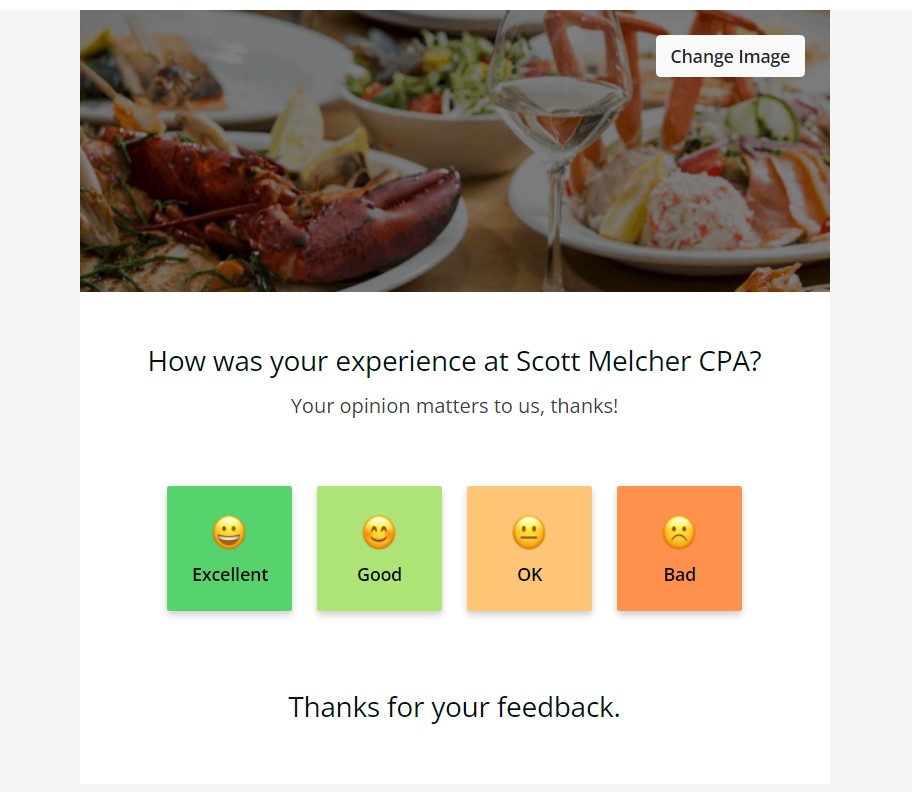
Post Planner's online reputation management tool helps you automatically manage your online reviews.
Here's how:
- It helps you optimize your business profiles
- It helps you sync all of your business listings across the internet (including Facebook and Google).
- It helps you manage your reviews and reputation
- It helps you automate getting 5-star reviews from customers
18. Use it for lead generation
You probably wouldn't be reading this post if you weren't trying to make more money!
But for you to generate the right leads on Facebook, you need to create the right ads or content to target your audience.
Then, you can create a piece of premium content that you can offer to your audience for free... in exchange for their contact information.
This can be things like:
- Ebooks
- Templates
- Guides
- Webinars
- Other resources
Then, as your list grows, you can filter through the list to reach out to people who are your ideal clients.
19. Get feedback from your audience
One of the most valuable, indirect ways that Facebook can help your business make more money?
Customer feedback!
You can either:
- Do social listening — Scan through Facebook to see what people say about your business (use it as constructive criticism).
- Survey your audience — Make a post on Facebook asking for your followers' opinions on something related to your business.
This will help you improve your product and customer experience so you'll get more LOYAL customers in the future.
2 Main disadvantages of Facebook
Are these 2 "disadvantages" of using Facebook substantial enough for you to NOT use Facebook for your business?
Heck no — in my opinion.
But I'm listing them to prevent you from wasting your time so you can be more effective.
Reason #1: It takes time
You can't expect to create a Facebook profile and start generating new business right away.
You need to learn what you should do, and practice it.
Then, as you get better at Facebook marketing, you can start expecting results.
I recommend learning more about Facebook by reading more of our content on Facebook marketing.
Reason #2: It's addicting
70% of teens and young adults have a social media addiction.
Facebook — just like any social media — is designed to KEEP you on their platform.
So it's easy to get sucked into your feed and get caught in the loop of consuming INSTEAD of creating.
So consider timing yourself when you're using Facebook so you know when to log off.
Wait, Is Facebook good for B2B companies?
Yes, and here's why:
Most people are already on Facebook.
Whether you're doing paid ads, lead generation outreach on Facebook groups, or posting for engagement, your customers (company decision-makers, CEOs, etc.) are there.
It all comes down to your marketing objective and ability to resonate with B2B decision-makers.
If you're running Facebook ads, target by occupation, and industry, and write ad copy that resonates with your ideal customers.
I mean, sure:
Maybe a CEO is just on Facebook to read memes, but your ad could still win their interest!
Here are some best practices to keep in mind when it comes to B2B Facebook marketing:
- Schedule and post educational industry content on your Facebook page (blogs, infographics, case studies.)
- Add a Facebook pixel to your website. This will help you retarget potential B2B visitors with ads.
- Create a Facebook group where you can add value to B2B professionals in your industry (and market to them from time to time).
- Add your business hours and company information to your business's Facebook page.
- Have your page button be a link to your calendar for an introductory call.
- Use Facebook's ad scheduling feature to run your ads during peak business hours if you're running conversion campaigns.
- Export a spreadsheet of your customers and create a lookalike audience of them. Then, run an ad focused on the top 1-2% of people similar to your customers.
- Suppose you're getting great results from a Facebook ad campaign. Save that audience as a custom audience. In the future, you can test different creatives with them and even make a lookalike audience off of that audience.
Create, curate, & automate Facebook posts with Post Planner
Hopefully, these 19 benefits and best practices have helped you see that having a Facebook business page is an absolute no-brainer.
I personally can't imagine running a business and NOT having a Facebook page.
For those of you who already have pages, I hope you've been motivated to improve them!
One of the BEST ways to be successful on Facebook is by posting proven, data-backed, viral content…
And posting it when your audience is most active with automation.
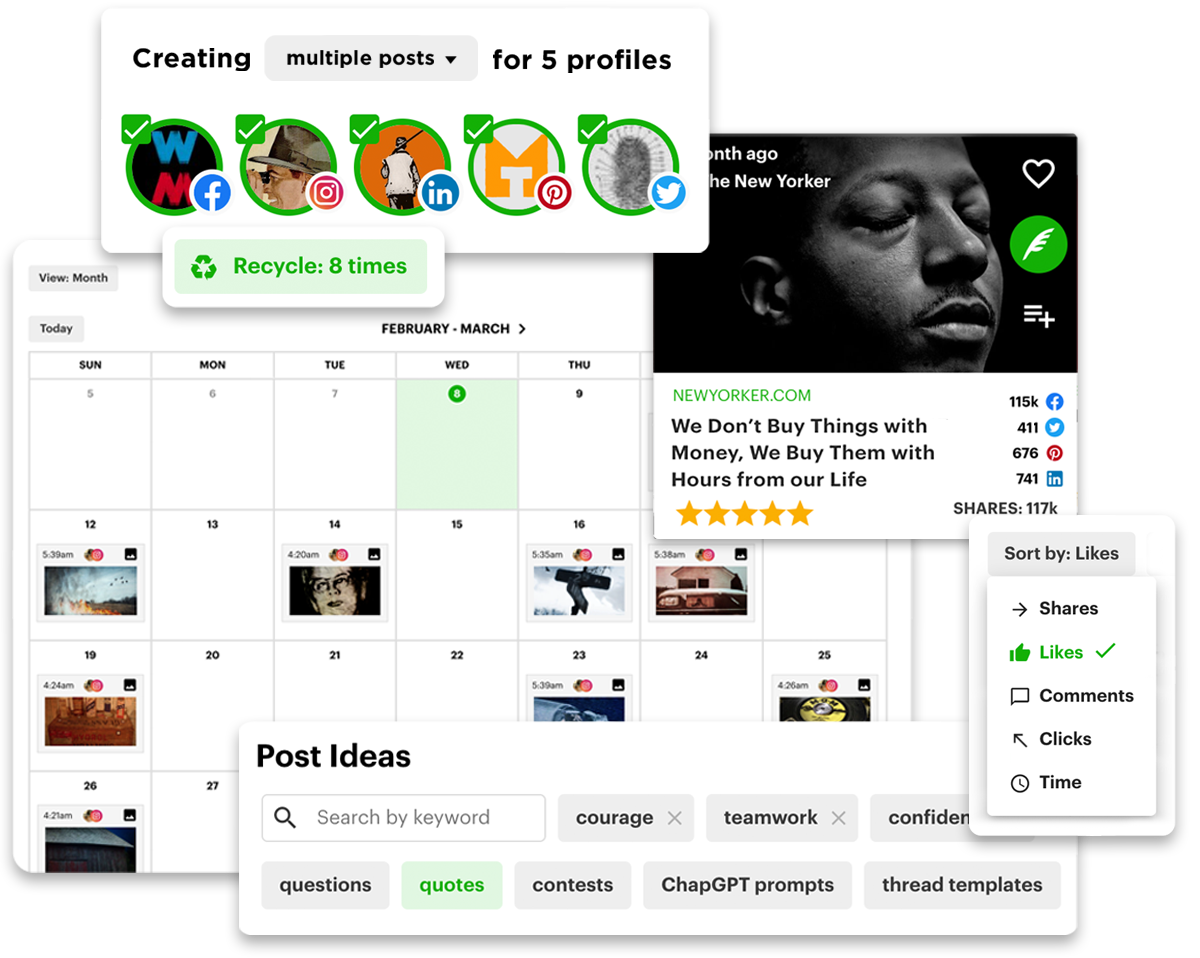
Luckily, Post Planner lets you do this with a content scheduling tool and content library.
It's just a couple of clicks away.
Try it today by creating a FREE Post Planner account! :)
Frequently asked questions about the benefits of Facebook for business
How do you benefit from Facebook?
Facebook is a tool.
It's all about how you use it.
To get the most out of Facebook, you need to pinpoint why your business is on it in the first place.
Want more brand awareness?
Post consistently, learn when your audience is online, run brand awareness campaigns, and boost your successful posts to more audiences.
Want more purchases for your product or service?
Run paid ads, optimize them, tweak your creatives, and create landing pages.
Want to generate leads?
Collect emails, create (or join) Facebook groups, and "Friend" people you can help in your niche.
The possibilities are endless with Facebook.
But you first have to KNOW your goals.
Think about it:
Expecting results from just posting content isn't going to work.
Facebook is designed to cater to SPECIFIC business targets.
I mean — sure — businesses with 500,000+ page followers can promote a product and sell out within the blink of an eye.
But for the average small or even medium-sized business, you have to get clear on your business agenda, plus:
- Find AND exhaust multiple strategies
- Change and test your offers
- Improve your marketing messages (aka your brand's copywriting)
Trust me...
With this dose of reality, you can better leverage the 19 benefits of Facebook for business.
What are the top features of Facebook?
The top features used by users are bound to change. However, knowing which features they're using most can help you better reach your ideal audience.
Here are the most popular Facebook features right now:
- Reels
- Marketplace
- Groups
- Events
- Live
- Stories
What type of content is most viewed on Facebook?
Currently, these are the types of Facebook content that get the most views:
- Reels
- Videos
- Pictures
The common denominator here? Visual content!


ViewHide comments (29)